


Share your favorite photos with family thanks to Family Sharing and iCloud!
Apple's iCloud service offers a fantastic feature for family groups called Family Sharing: It lets you share storage space, purchase accounts, Apple Music subscriptions, and more between multiple iCloud users — including managed accounts for younger children.
Family Sharing also integrates with Apple's free Shared Albums feature to provide your family with a secure shared album where you can share images and video. Each family member has their own separate iCloud Photo Library or Photo Stream library, but the Family album allows them a space to store communal photos, images, and video.
Here's how to use iCloud Photo Sharing in tandem with Family Sharing to access the Family album on your best iPhone, iPad, or Mac.
Note: Before proceeding, make sure you've turned on iCloud Shared Albums — you won't be able to use the Family album if it's not enabled. You don't have to use iCloud Photo Library to turn on sharing if you prefer another syncing alternative.
How to view the Family album on your iPhone, iPad, or Mac
Want to see what your family members have already added to this album? You'll want to open the Shared section of your Photos app.
On iPhone or iPad
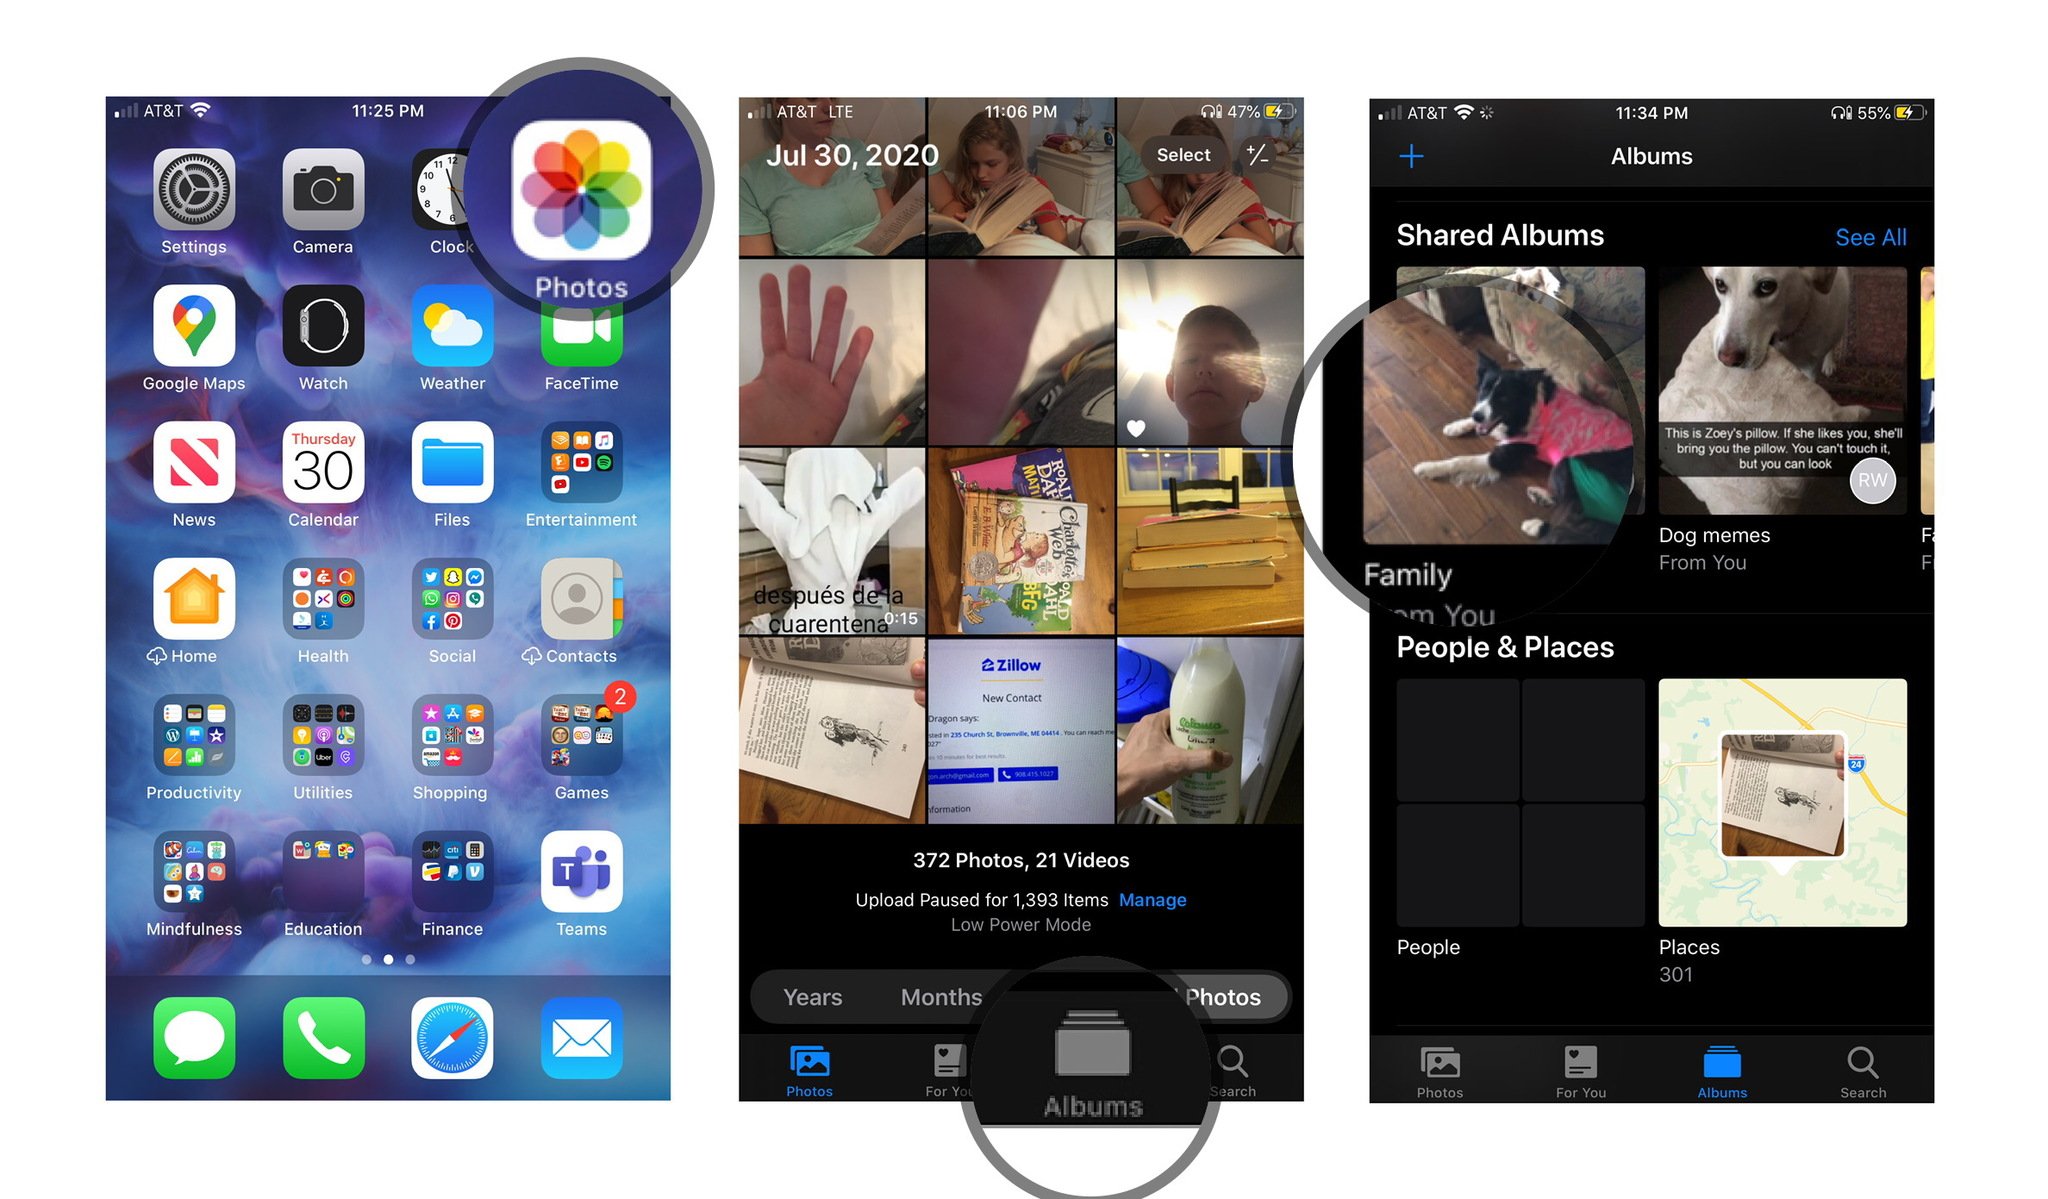
- Launch the Photos app on your iPhone or iPad.
- Tap on the Albums tab.
-
Scroll down to the Shared Albums section and select the Family album. (If you can't see it, tap on See All and browse through the shared albums until you find it.)
On your Mac
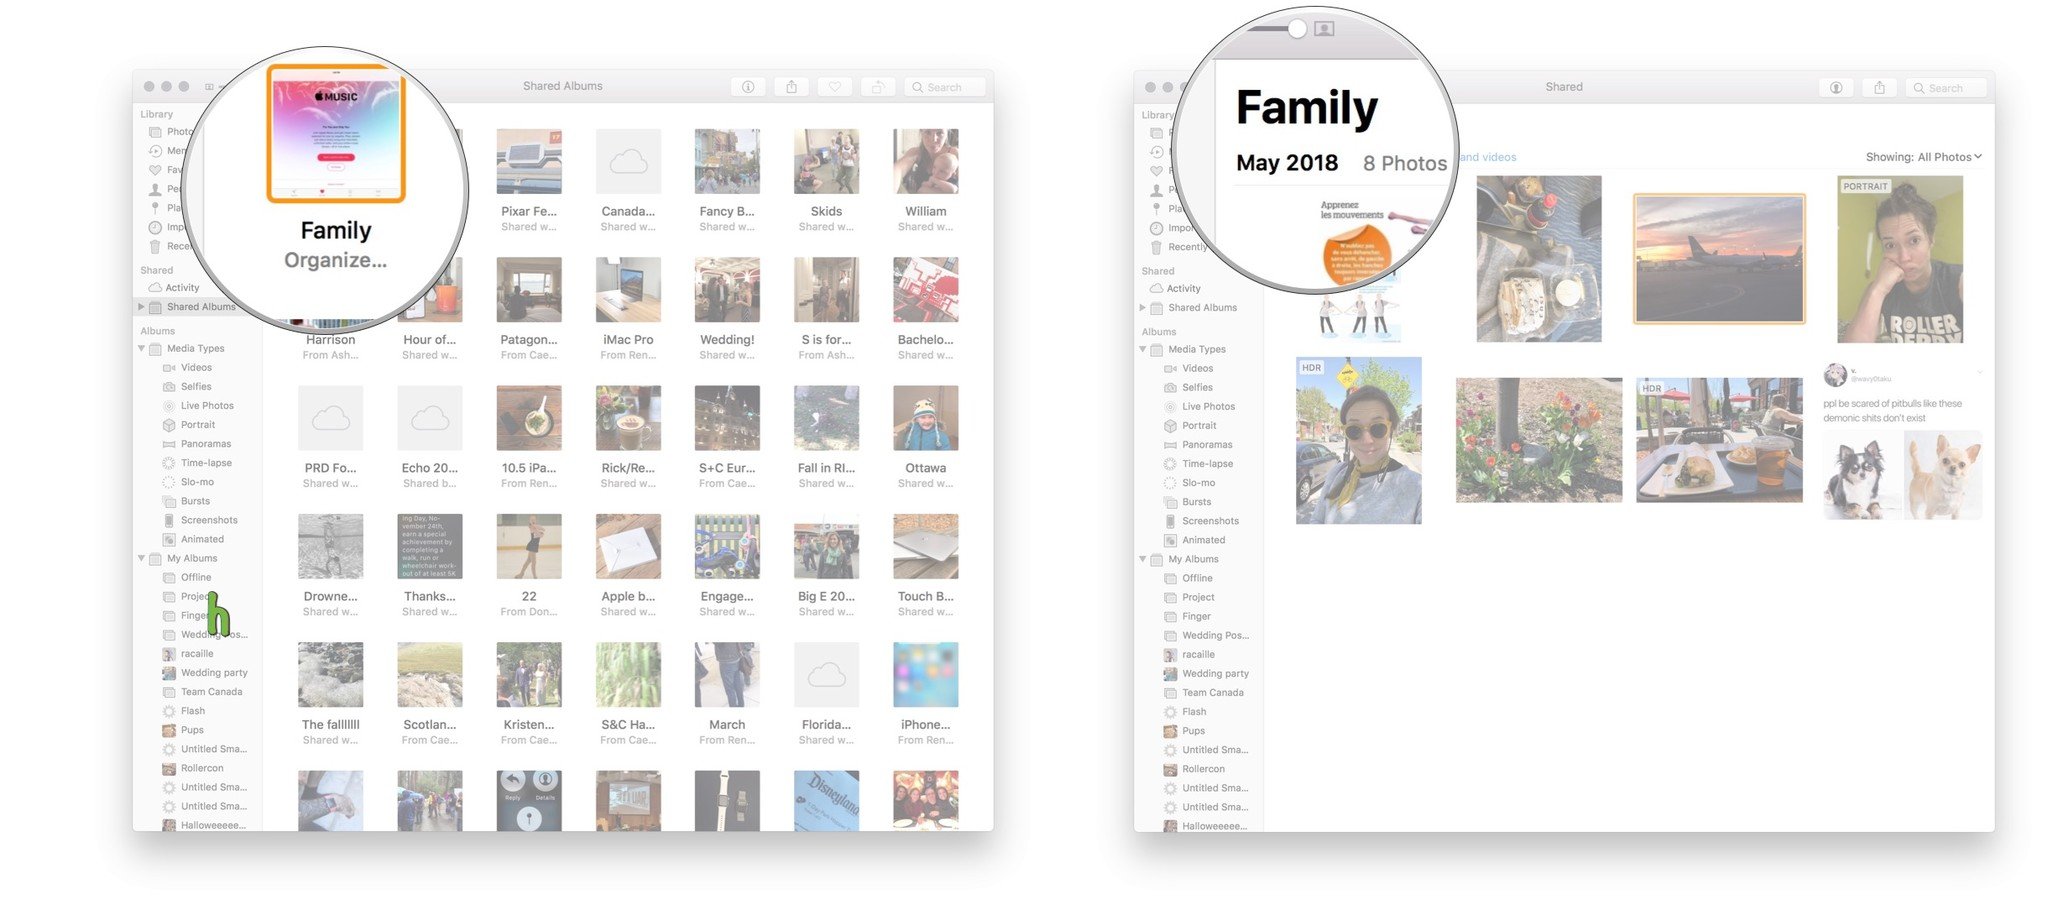
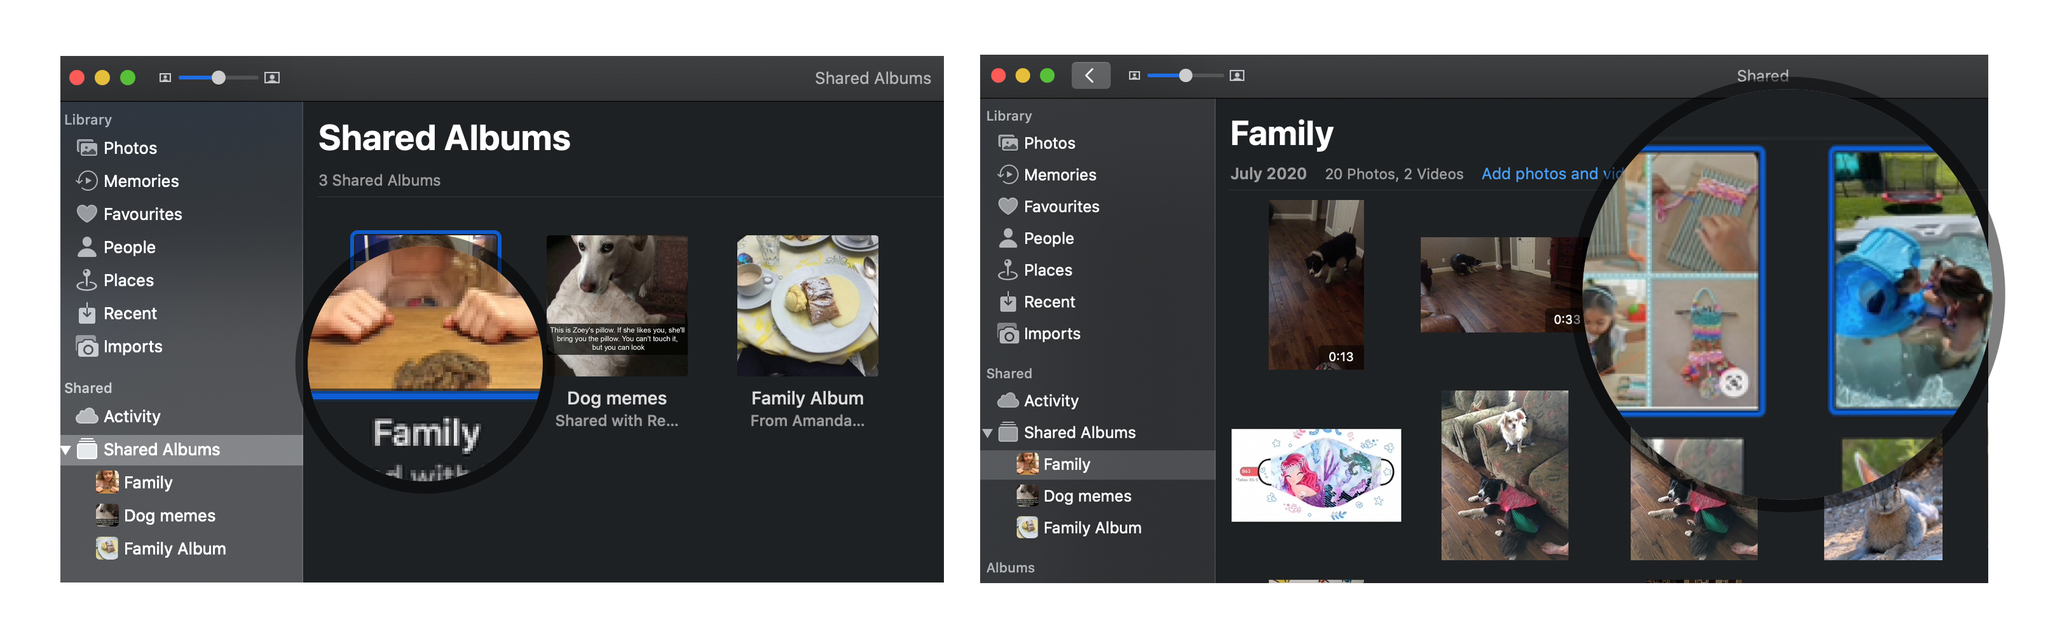
- Launch Photos on your Mac.
- Under the Shared section of the Sidebar, click Shared Albums.
-
Select the Family album.
How to add new photos or video to the Family album on your iPhone, iPad, or Mac
When you want to add images to your Family album, you'll do so like pretty much any other album addition.
On your iPhone or iPad
- Launch the Photos app on your iPhone or iPad.
- Tap on the Albums tab.
-
Scroll down to the Shared Albums section and select the Family album. (If you can't see it, tap on See All and browse through the shared albums until you find it.)
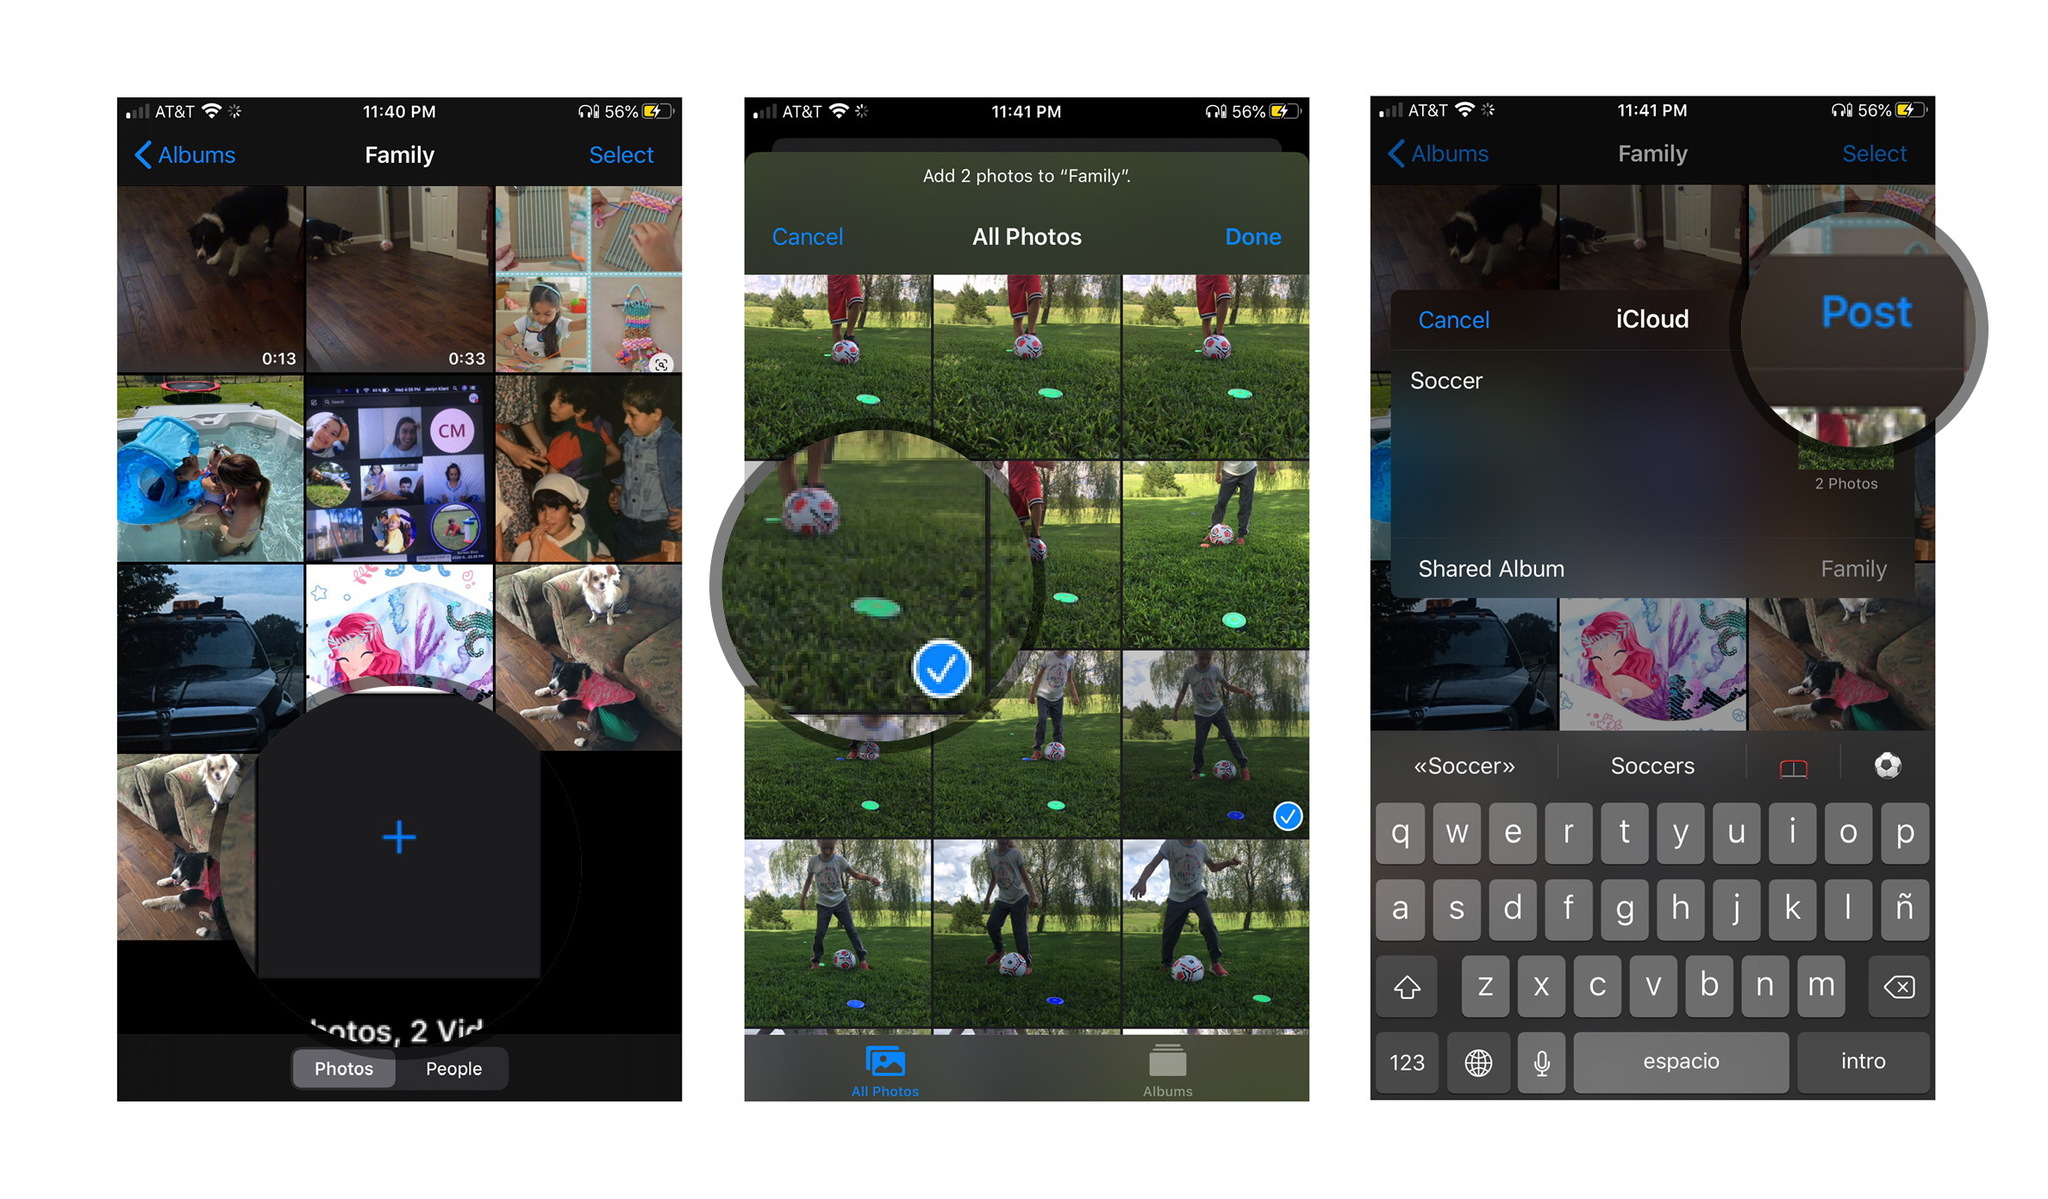
- Tap on the plus sign.
- Tap the photos you want to add and then tap Done in the upper right corner.
-
Type a description if you'd like, and then tap Post in the pop-up window.
On your Mac
- Launch Photos on your Mac.
- Click the photos you want to share with family (shift-click or command-click to select multiple).
- Click the share button on the upper right of the window. It's a box with an upward arrow.
- Click Shared Albums.
-
Click Family. The images will then sync over to your family member's device.

How to remove photos or video from the Family album on your iPhone, iPad, or Mac
No longer want an image or video in your Family album? Any member of the family can delete content from the album at any time.
On your iPhone or iPad
- Launch the Photos app on your iPhone or iPad.
- Tap on the Albums tab.
-
Scroll down to the Shared Albums section and select the Family album. (If you can't see it, tap on See All and browse through the shared albums until you find it.)
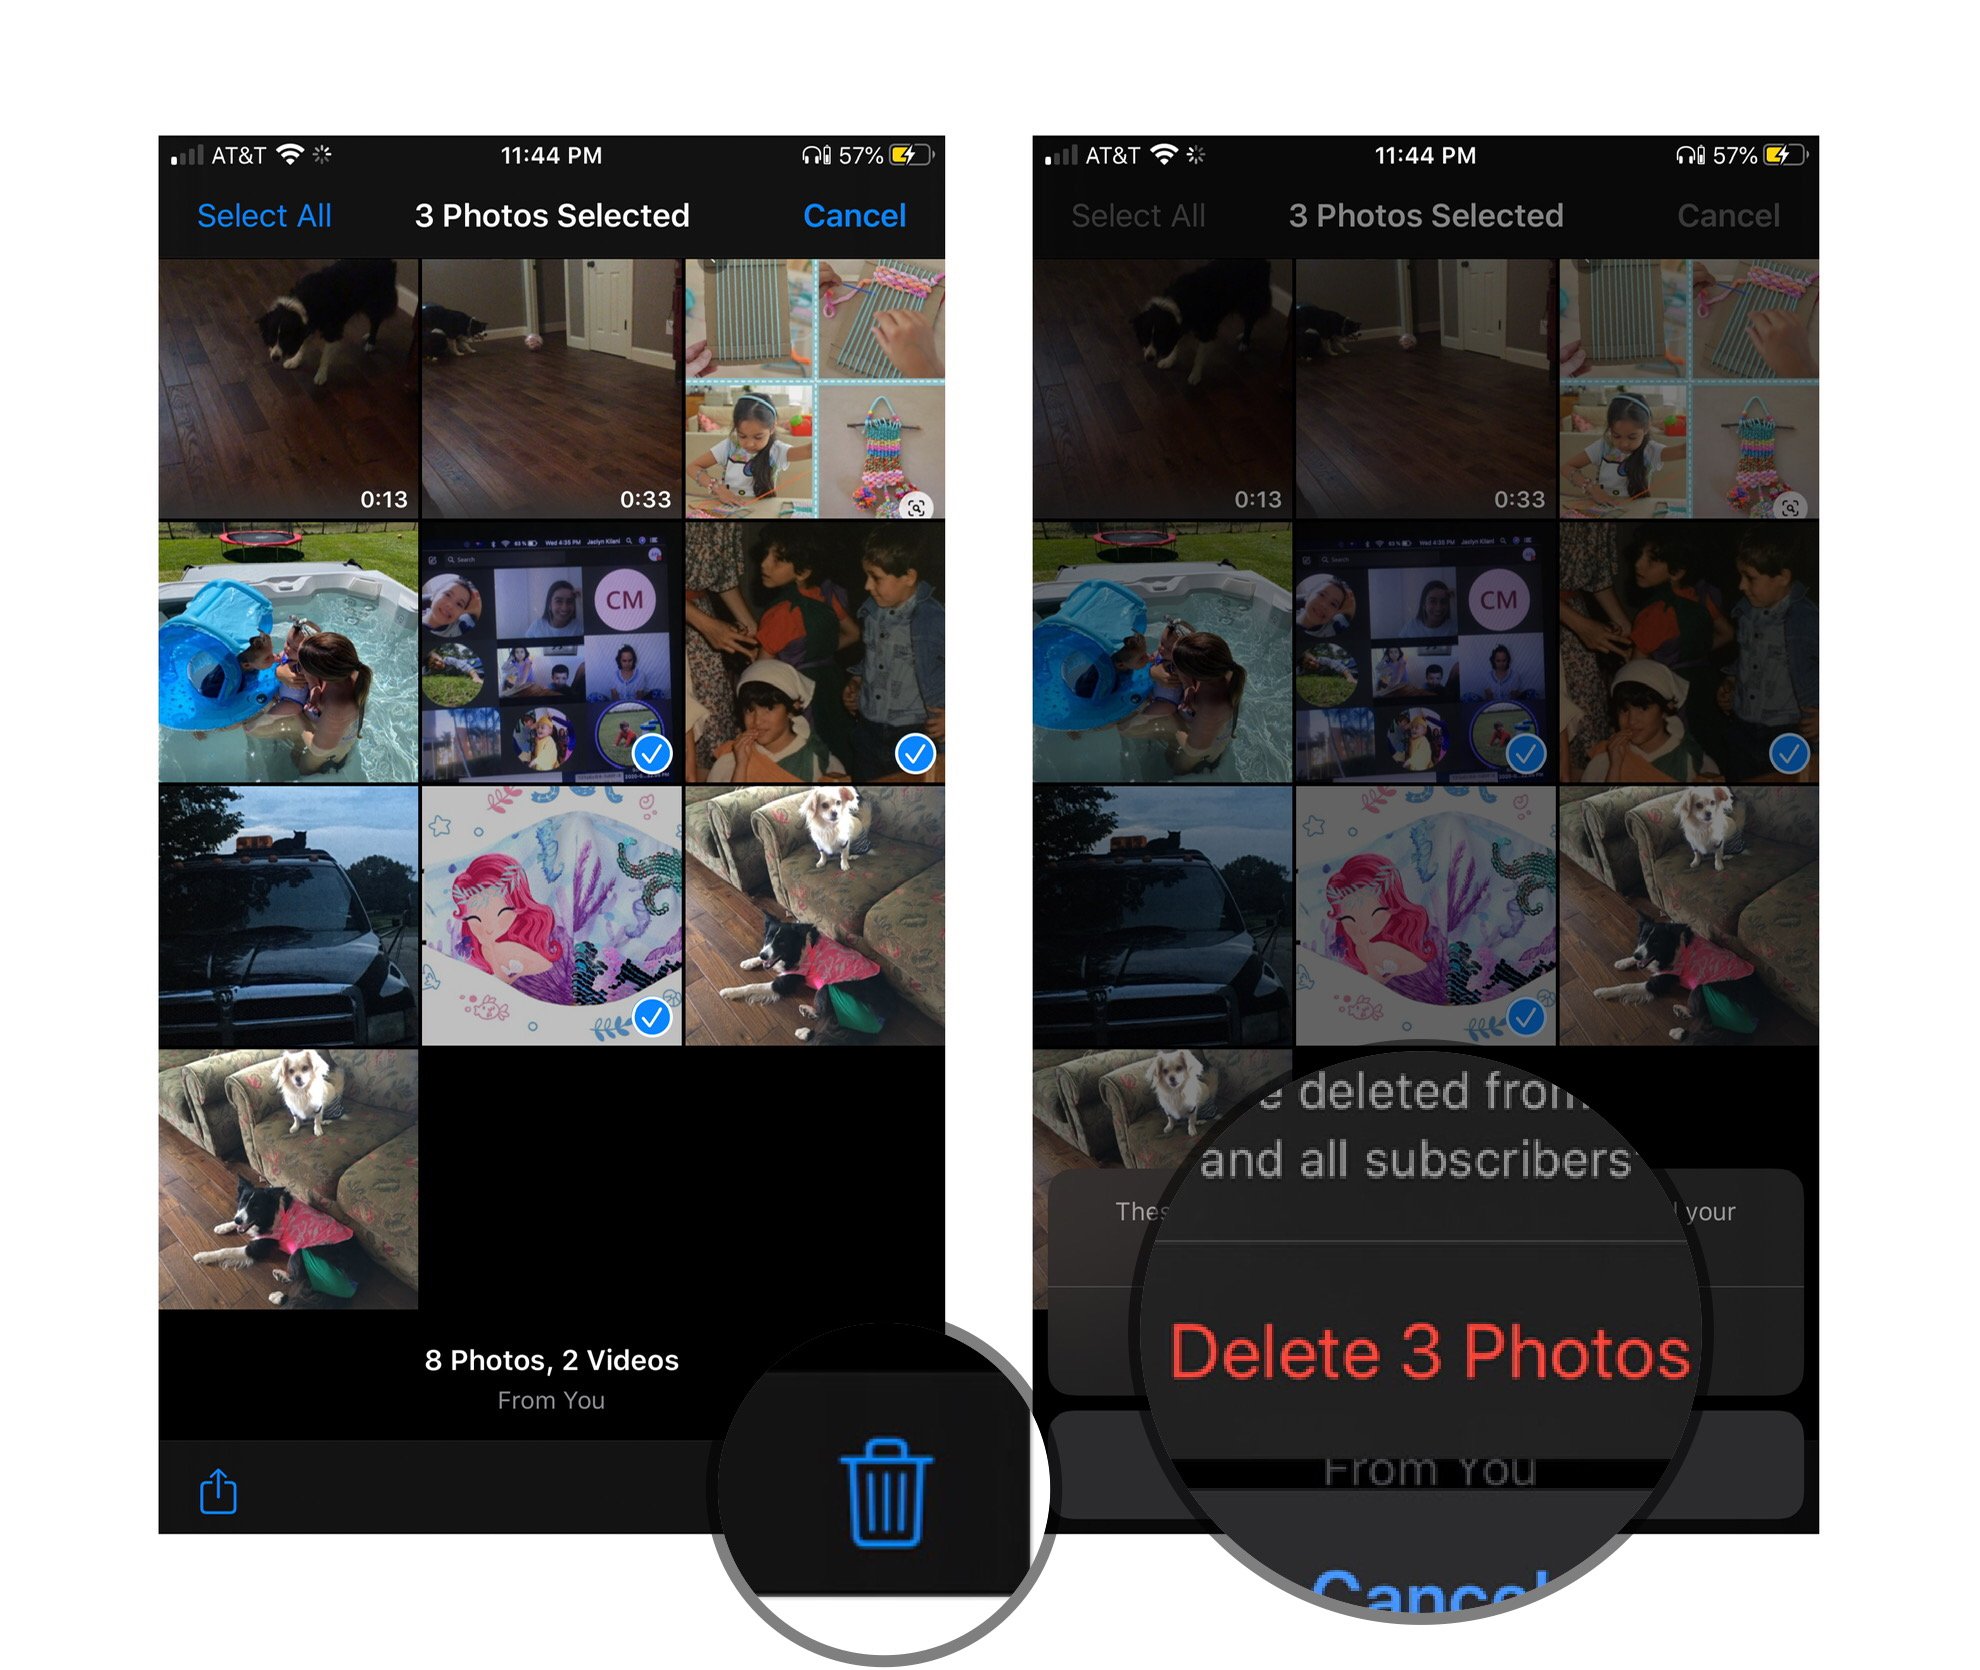
- Tap Select in the upper right corner.
-
Tap the photos or video you want to delete.
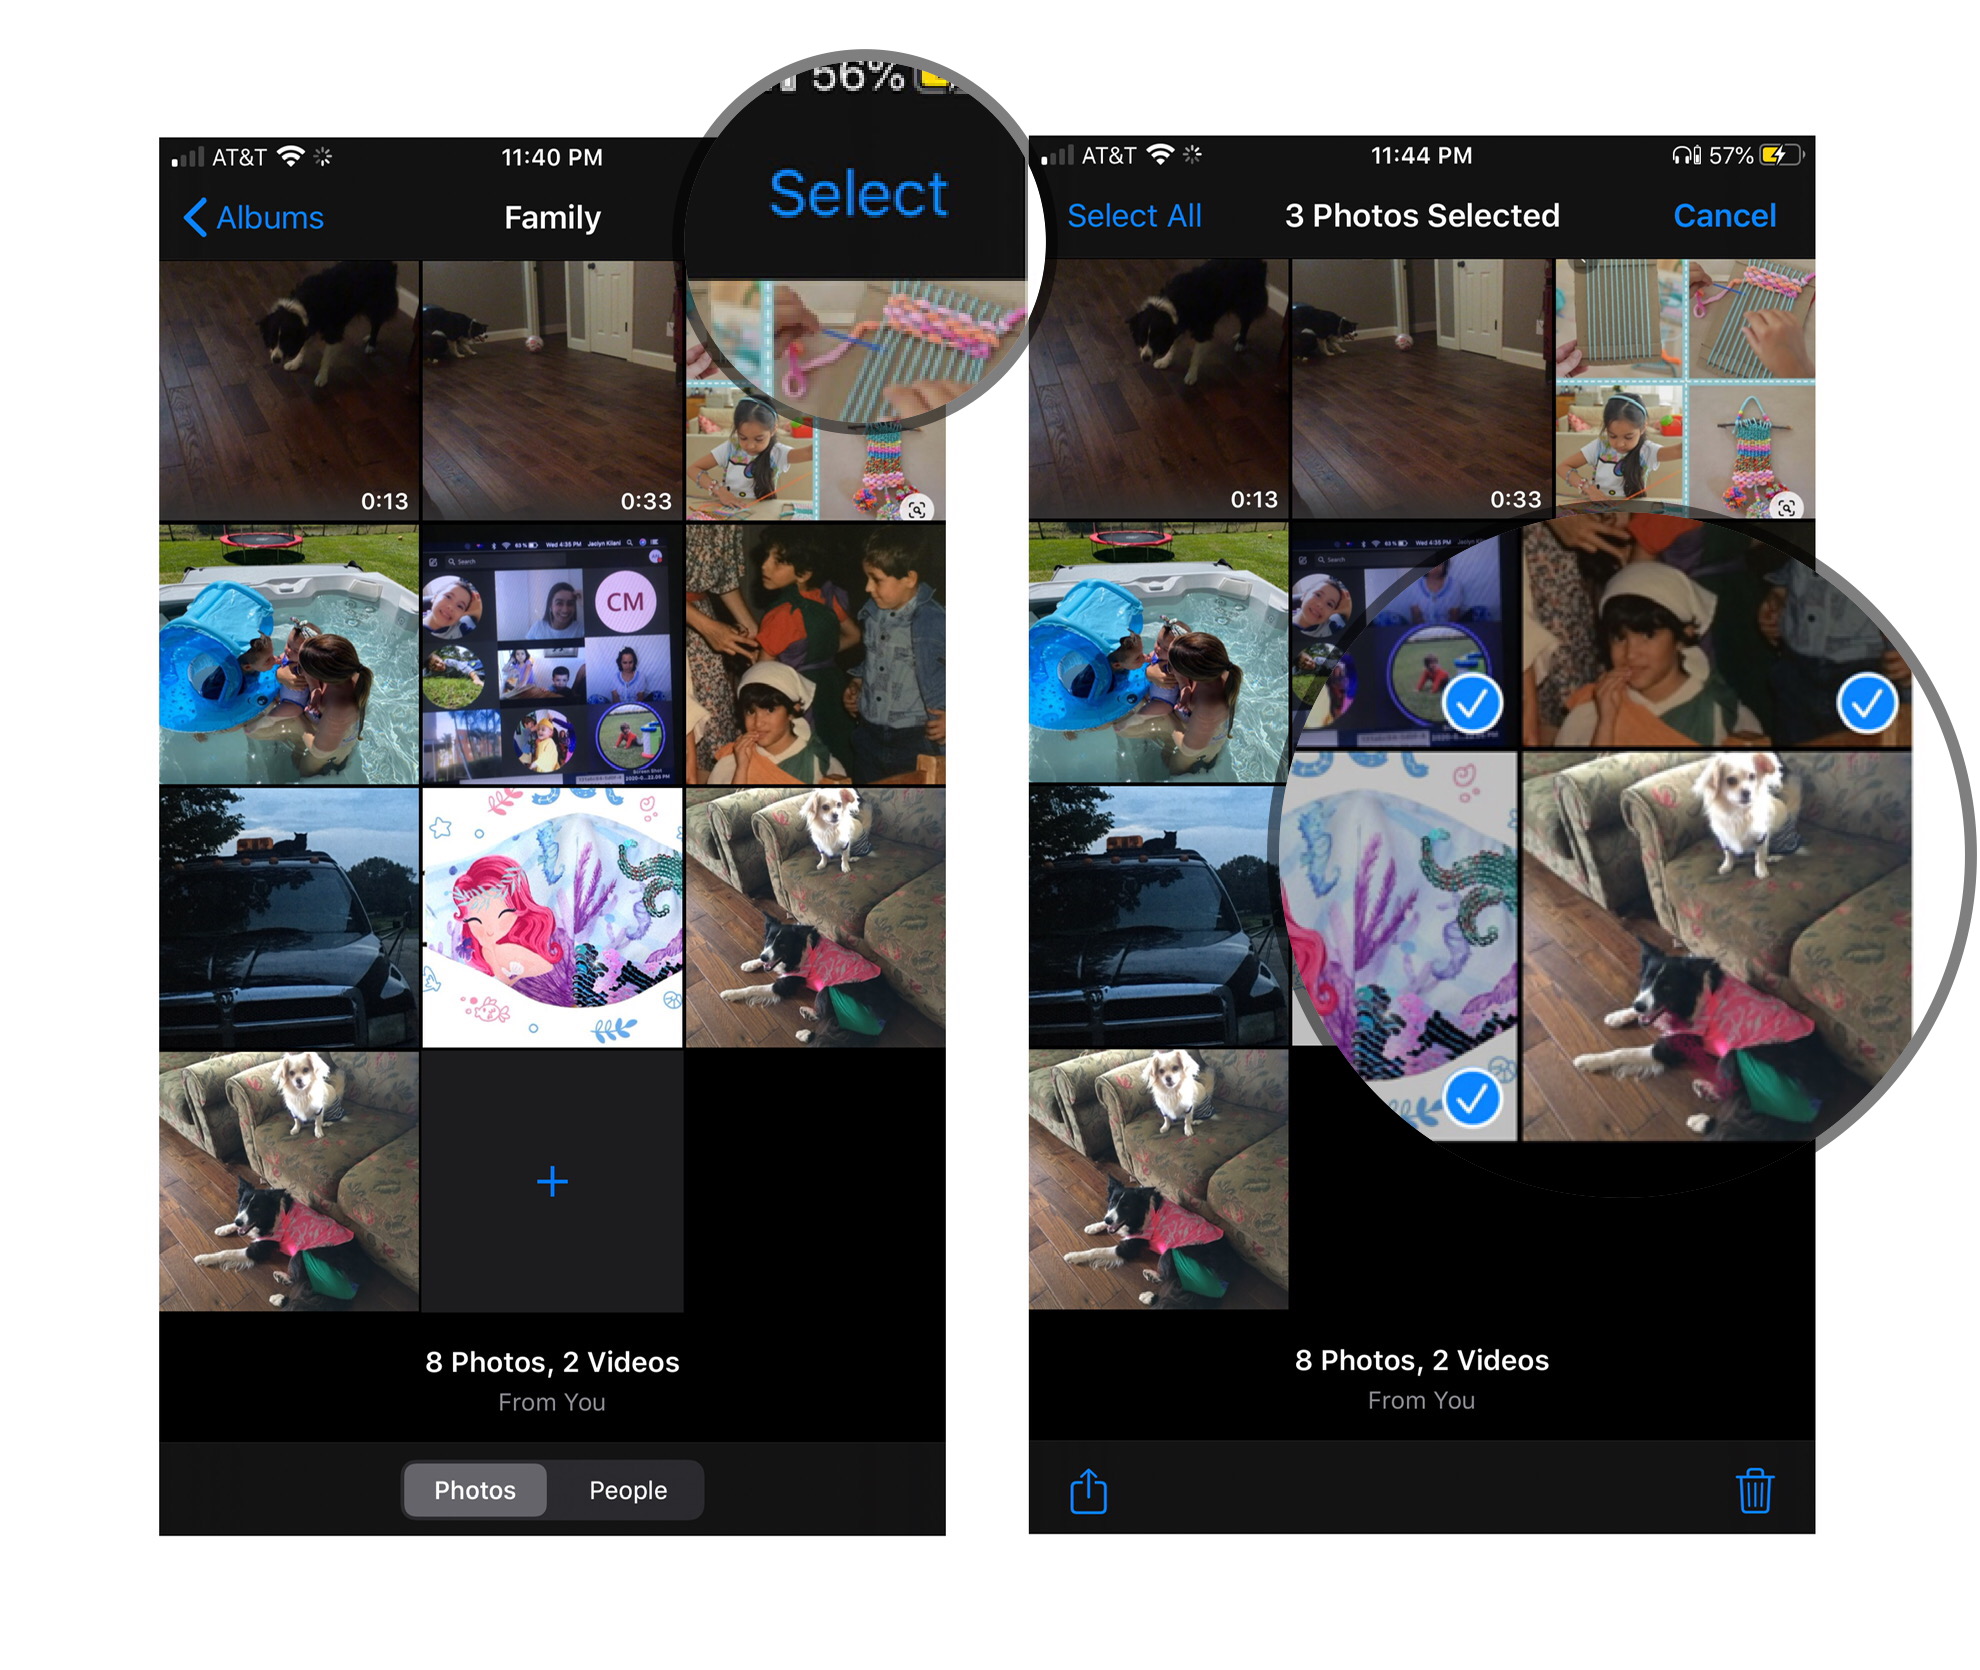
- Tap the Trash icon in the bottom right corner.
-
Tap Delete Photos to confirm that you want to delete the selected photos.
On your Mac
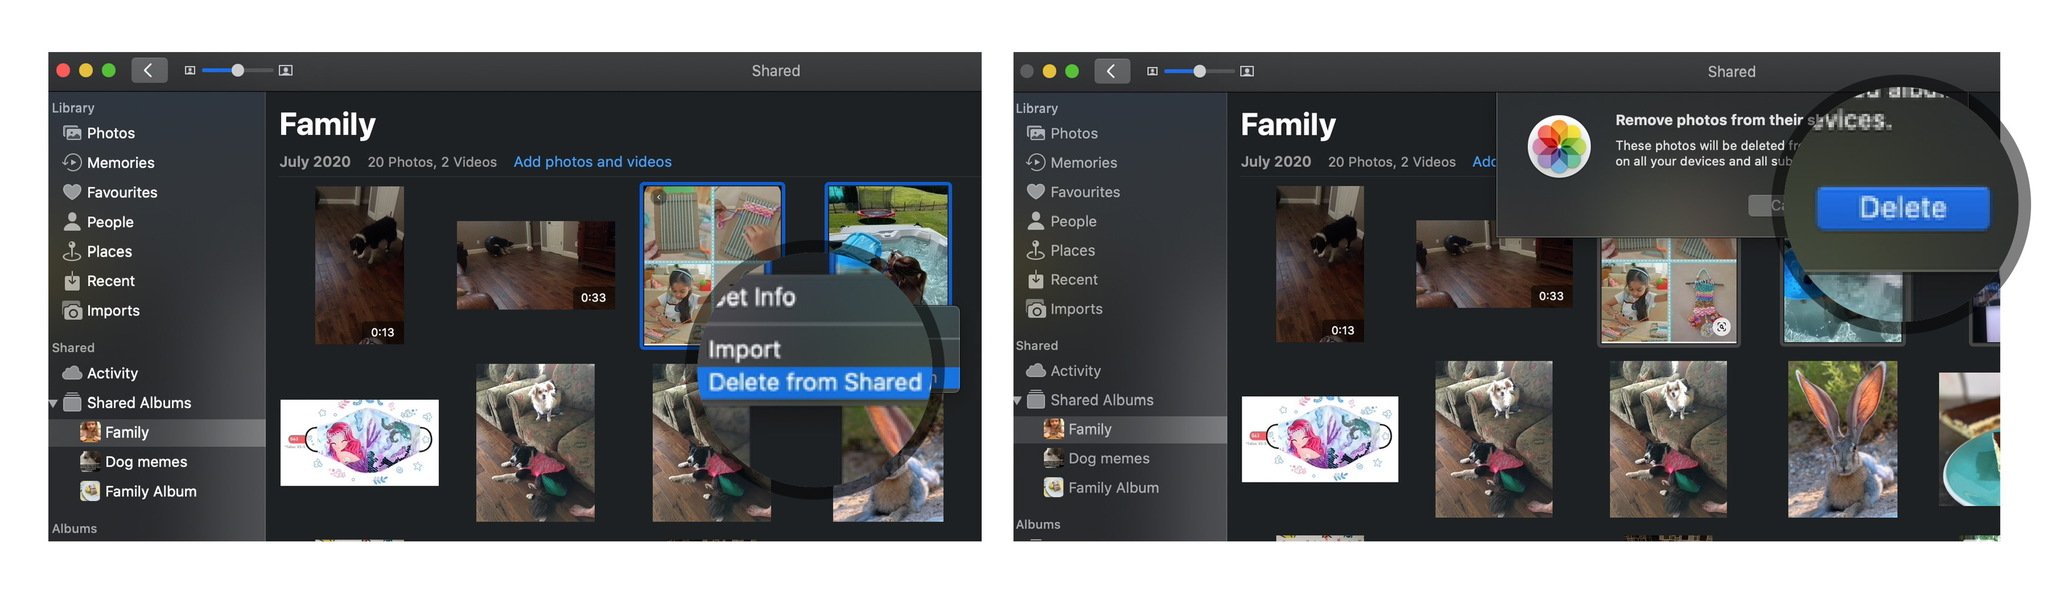
- Launch the Photos app on your Mac.
- Click on Shared Albums in the sidebar.
- Select the Family album.
-
Select the images you wish to delete.
- Press the Delete key on your keyboard.
-
Click on Delete to confirm that you want to remove the photo from the shared album.
Share your favorite memories
As you can see, it's easy to use Family Sharing and iCloud to share your favorite moments with those close to you. And whenever someone shares a new photo or video, you'll get a notification! Never miss out on those great memories again.
Updated March 2022: Updated for both Mac and iOS.


0 comments:
Post a Comment