


iCloud Photo Sharing makes it easy to share your favorite pictures and video with other people. Here's how to get started with it!
Apple's iCloud service offers a number of features for users who want to share items with their colleagues, friends, and family. iCloud Photo Sharing is one of those. You can use the Photos app on iPhone, iPad, or Mac (or a PC) to add images to a shared album that your friends and family can then access, comment on, and even add their own contributions to the set.
Once you've set up iCloud Photo Sharing, here's how you can create, view, and edit shared photo albums on your iPhone, iPad, Mac, or PC.
How to view shared photo albums on iPhone, iPad, Mac, and PC
Note that by default, when you open the Shared section in Photos on the best iPhone and iPad, you'll be taken to your activity feed for shared albums, which shows things that have been added or comments that have been made.
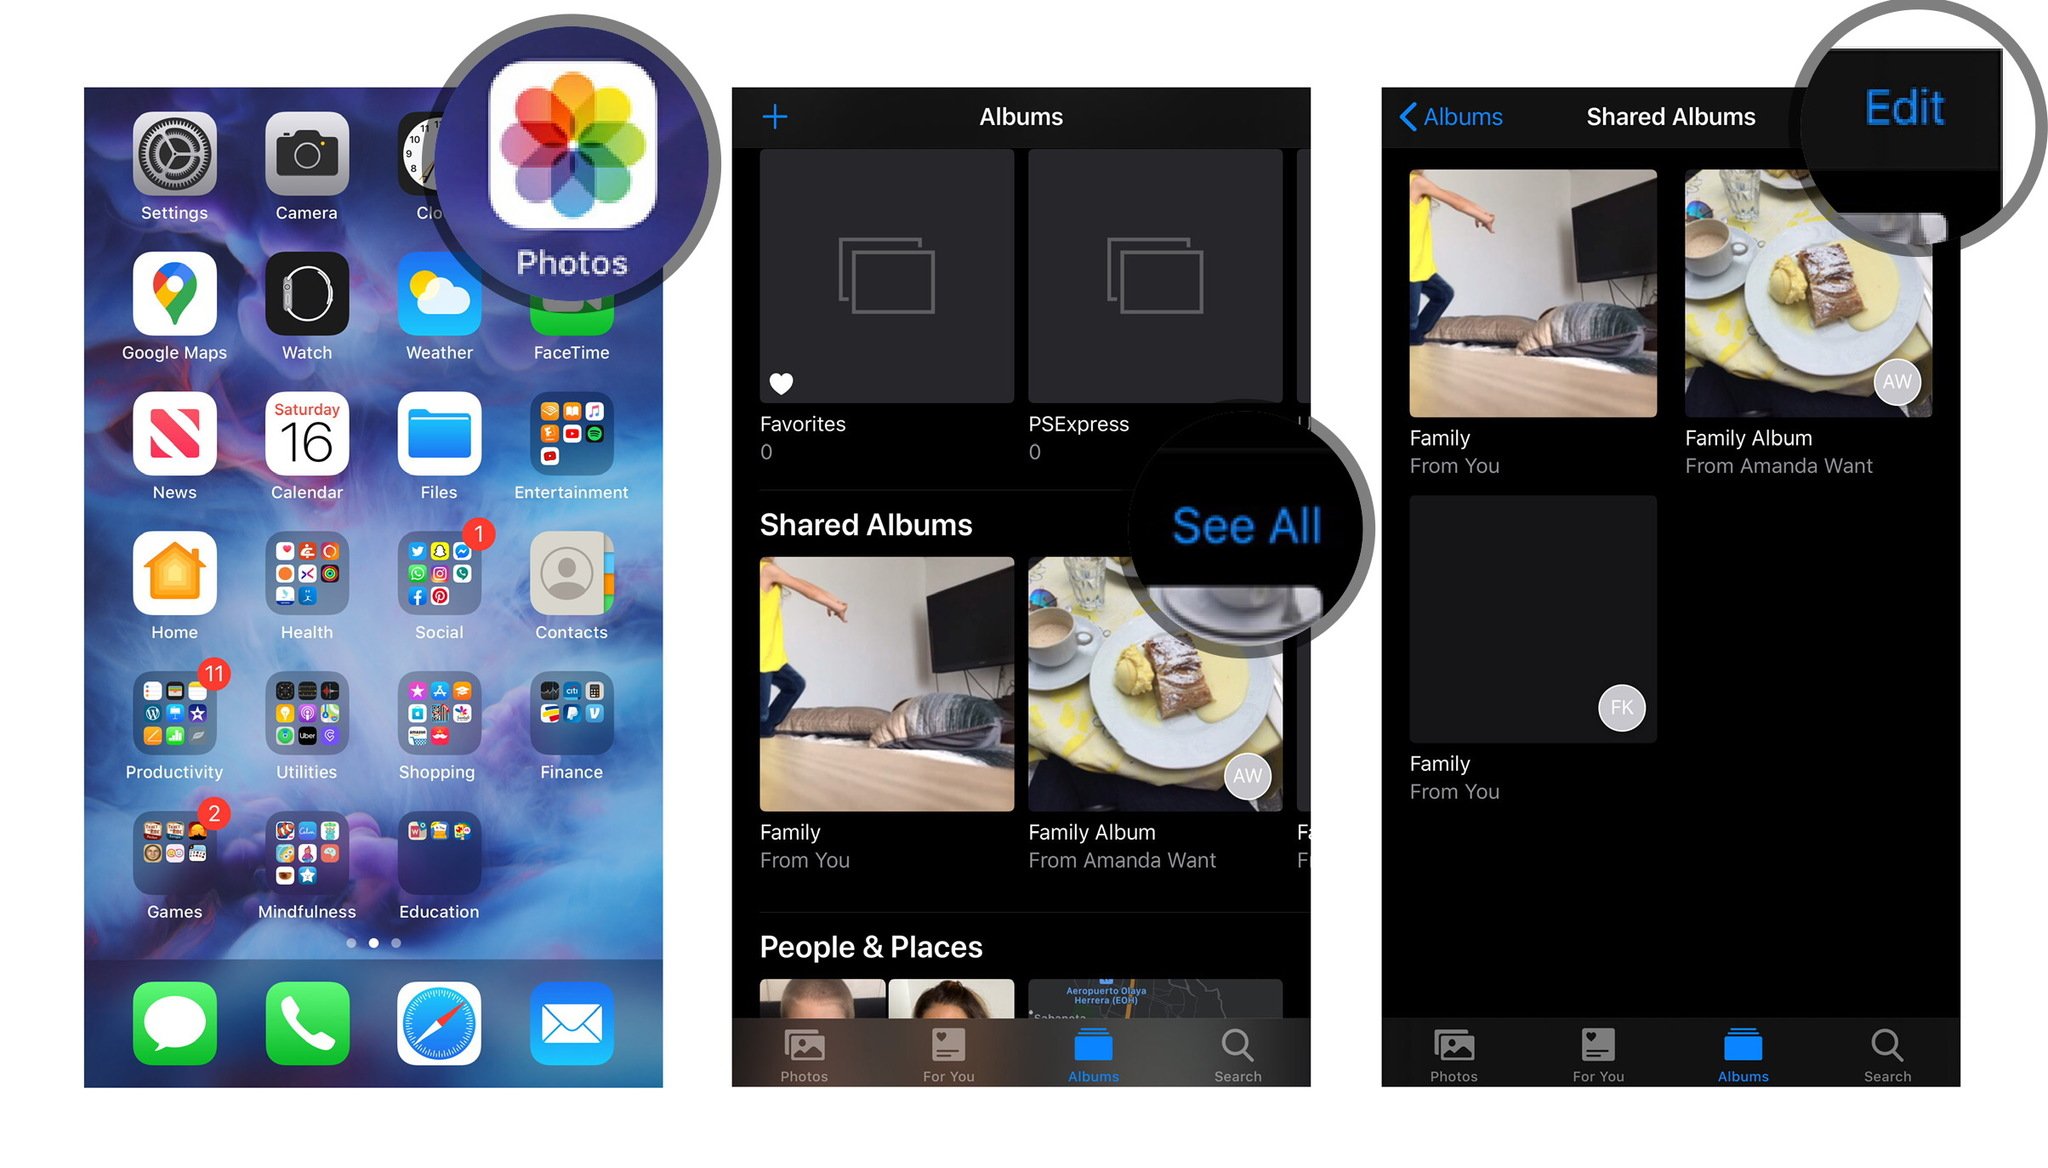
On iPhone and iPad
- Open Photos on your iPhone or iPad.
- Tap on the Albums tab.
-
Scroll down until you see the Shared Albums category and tap See All to view shared albums.

On your Mac
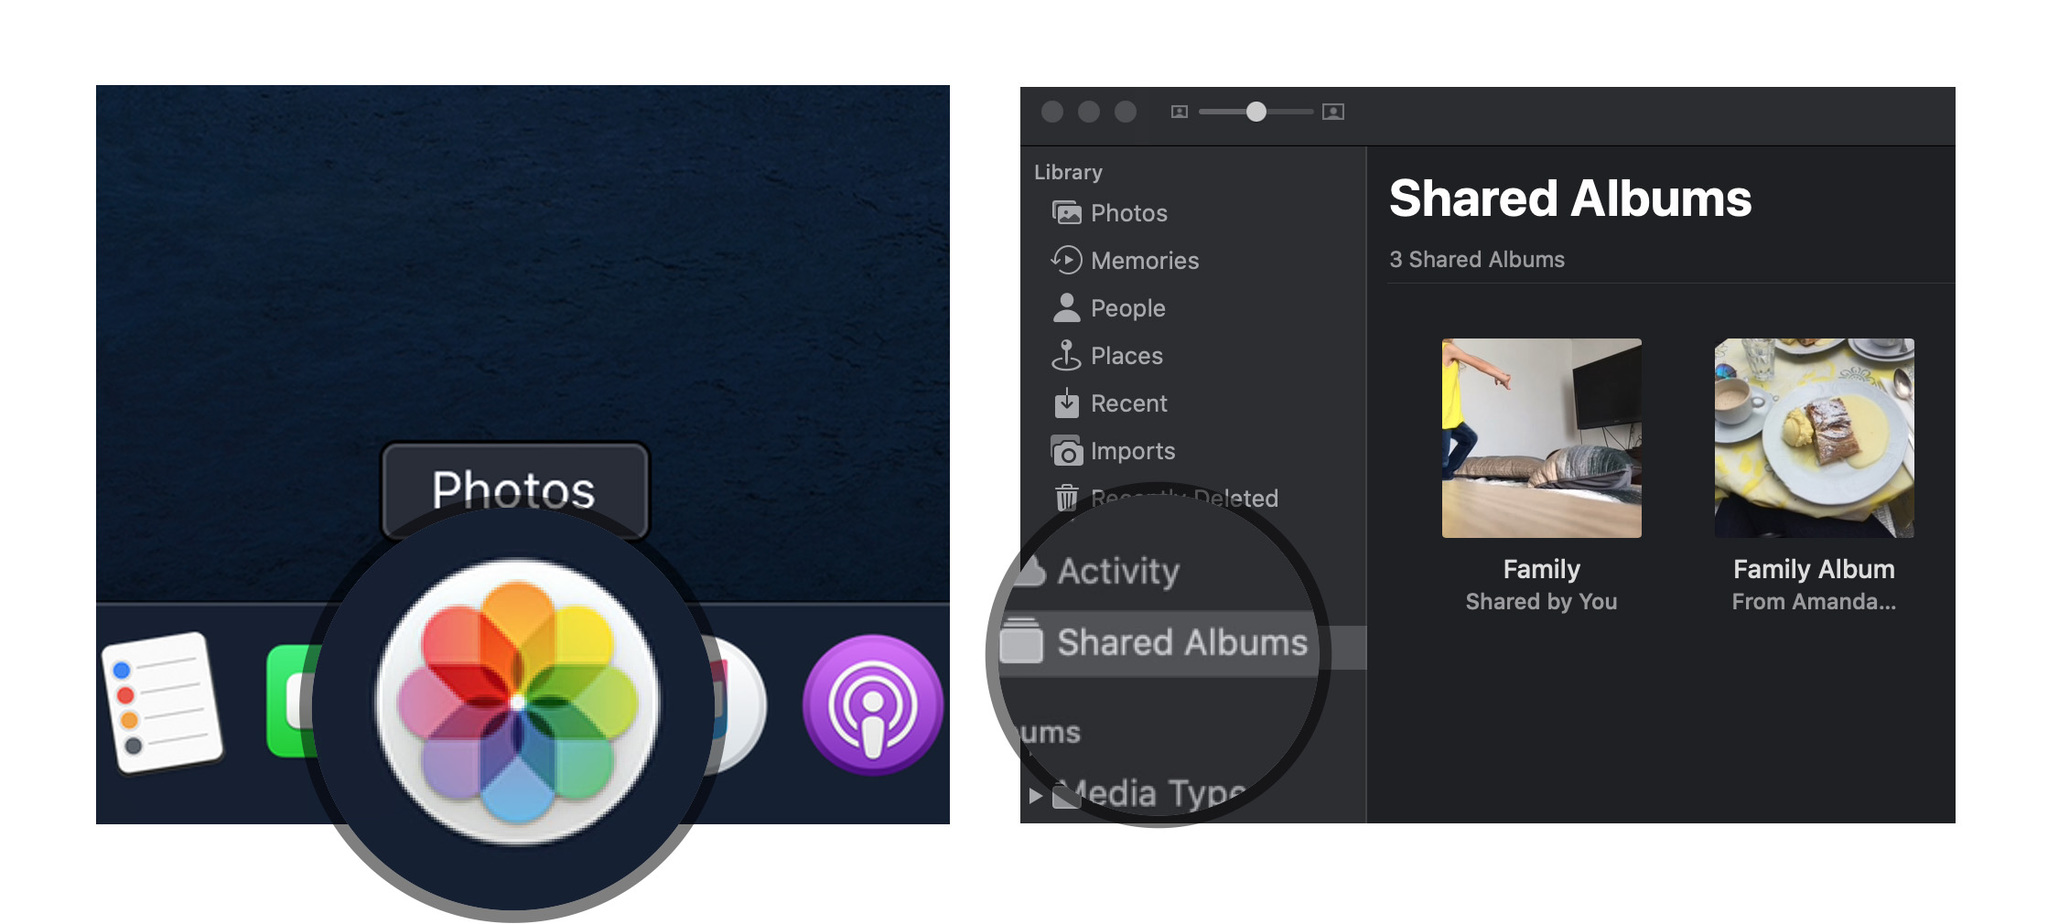
- Launch the Photos app on your Mac.
-
Tap the Shared Albums section on the sidebar.
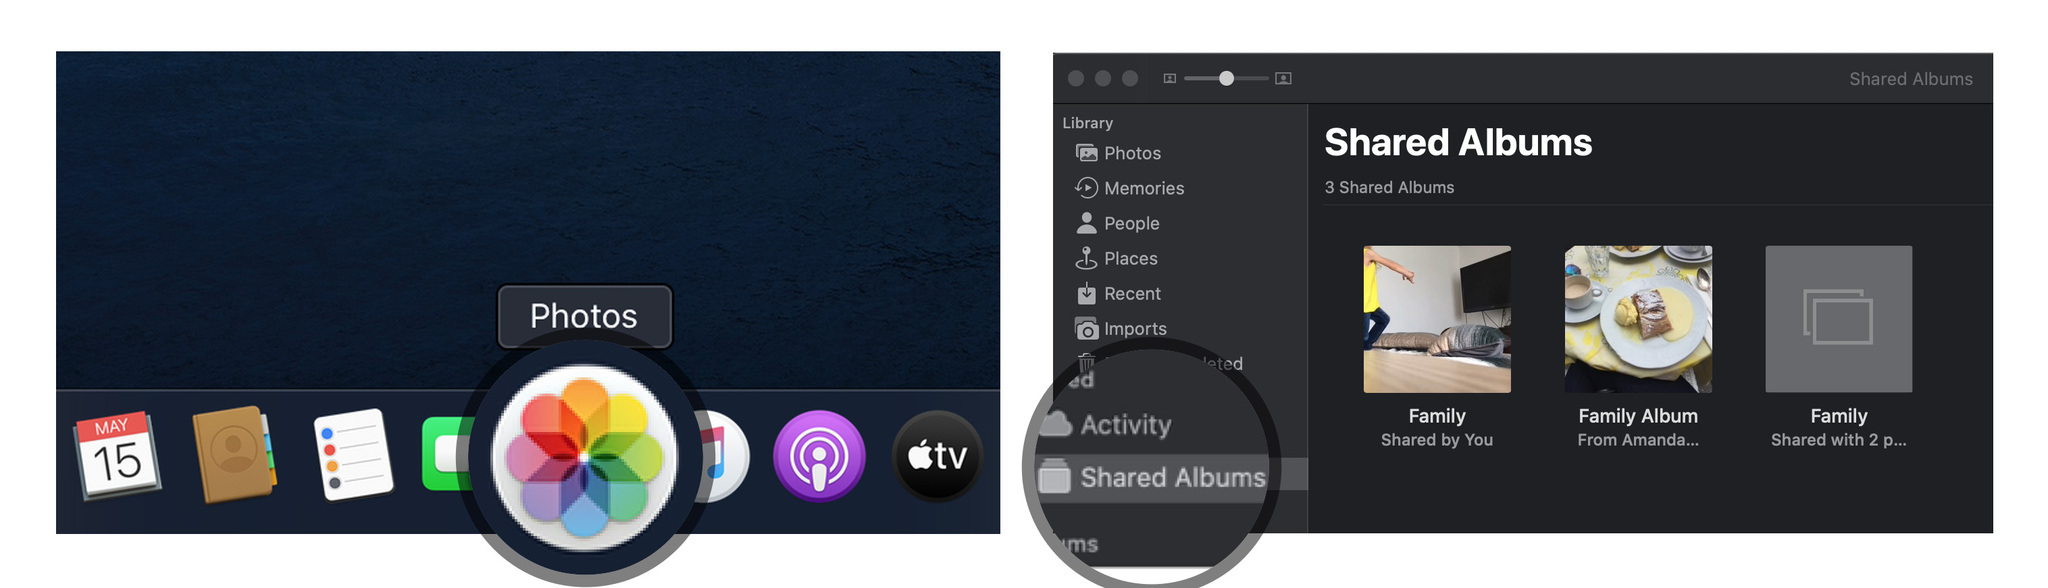
From here, you have two options for viewing shared images:
- Activity: This mode lets you view all recent activity in your shared albums
- Shared Albums: This shows you all your currently shared albums and all albums shared with you.
On your PC
-
Open your iCloud Photos folder.
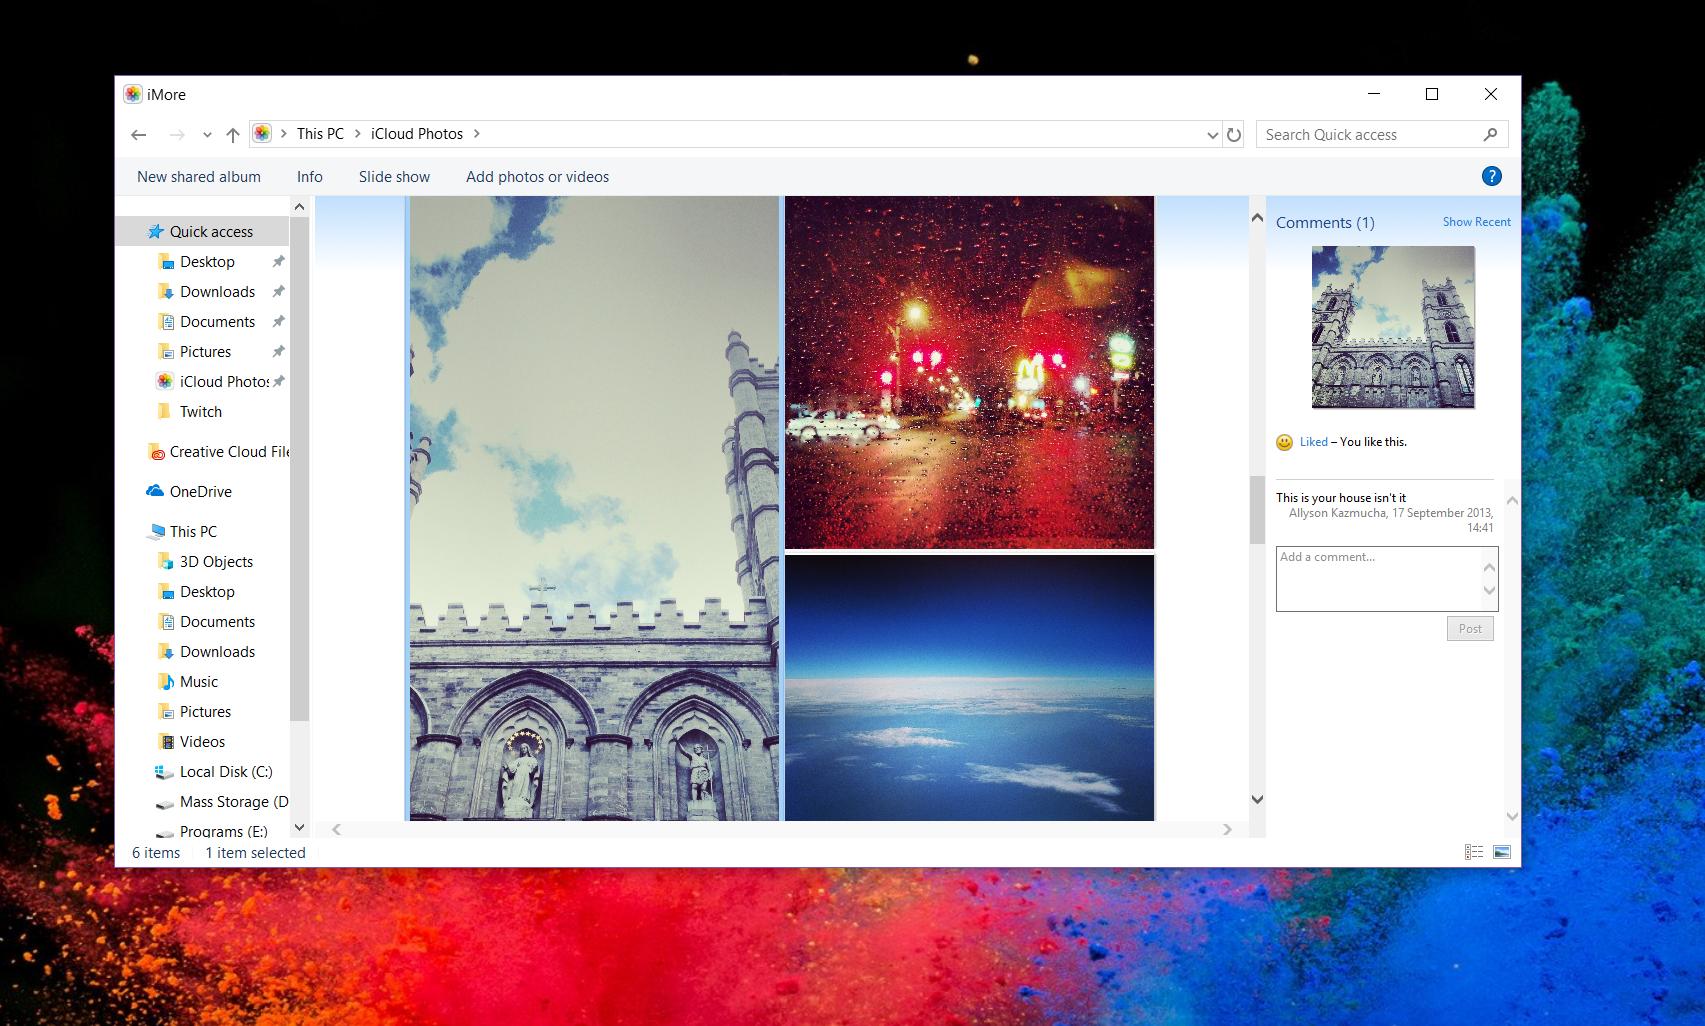
From here, you have two options for viewing shared images:
- Activity: This album lets you view all recent activity in your shared albums.
- Open a folder: The other folders in your iCloud Photos library include your shared albums and any regular albums you've created.
How to create a shared photo album on your iPhone, iPad, or Mac
If you want to share photos with your friends and family, you can create a shared photo album through iCloud and invite them to view it.
Note: In order for your recipients to properly view these images, you'll need to add the contact information they use for their iCloud account — it may well be different than their regular contact info, so make sure to check if you're in doubt.
On iPhone and iPad
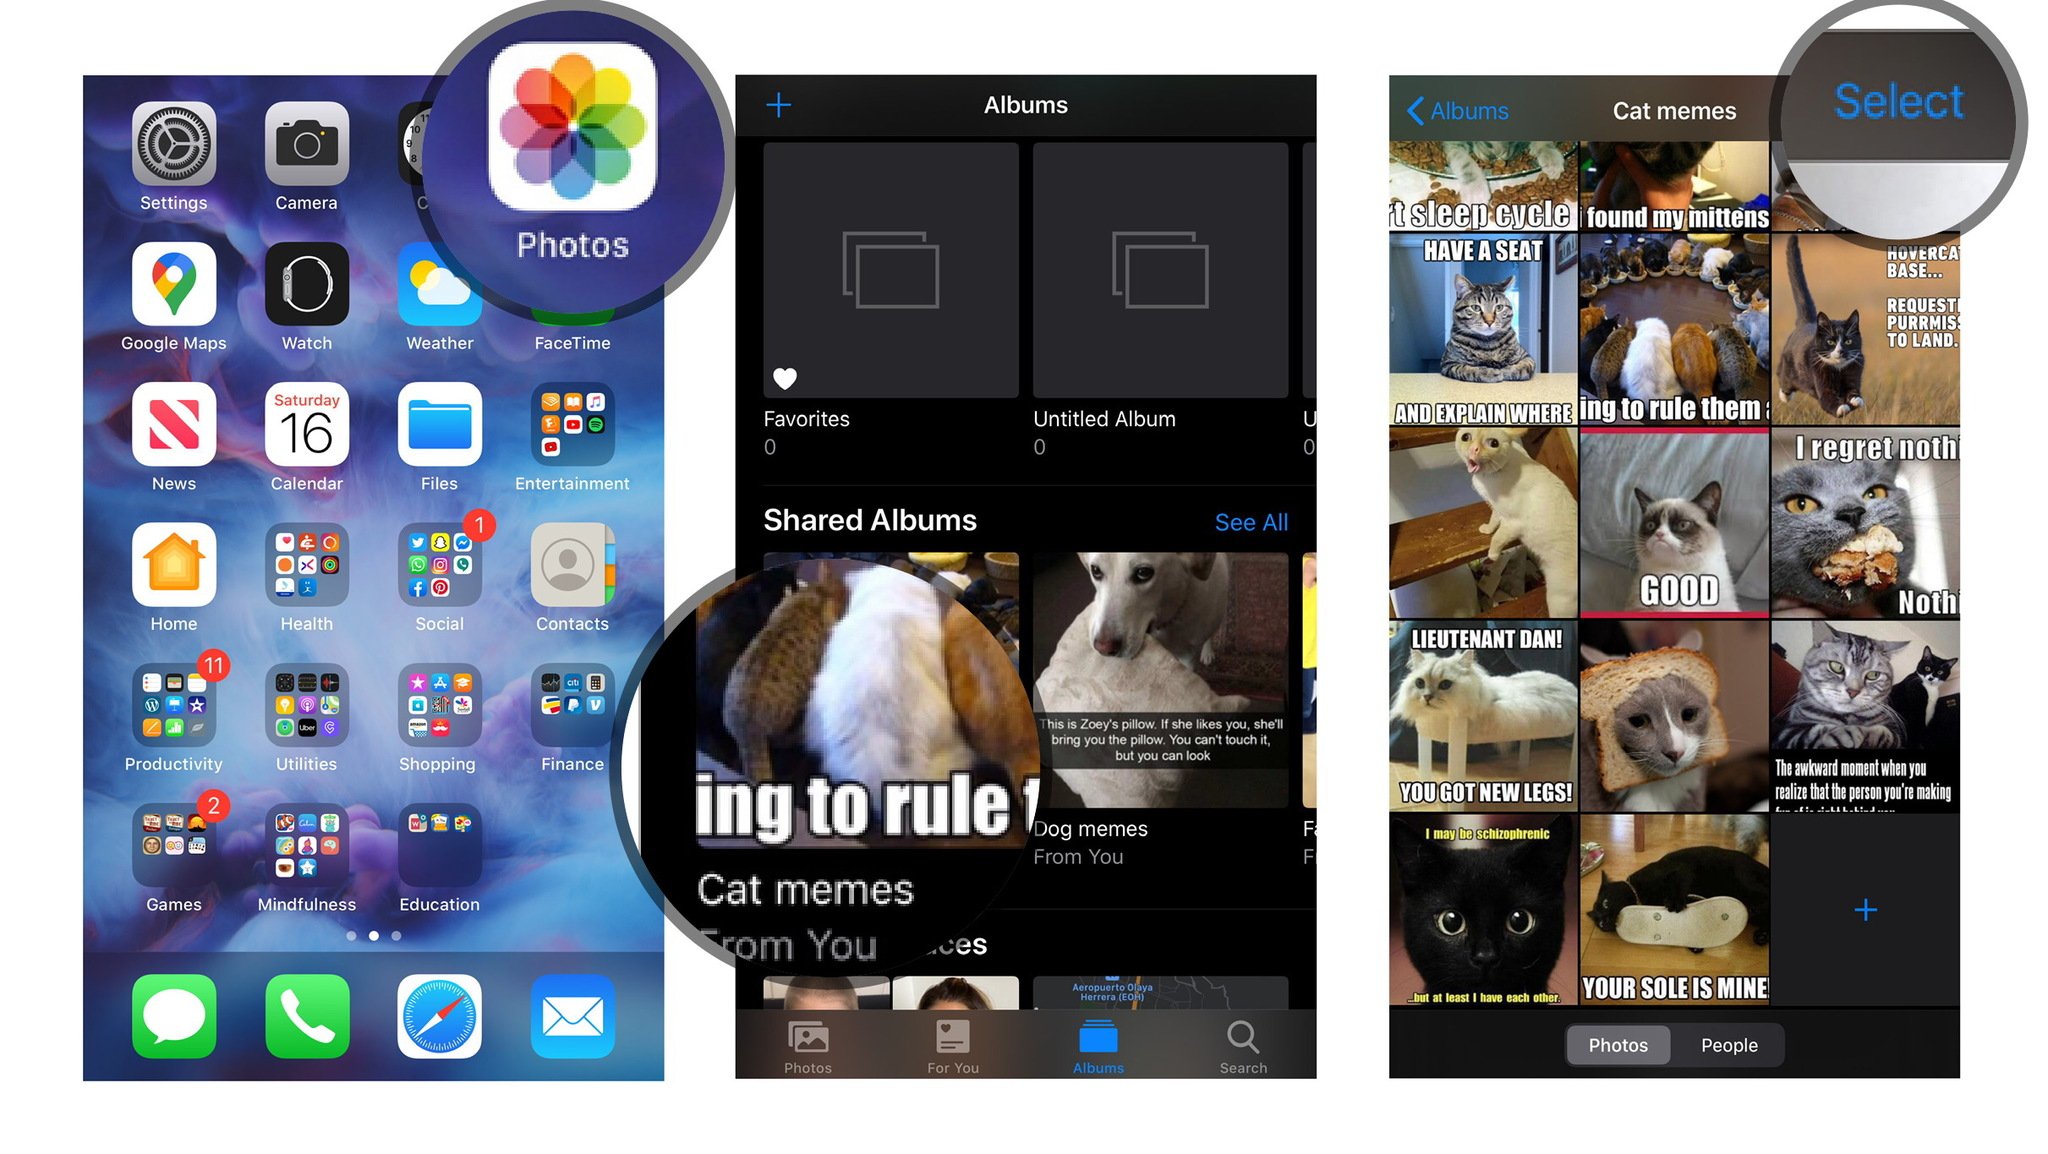
- Launch the Photos app on your iPhone or iPad.
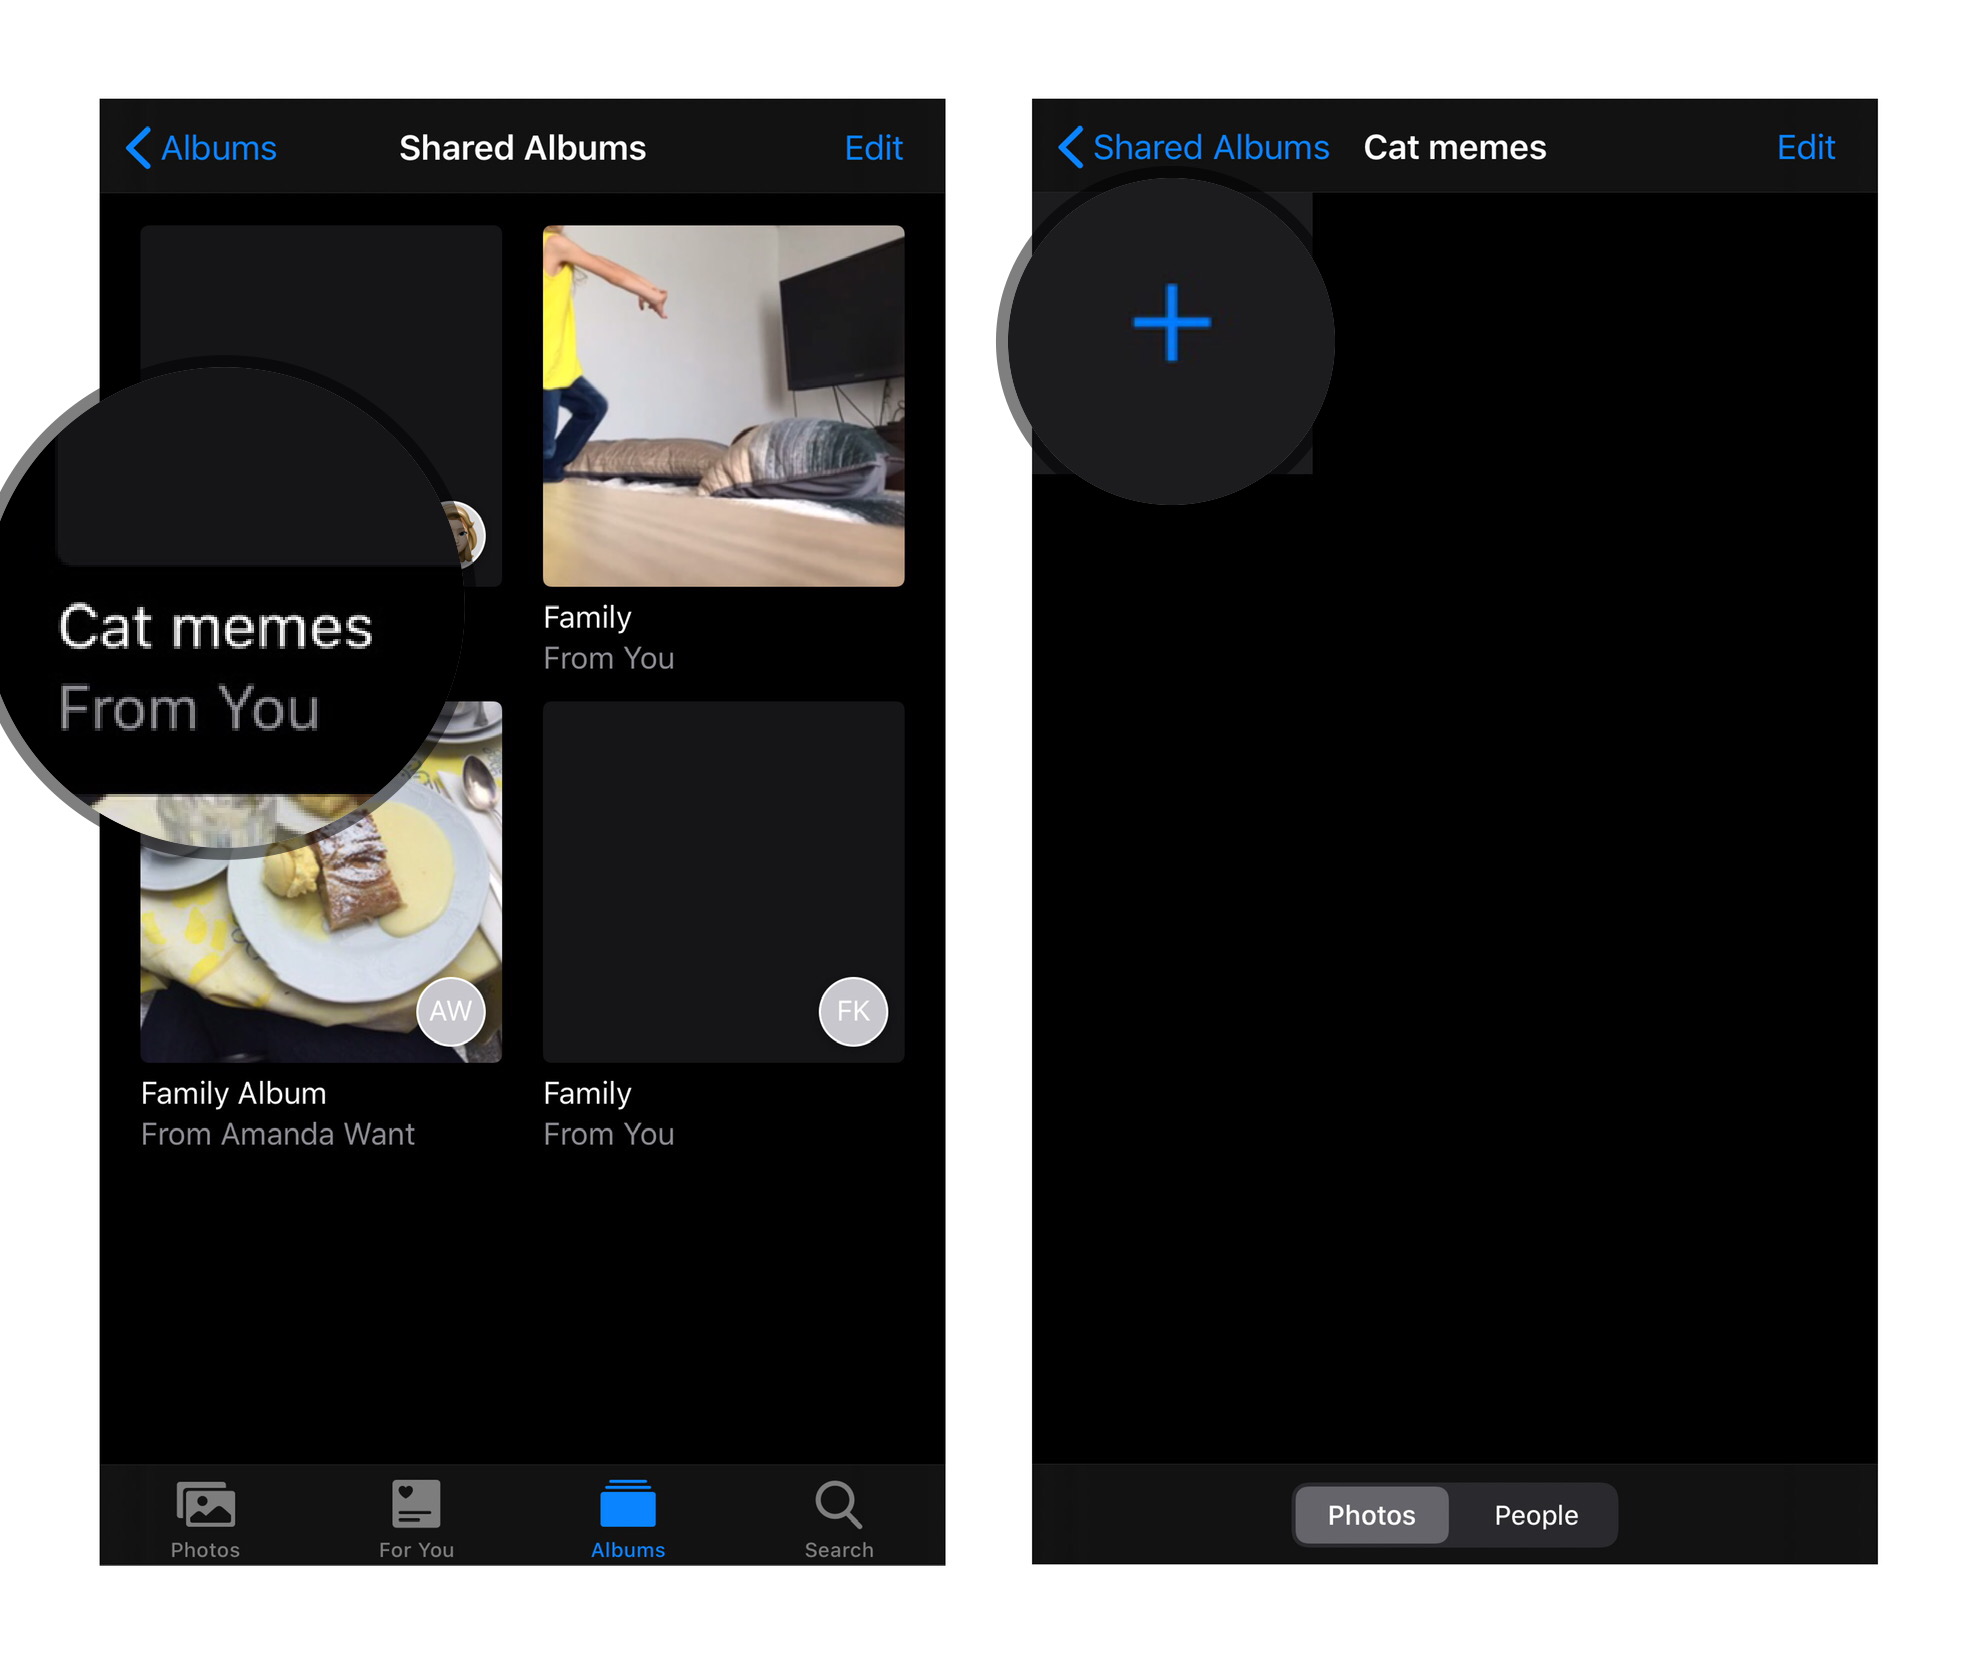
- From the albums tab, scroll down to Shared Albums and tap See All.
-
Tap Edit in the upper right corner.
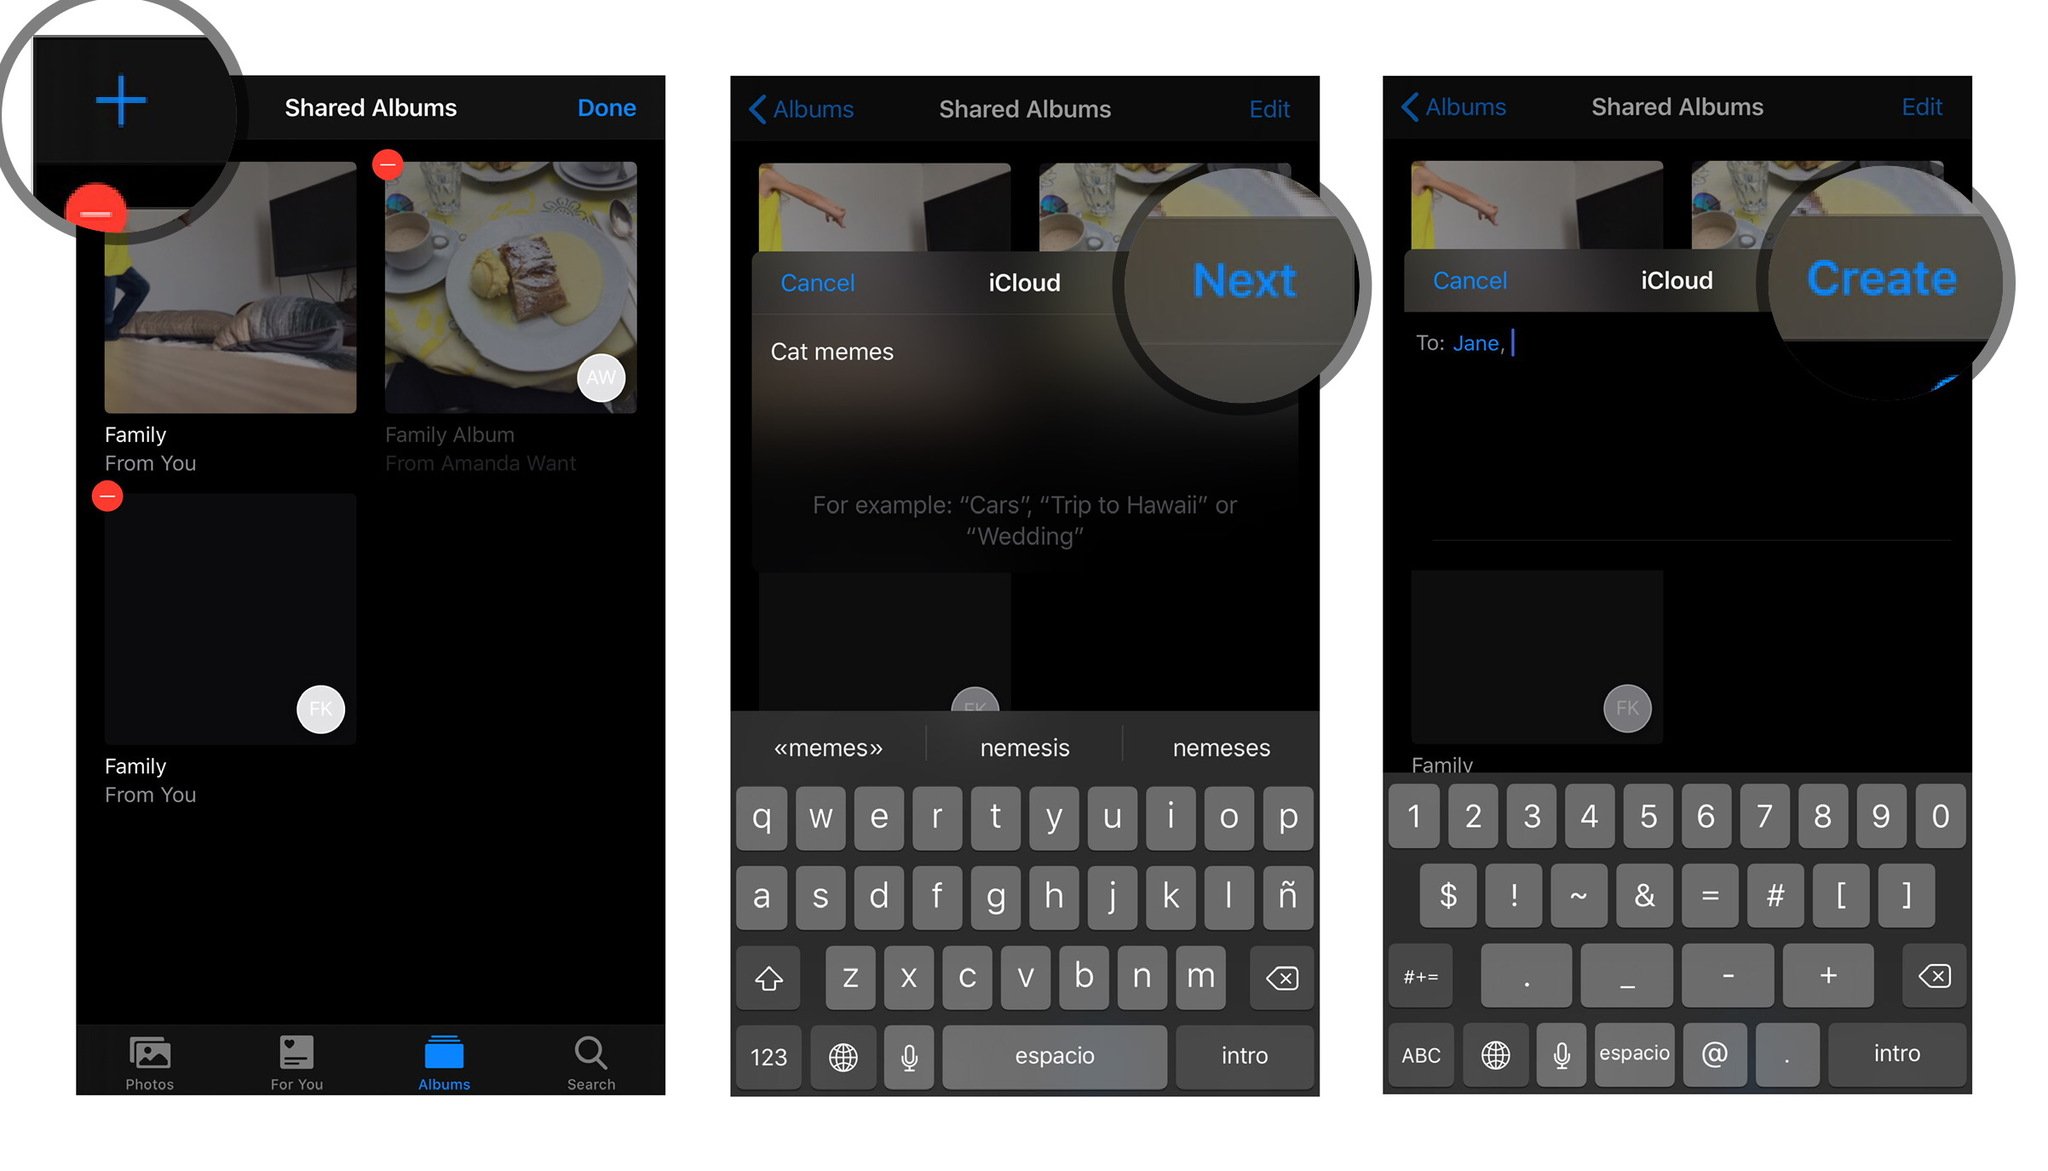
- Tap Add button in the upper left corner. It looks like a plus symbol (+).
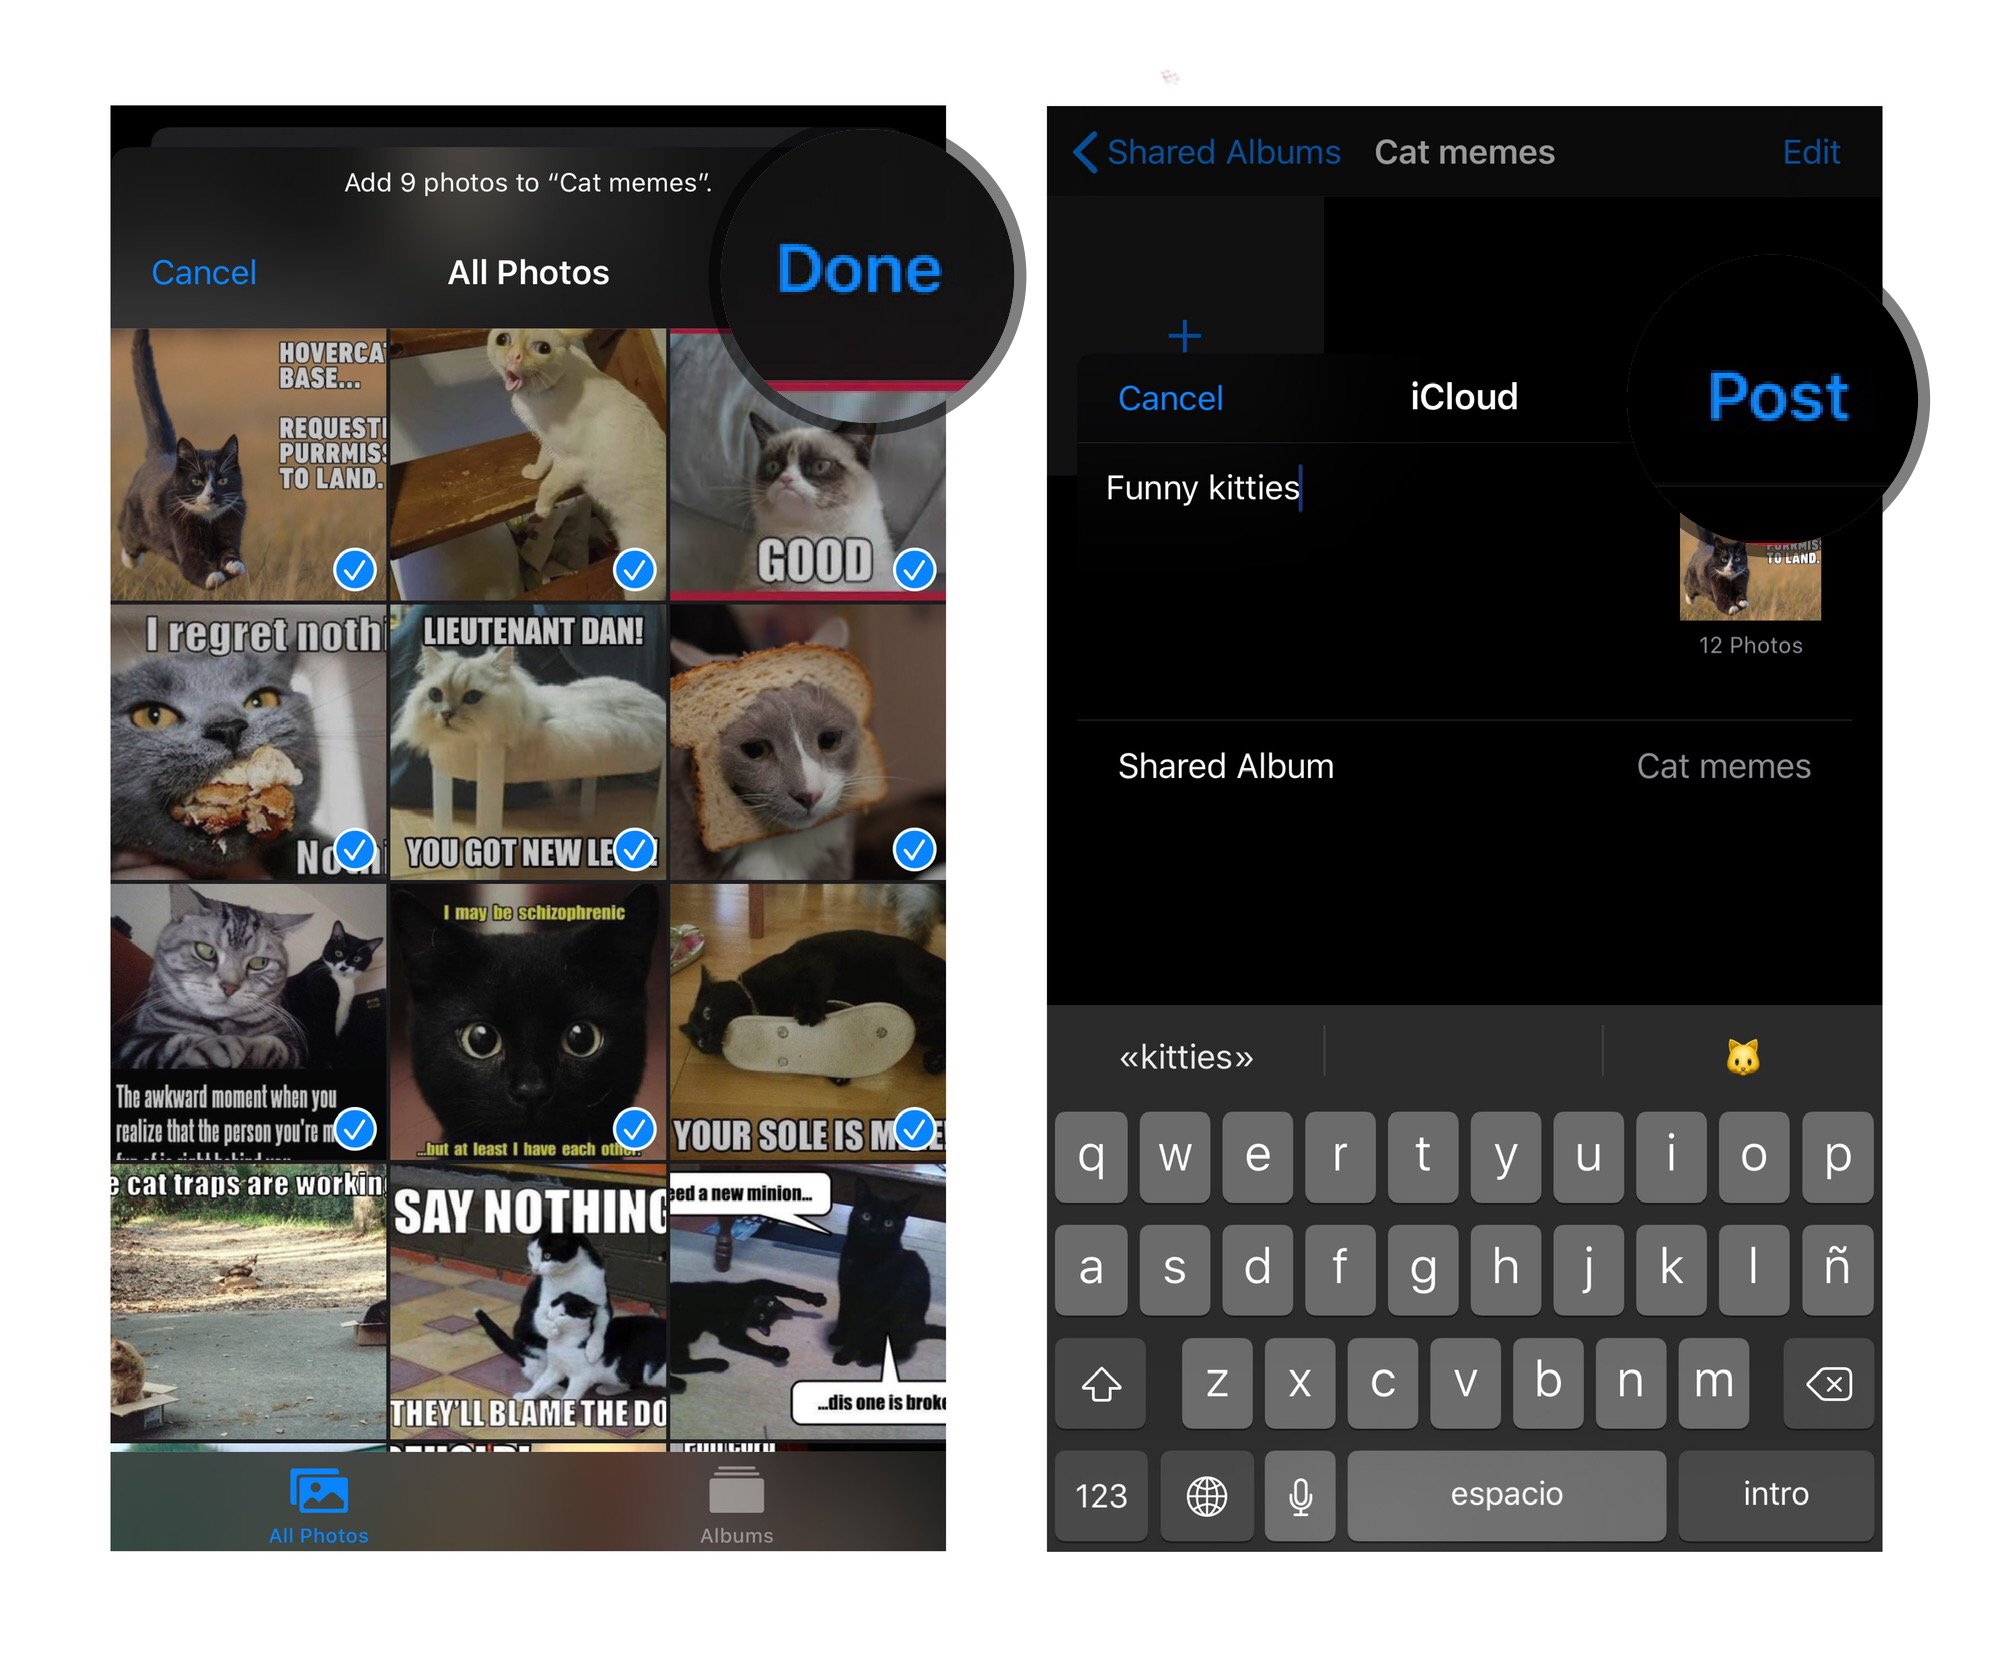
- Name your album and tap Next.
-
Add the contacts you want to share the album with and tap Create.
- Tap on the newly created Shared Photo Album.
-
Tap the Add button in the album tray. It looks like a plus symbol (+).
- Select photos you want to add and tap Done in the upper right corner.
-
Add a comment, if you like, and tap Post.
You can repeat steps 7-10 every time you want to add a new photo or video.
On your Mac
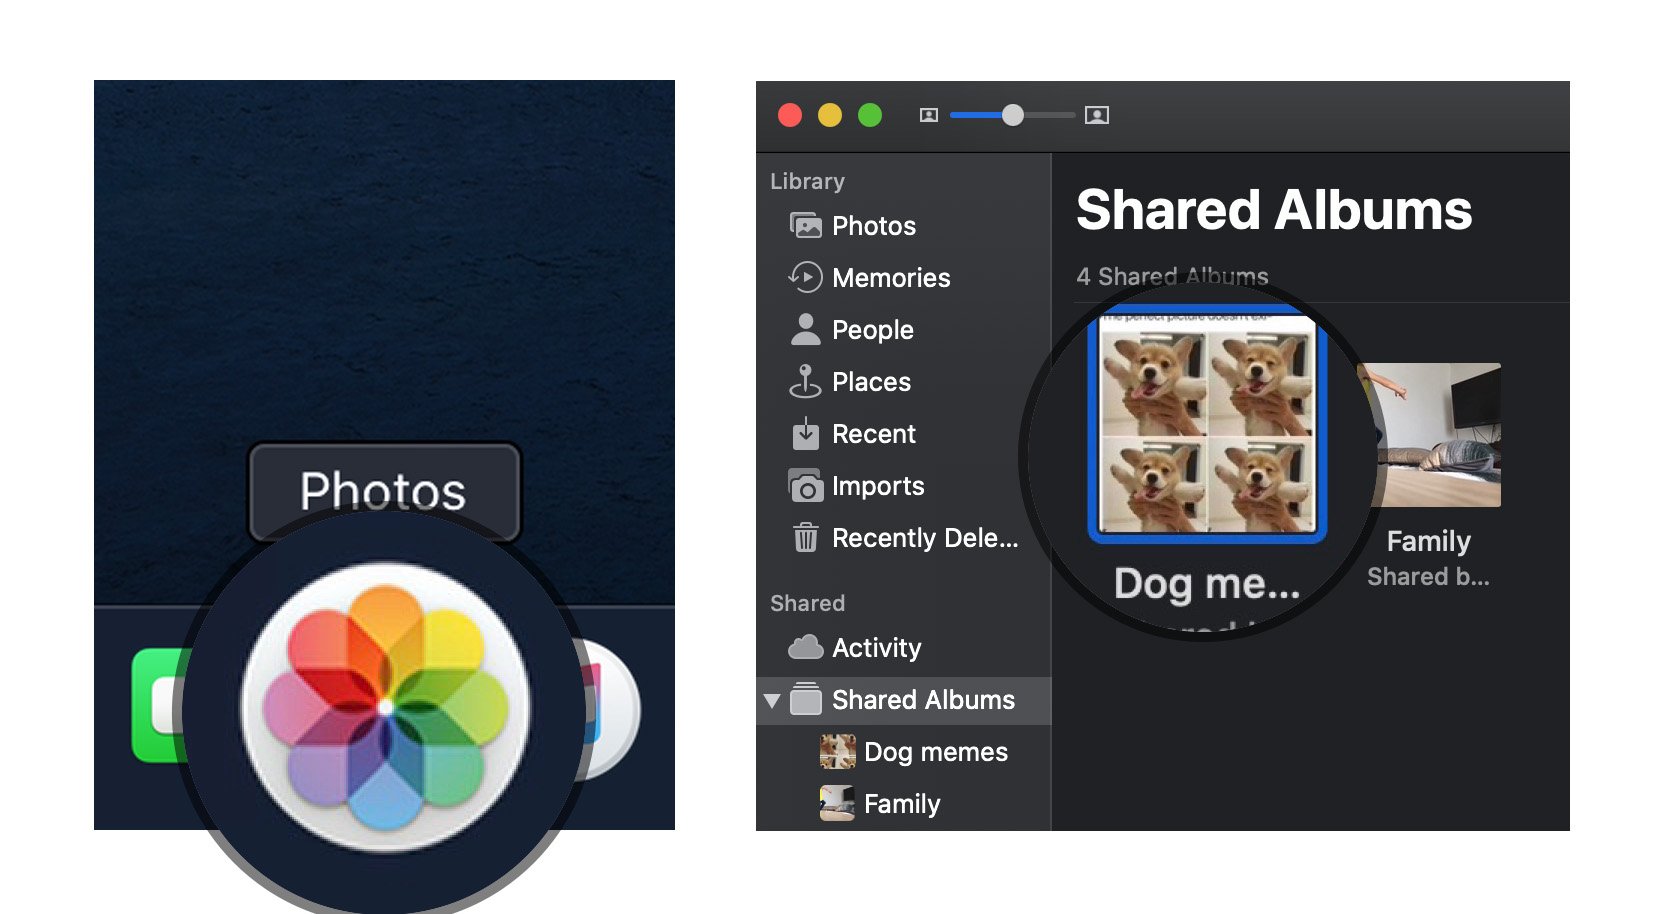
- Launch the Photos app on your Mac.
-
Click on Shared Albums in the sidebar.
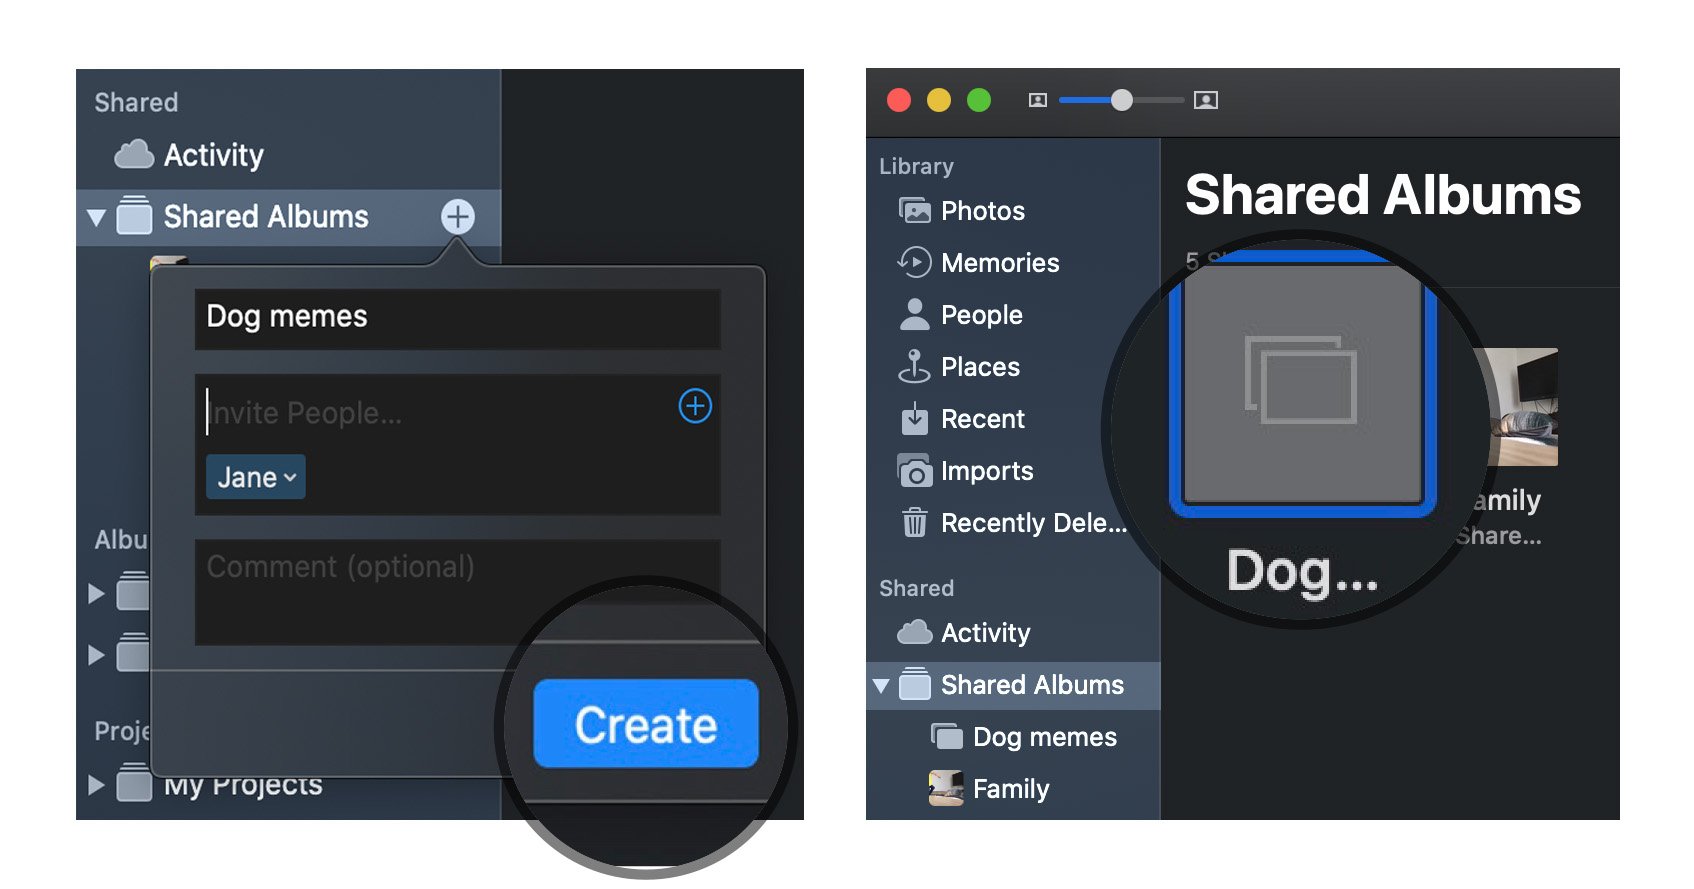
- Click on the Add symbol next to the word "Shared Albums" in the sidebar.
-
Name the album and enter the contact for your friends and family. Make sure you use their iCloud contacts.

- Click on Create.
-
Double or Control-Click on the newly created Shared Photo Album.
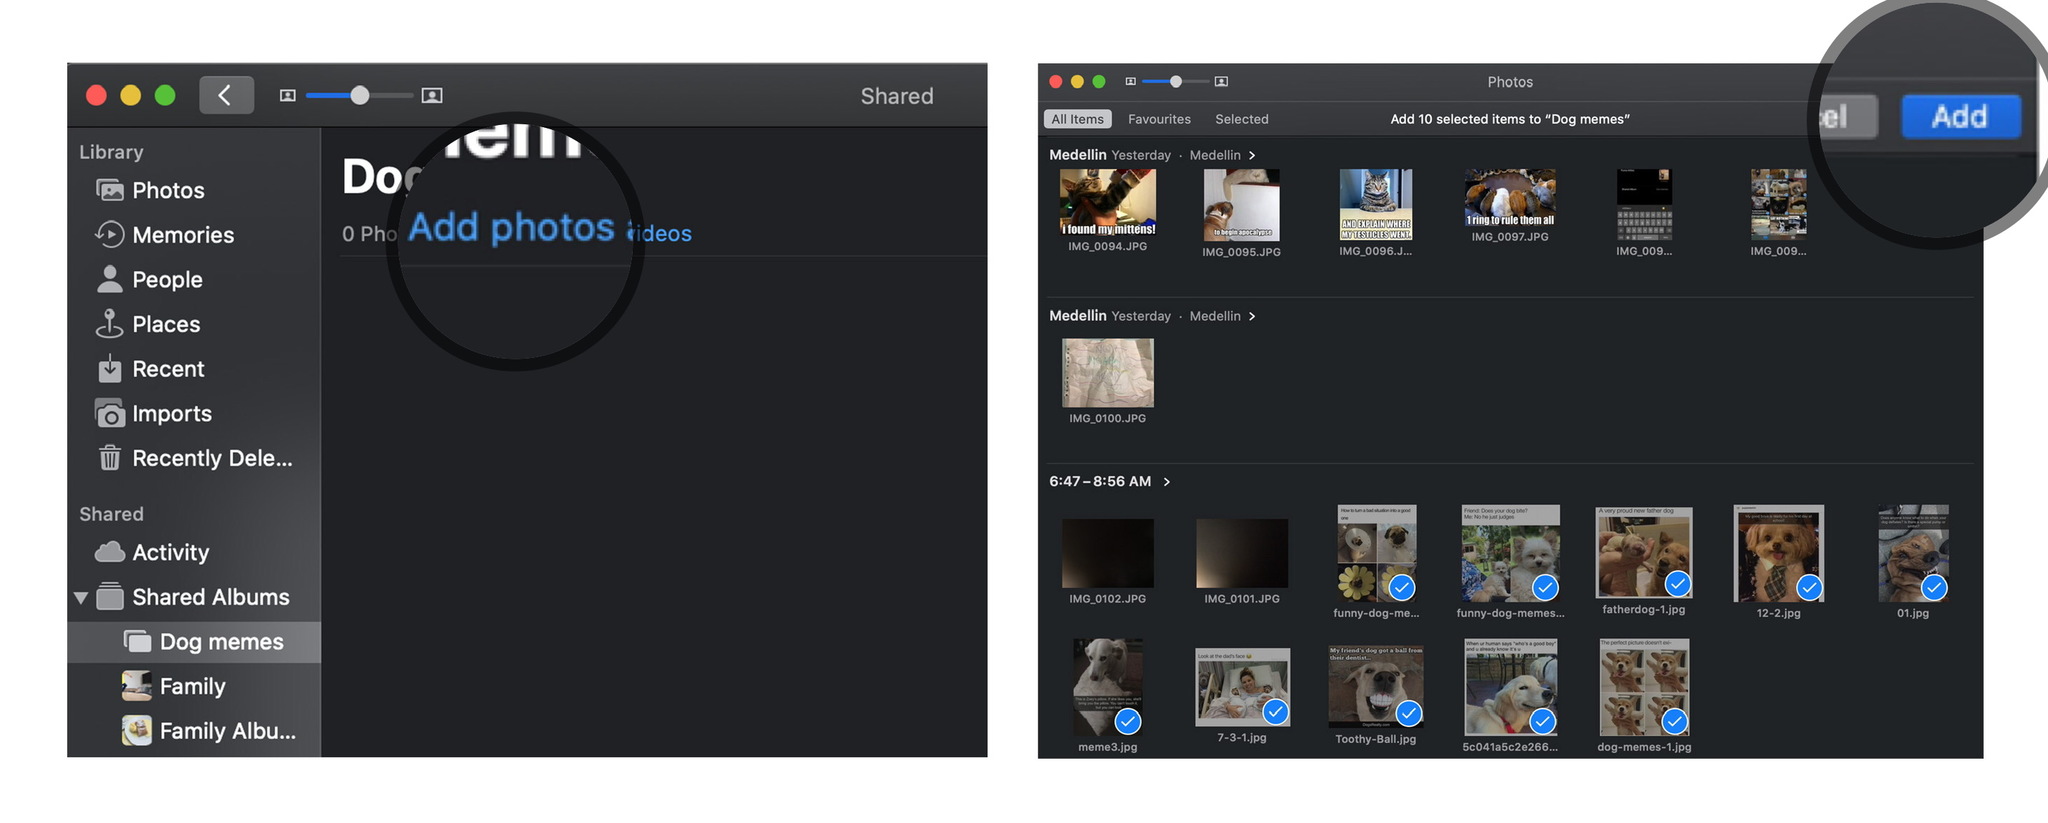
- Click on Add photos and videos in the upper left corner of the window.
-
Select the photos you want to add to your Shared Photo Album and click on Add in the upper right corner.
You can repeat steps 6-8 every time you want to add a new photo or video.
On your PC
- Open your iCloud Photos folder.
- Open (or create) the folder where you wish to add your new images.
- Click the New shared album button.
-
Add all email addresses for your friends and family.

- Give the album a name.
- Click Next.
- Select all the photos you want to add from your computer.
- Click Done.
All the photos added to this folder will now be available as a shared album; anyone you invited will be able to access them after pressing OK.
How to add images and video to a shared photo album on your iPhone, iPad, Mac, or PC
Once you've created an album, you can add more images or videos to it at any time with the tap of a few buttons. Here's how.
On iPhone or iPad
- Open the Photos app on your iPhone or iPad.
- Select the Albums tab and scroll down until you see Shared Albums.
-
If you don't see the album you want right away, tap See All to view all shared albums.

- Tap on the album you'd like to add photos to.
-
Press the plus button square at the top of the album.
- Select the images you wish to add and press Done.
-
Add a comment, if you like, and tap Post.
On your Mac
- Open the Photos app on your Mac.
-
Choose the Shared Album where you want to add more images and video.
- Click on the Add photos and videos button at the top of the album.
-
Choose the images you want to add and press Add.
On your PC
- Open your iCloud Photos folder.
- Open the folder where you wish to add your new images or video.
-
Click on the Add photos or videos button.

- Choose the new images or video you wish to add to the folder.
- Once you're ready, press Done.
How to delete images from a shared photo album on your iPhone, iPad, Mac, or PC
Don't want to share a particular picture or video after all? You can delete images from your shared photo album at any time — even if you weren't the one who added them!
Note: Anyone you've added to a shared photo album can download their own copy of an image or video once it's been added to the album. If you delete the photo or video after it's been available in the album, there's a chance it may have already been downloaded to another device.
On iPhone and iPad
- Launch the Photos app on your iPhone or iPad.
- From the Albums tab, select the Shared Album you wish to delete photos from.
-
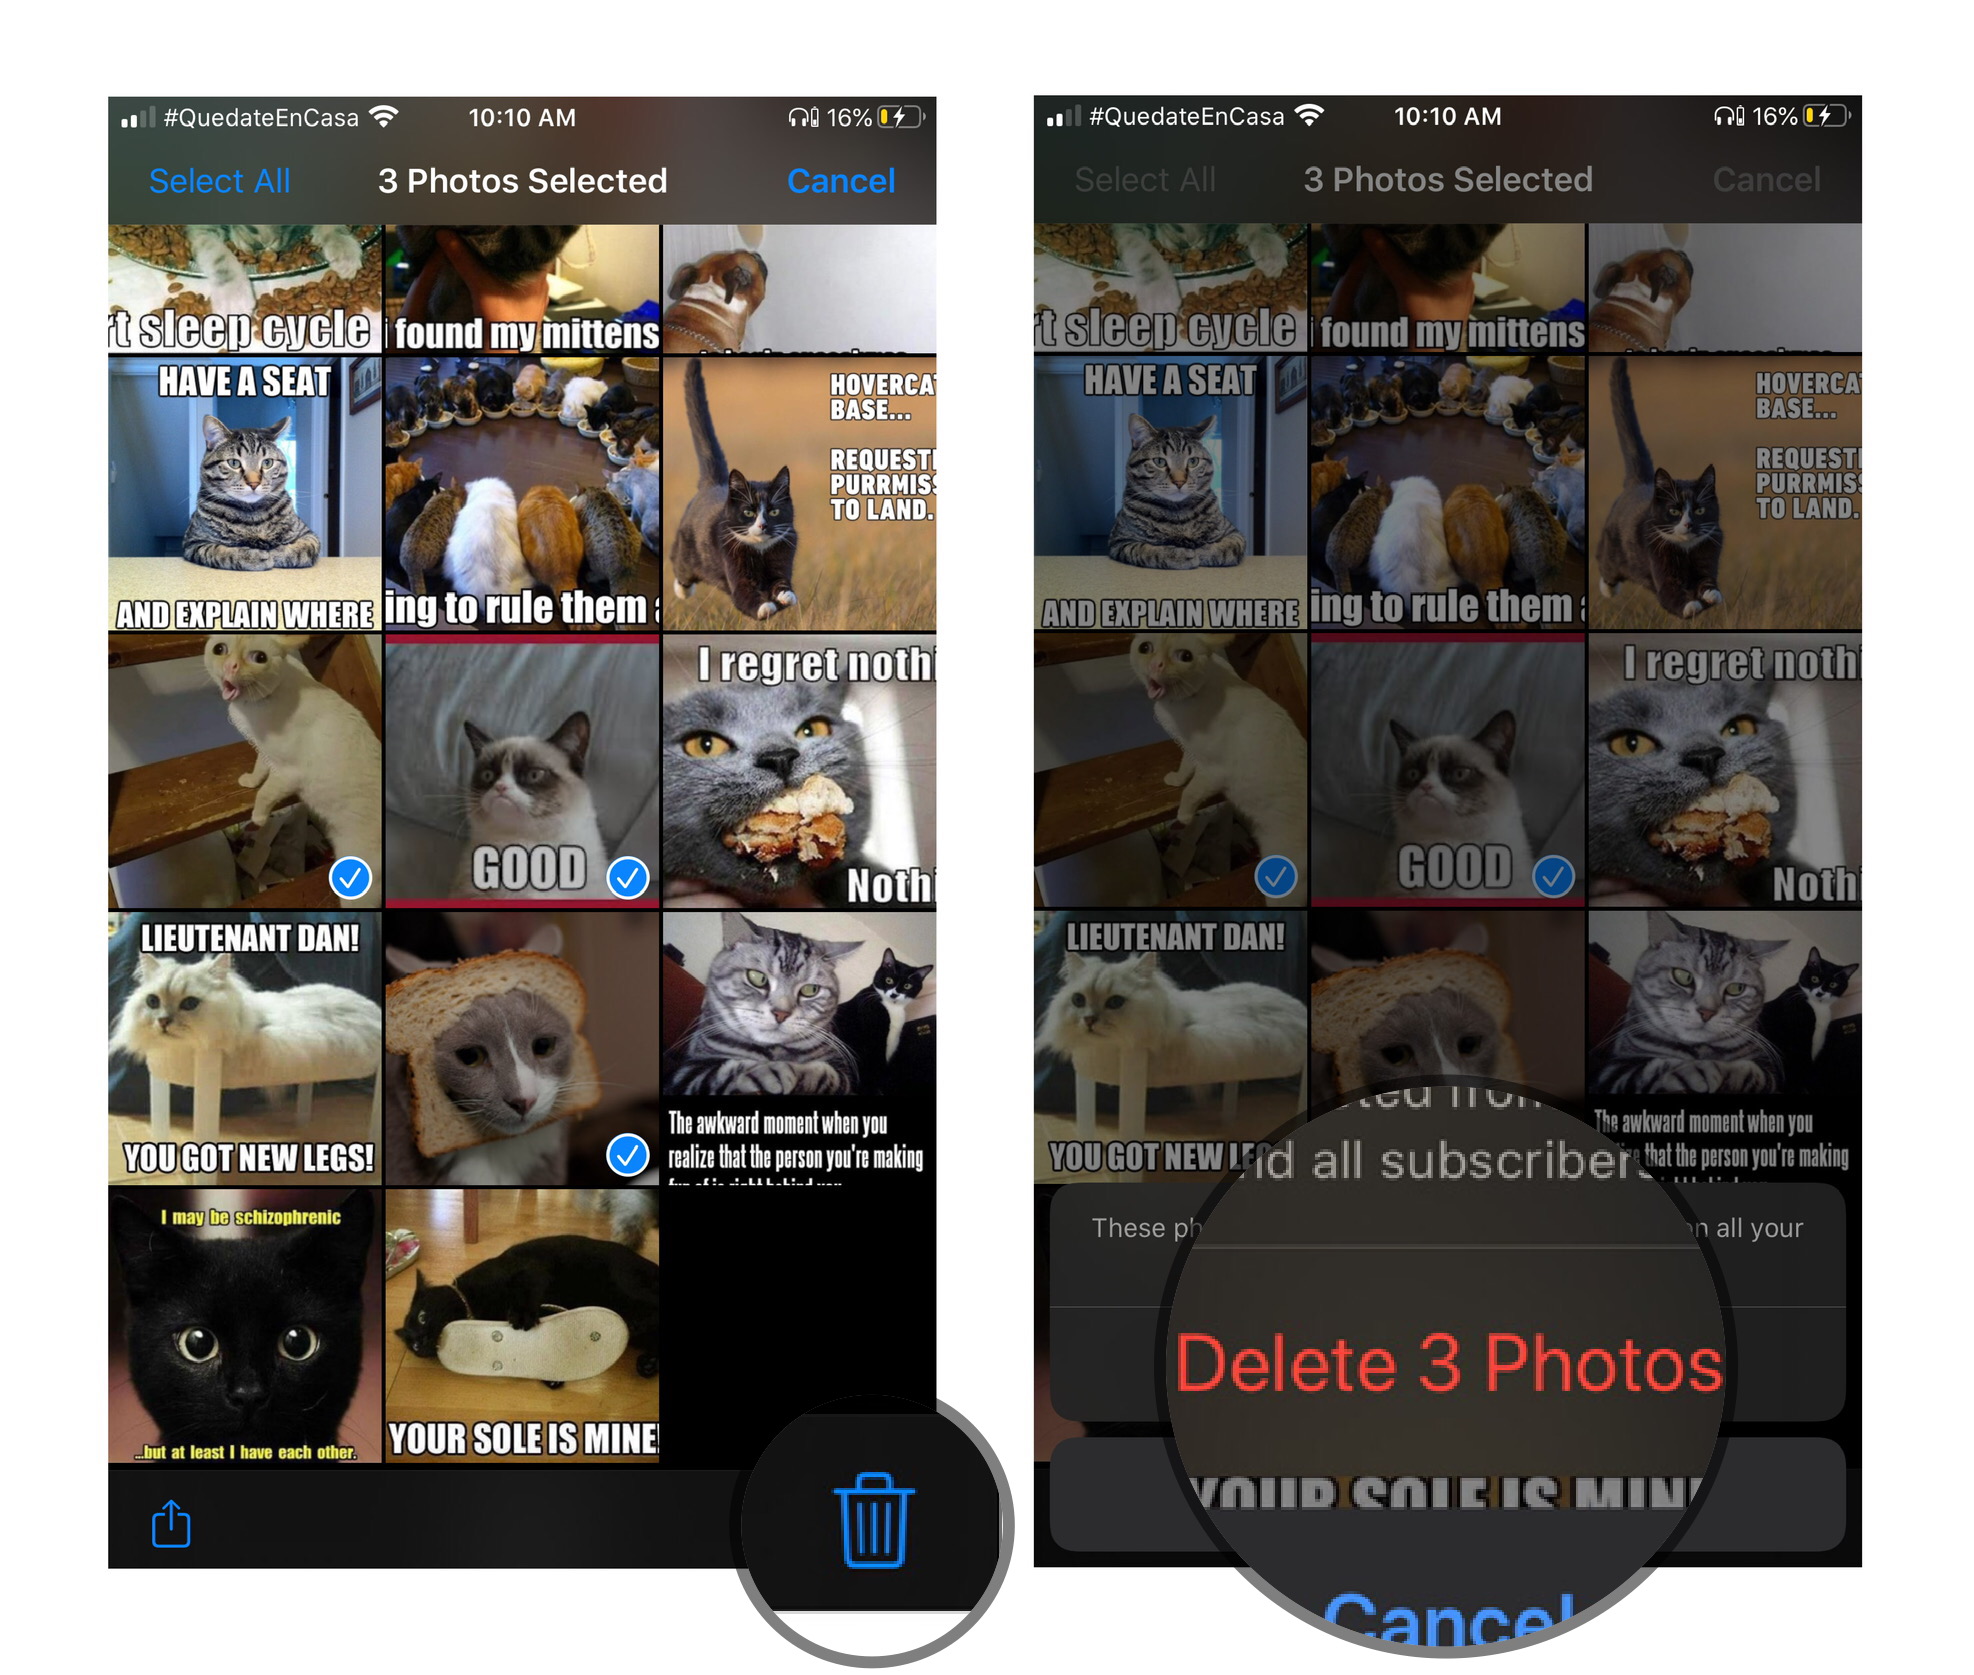
Tap Select in the upper right corner.
- Select the photos you want to delete and tap the Trash icon in the bottom right corner.
-
Confirm by tapping Delete Photos.
This will remove the photos or videos in the album for all of your iCloud connected devices and any friends you gave access to the album.
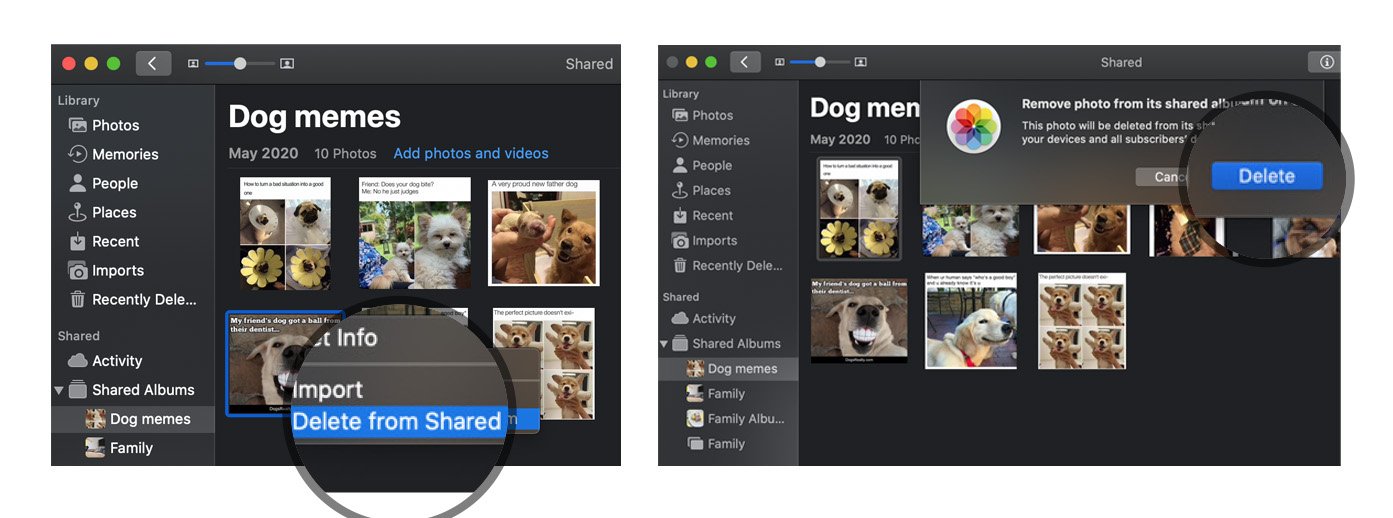
On your Mac
- Launch the Photos app on your Mac.
-
Click on the Shared Photo Album from which you want to delete photos.
- Right or Control-Click on the photo you want to delete.
- Select Delete from Shared Album from the list of options.
-
Click on Delete to confirm that you want to remove the photo from the shared album.
On your PC
- Open your iCloud Photos folder.
- Open the shared folder in question.
-
Delete or move the images you'd like to remove from the shared photo album.

How to subscribe to a shared photo album on your iPhone, iPad, Mac, or PC
When someone invites you to a shared photo album, you'll have to subscribe before you can view photos and video (and, if the owner has allowed you to, add your own images and video). Here's how to do it.
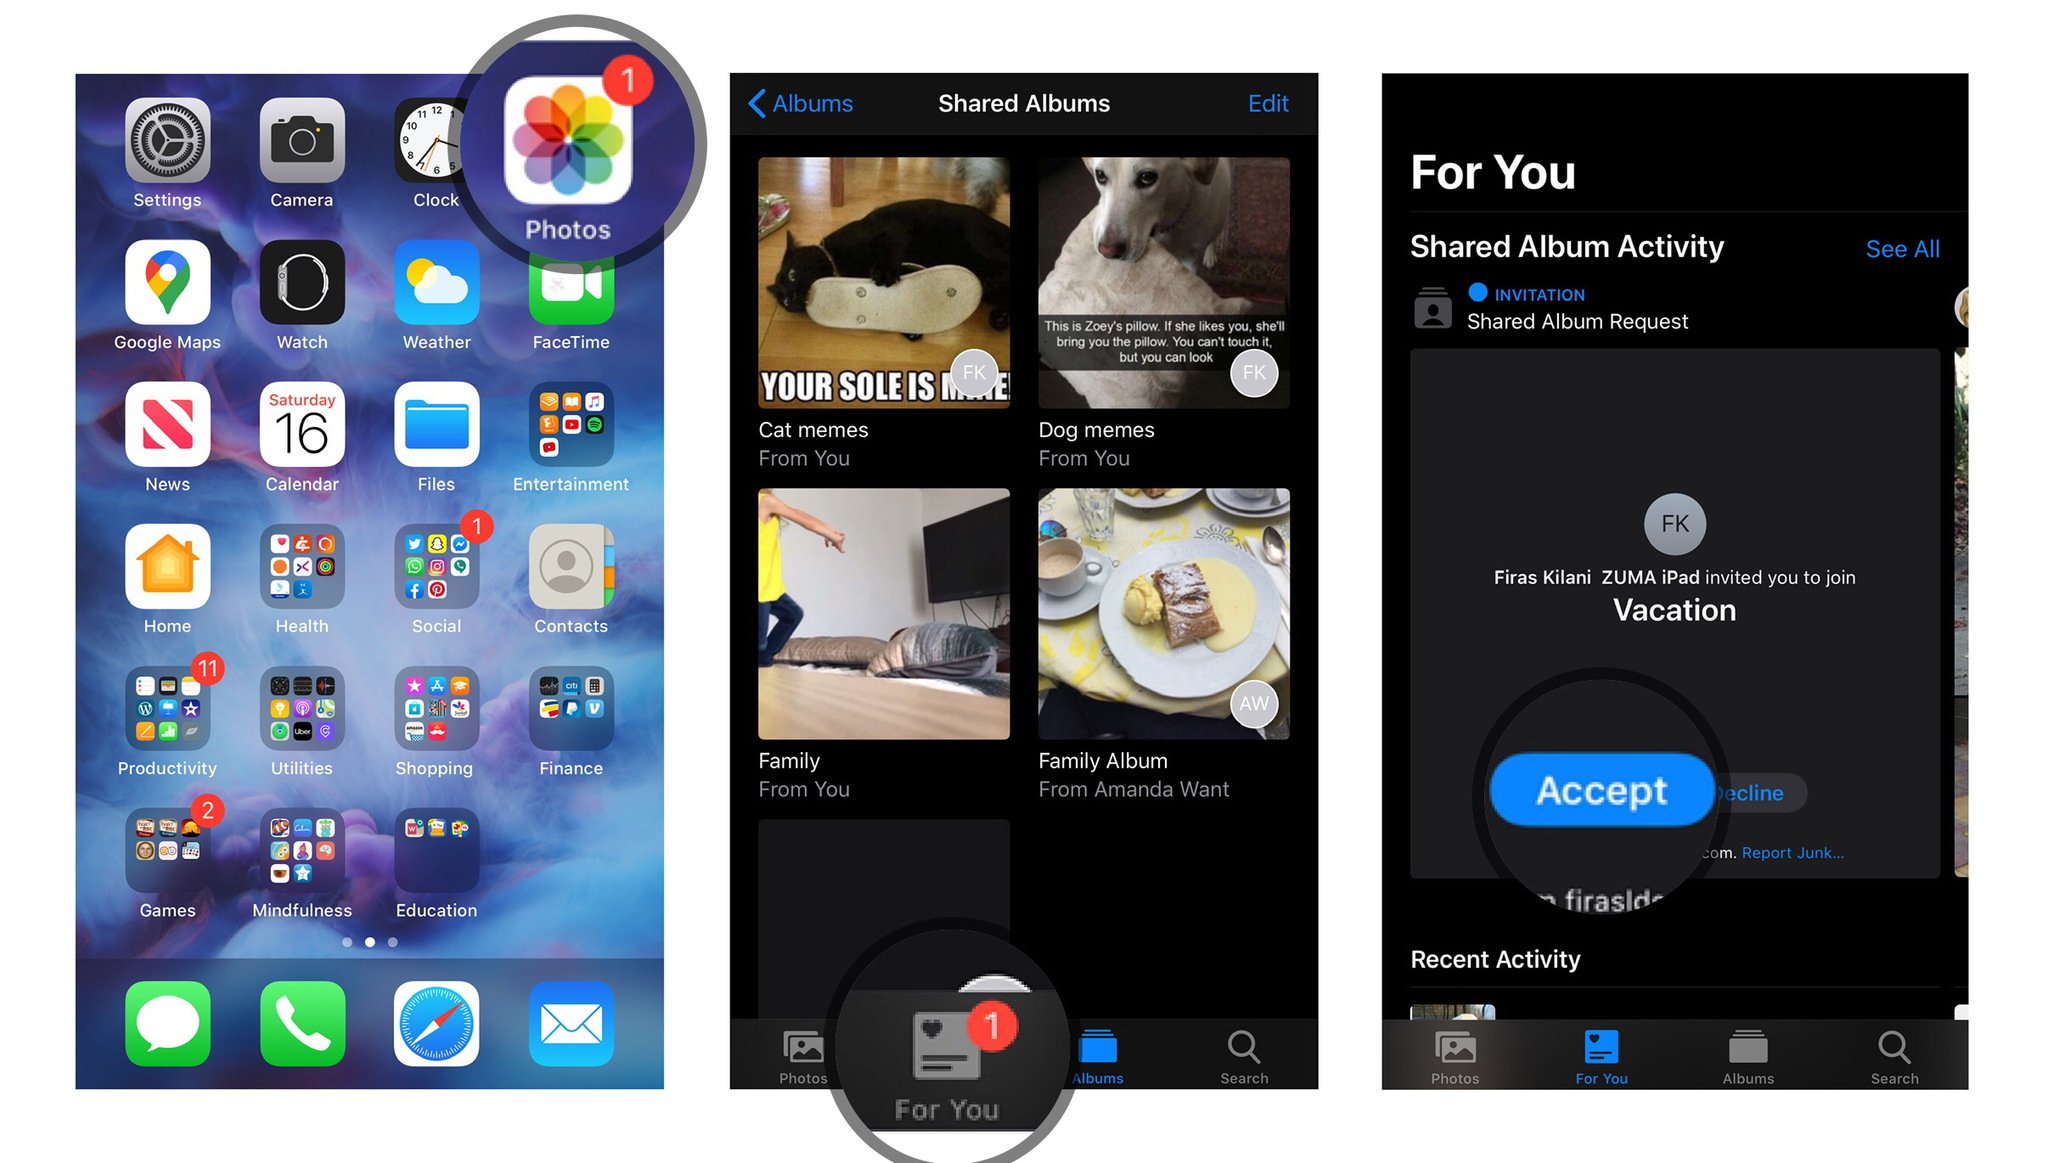
On iPhone or iPad
- Open the Photos app on your iPhone or iPad.
- Select the For You tab.
-
Under Invitations, tap Accept or Decline to join or reject a shared album.
On your Mac
- Open the Photos app on your Mac.
- Select the Activity album under the Shared section of the sidebar.
-
Under Invitations, tap Accept or Decline to join or reject a shared album.

On your PC
- Open your iCloud Photos folder.
- Select the Activity folder.
- Under Invitations, tap Accept or Decline to join or reject a shared album.
How to unsubscribe from a shared photo album on your iPhone, iPad, Mac, or PC
Decided you no longer want to be part of a shared photo album someone else sent you? It's a simple process to unsubscribe from that album.
On iPhone or iPad
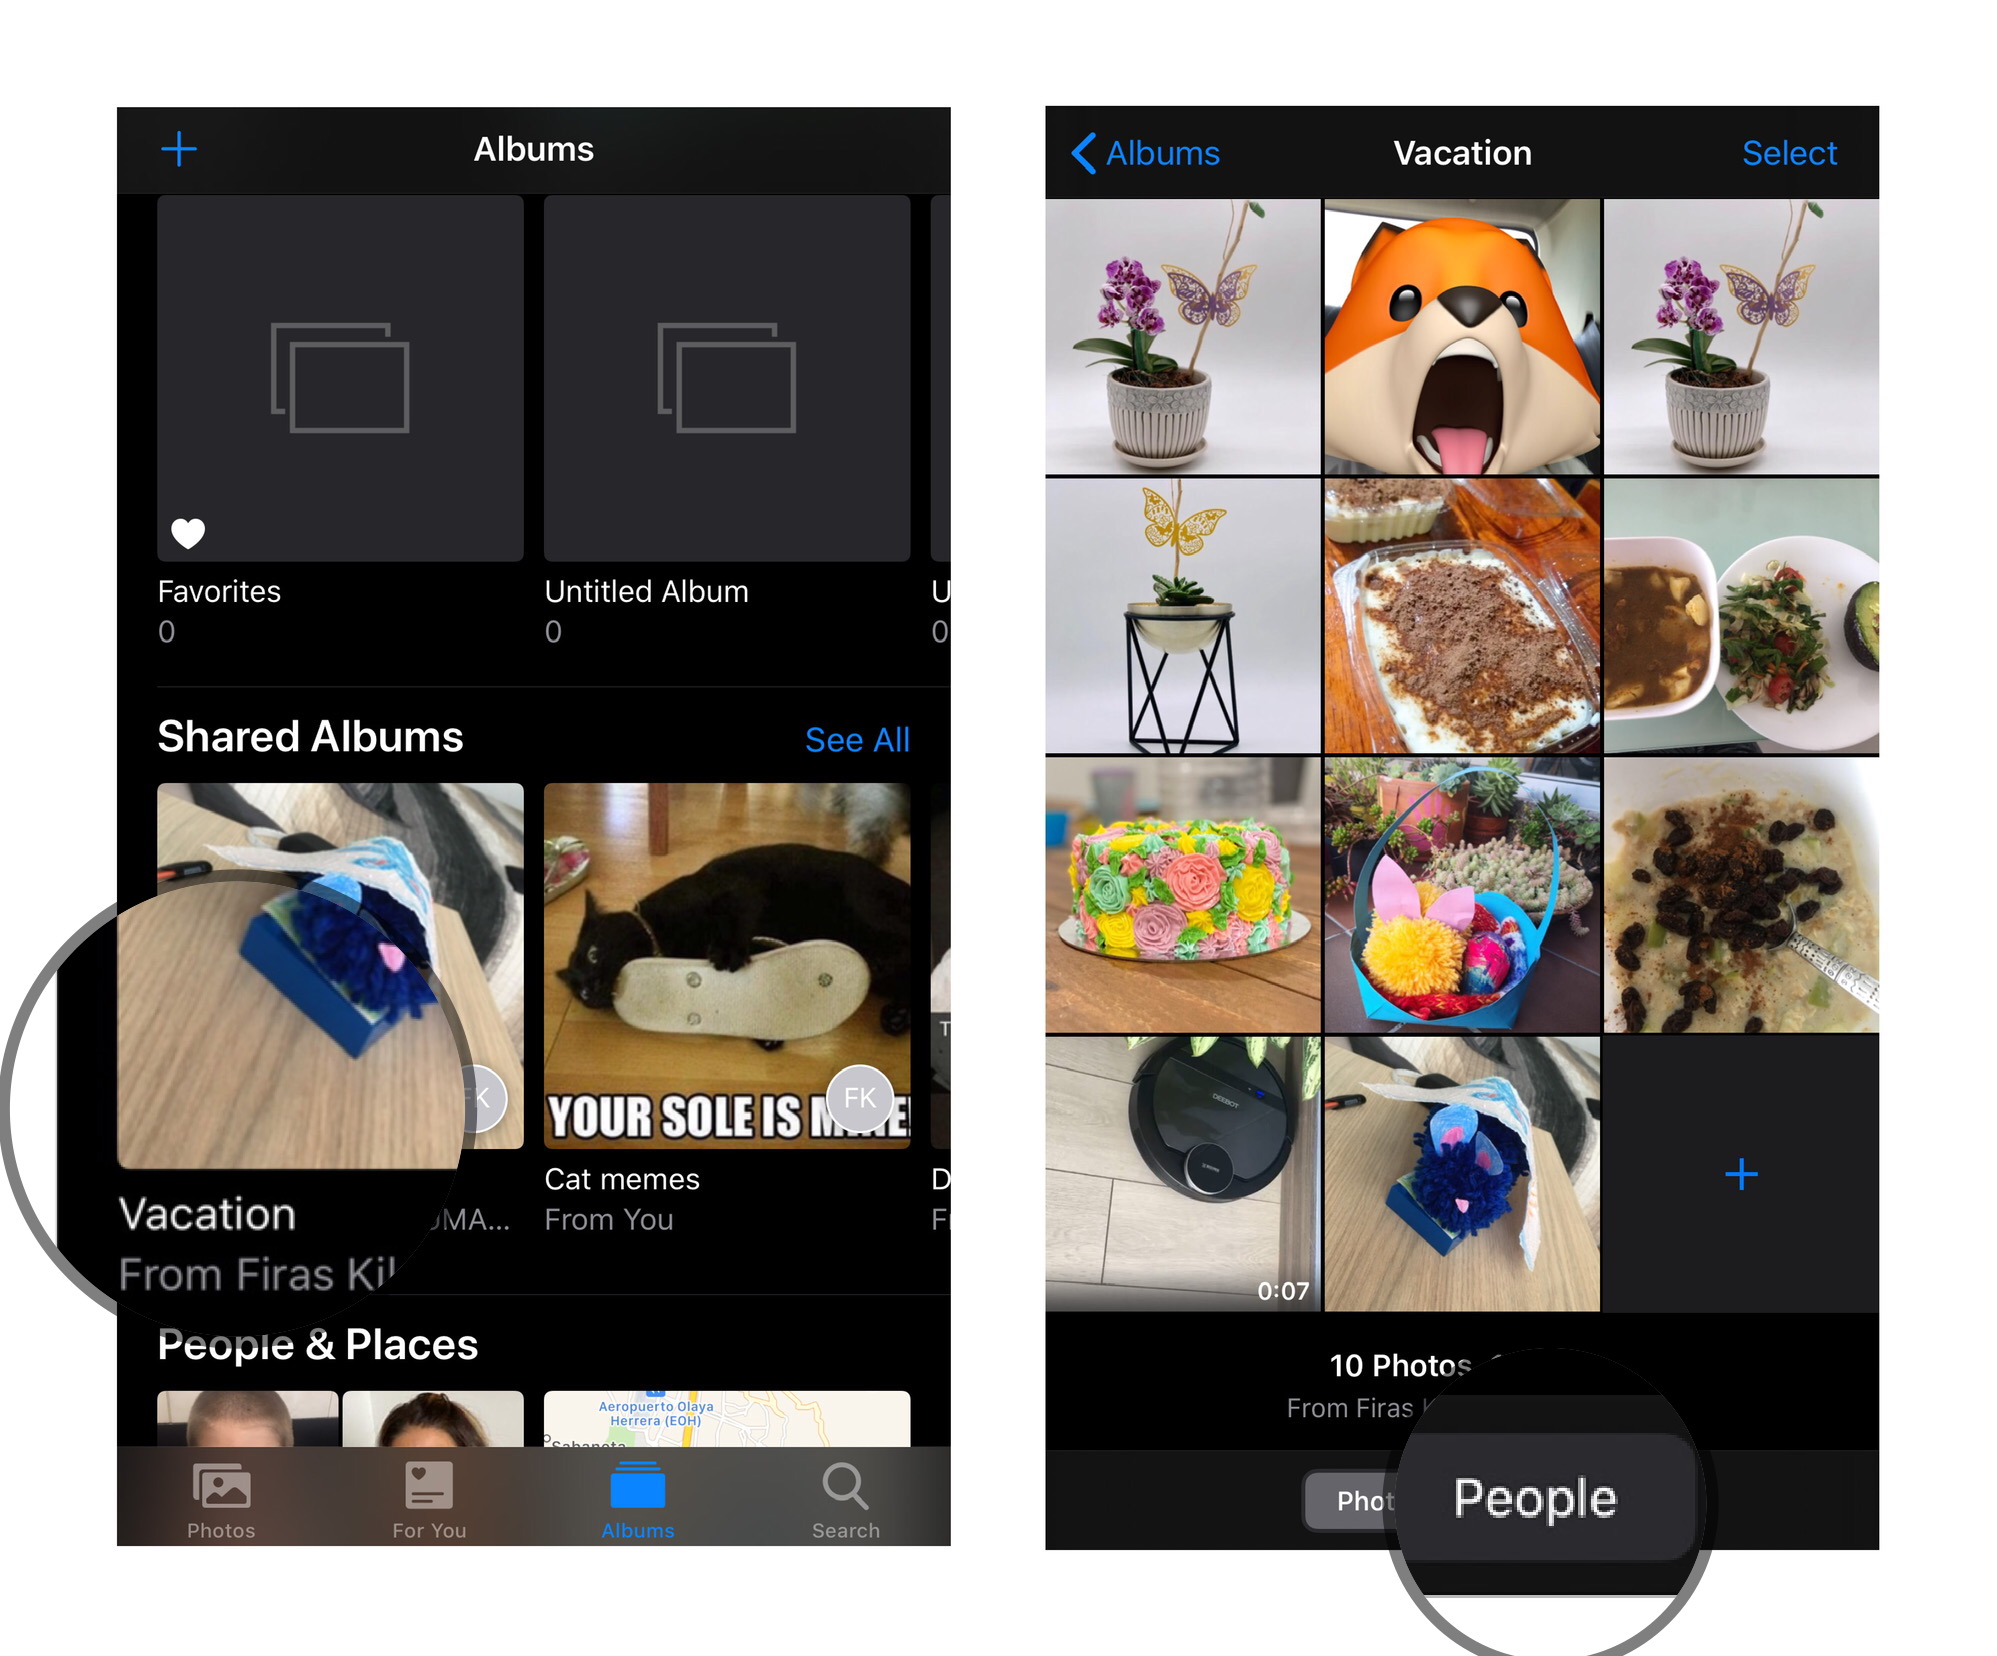
- Open the Photos app on your iPhone or iPad.
- Scroll down to Shared Albums and choose the album in question.
-
Select the People tab.
- Tap on the Unsubscribe button.
-
Press the Unsubscribe button once more to confirm.

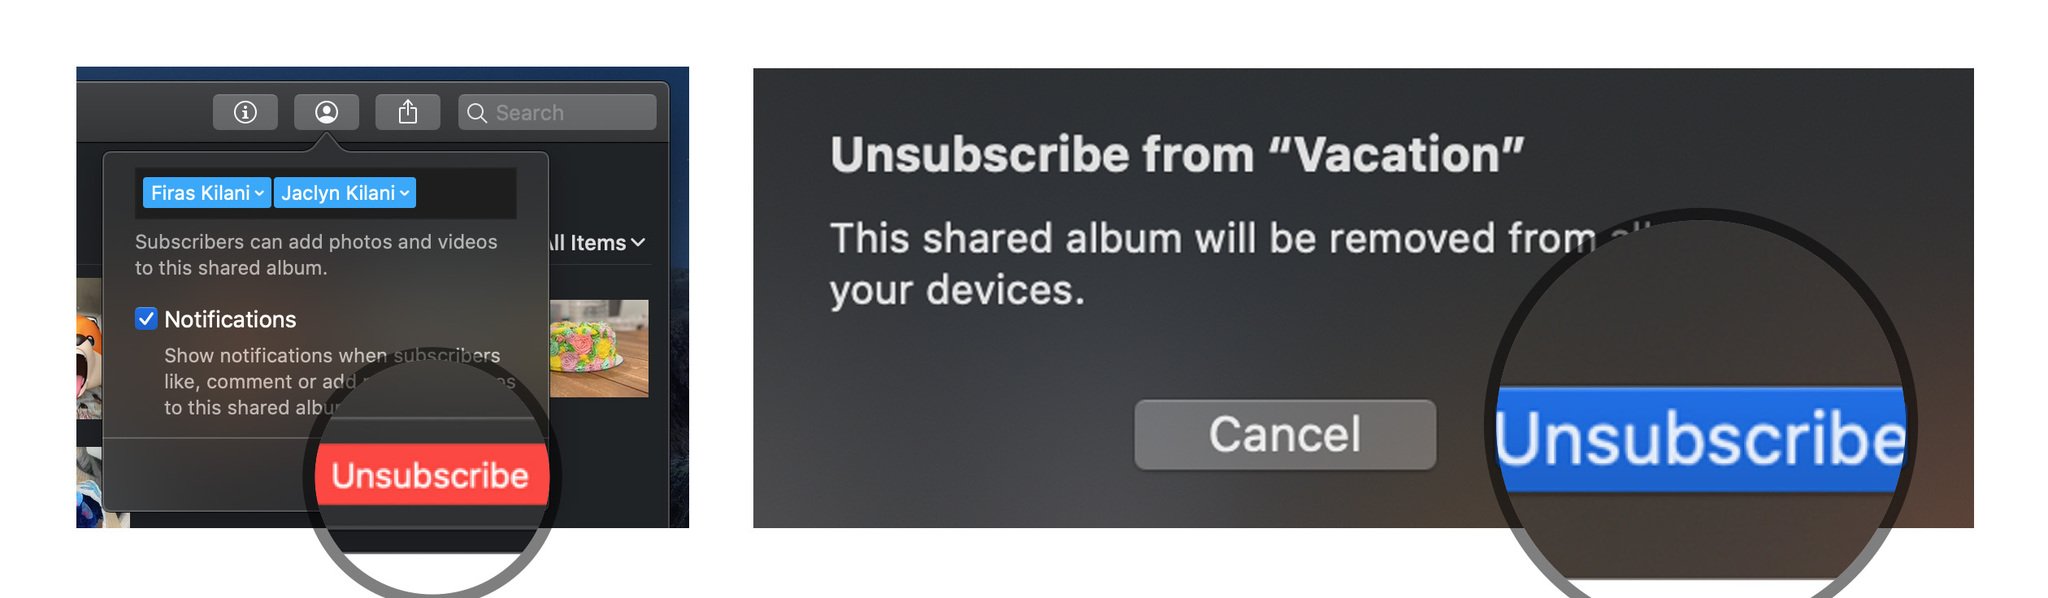
On your Mac
- Launch the Photos app.
- From the Shared Albums tab, choose the album in question.
-
Select the People icon in the toolbar.

- Tap on the Unsubscribe button.
-
Press the Unsubscribe button once more to confirm.
On your PC
- Open your iCloud Photos folder.
- Choose the folder you'd like to delete.
- Click Info.
-
In the box that appears, click Unsubscribe in the bottom left corner.

How to delete a shared photo album on your iPhone, iPad, Mac, or PC
If you decide you no longer want to share an album with a group, you can delete it; this removes it from iCloud on all your connected devices and all those you shared it with. (If you want to remove a shared album from your device that someone else created, you'll have to unsubscribe instead of deleting it.)
Note: Anyone you've added to a shared photo album can download their own copy of an image or video once it's been added to the album. If you delete the photo or video after it's been available in the album, there's a chance it may have already been downloaded to another device.
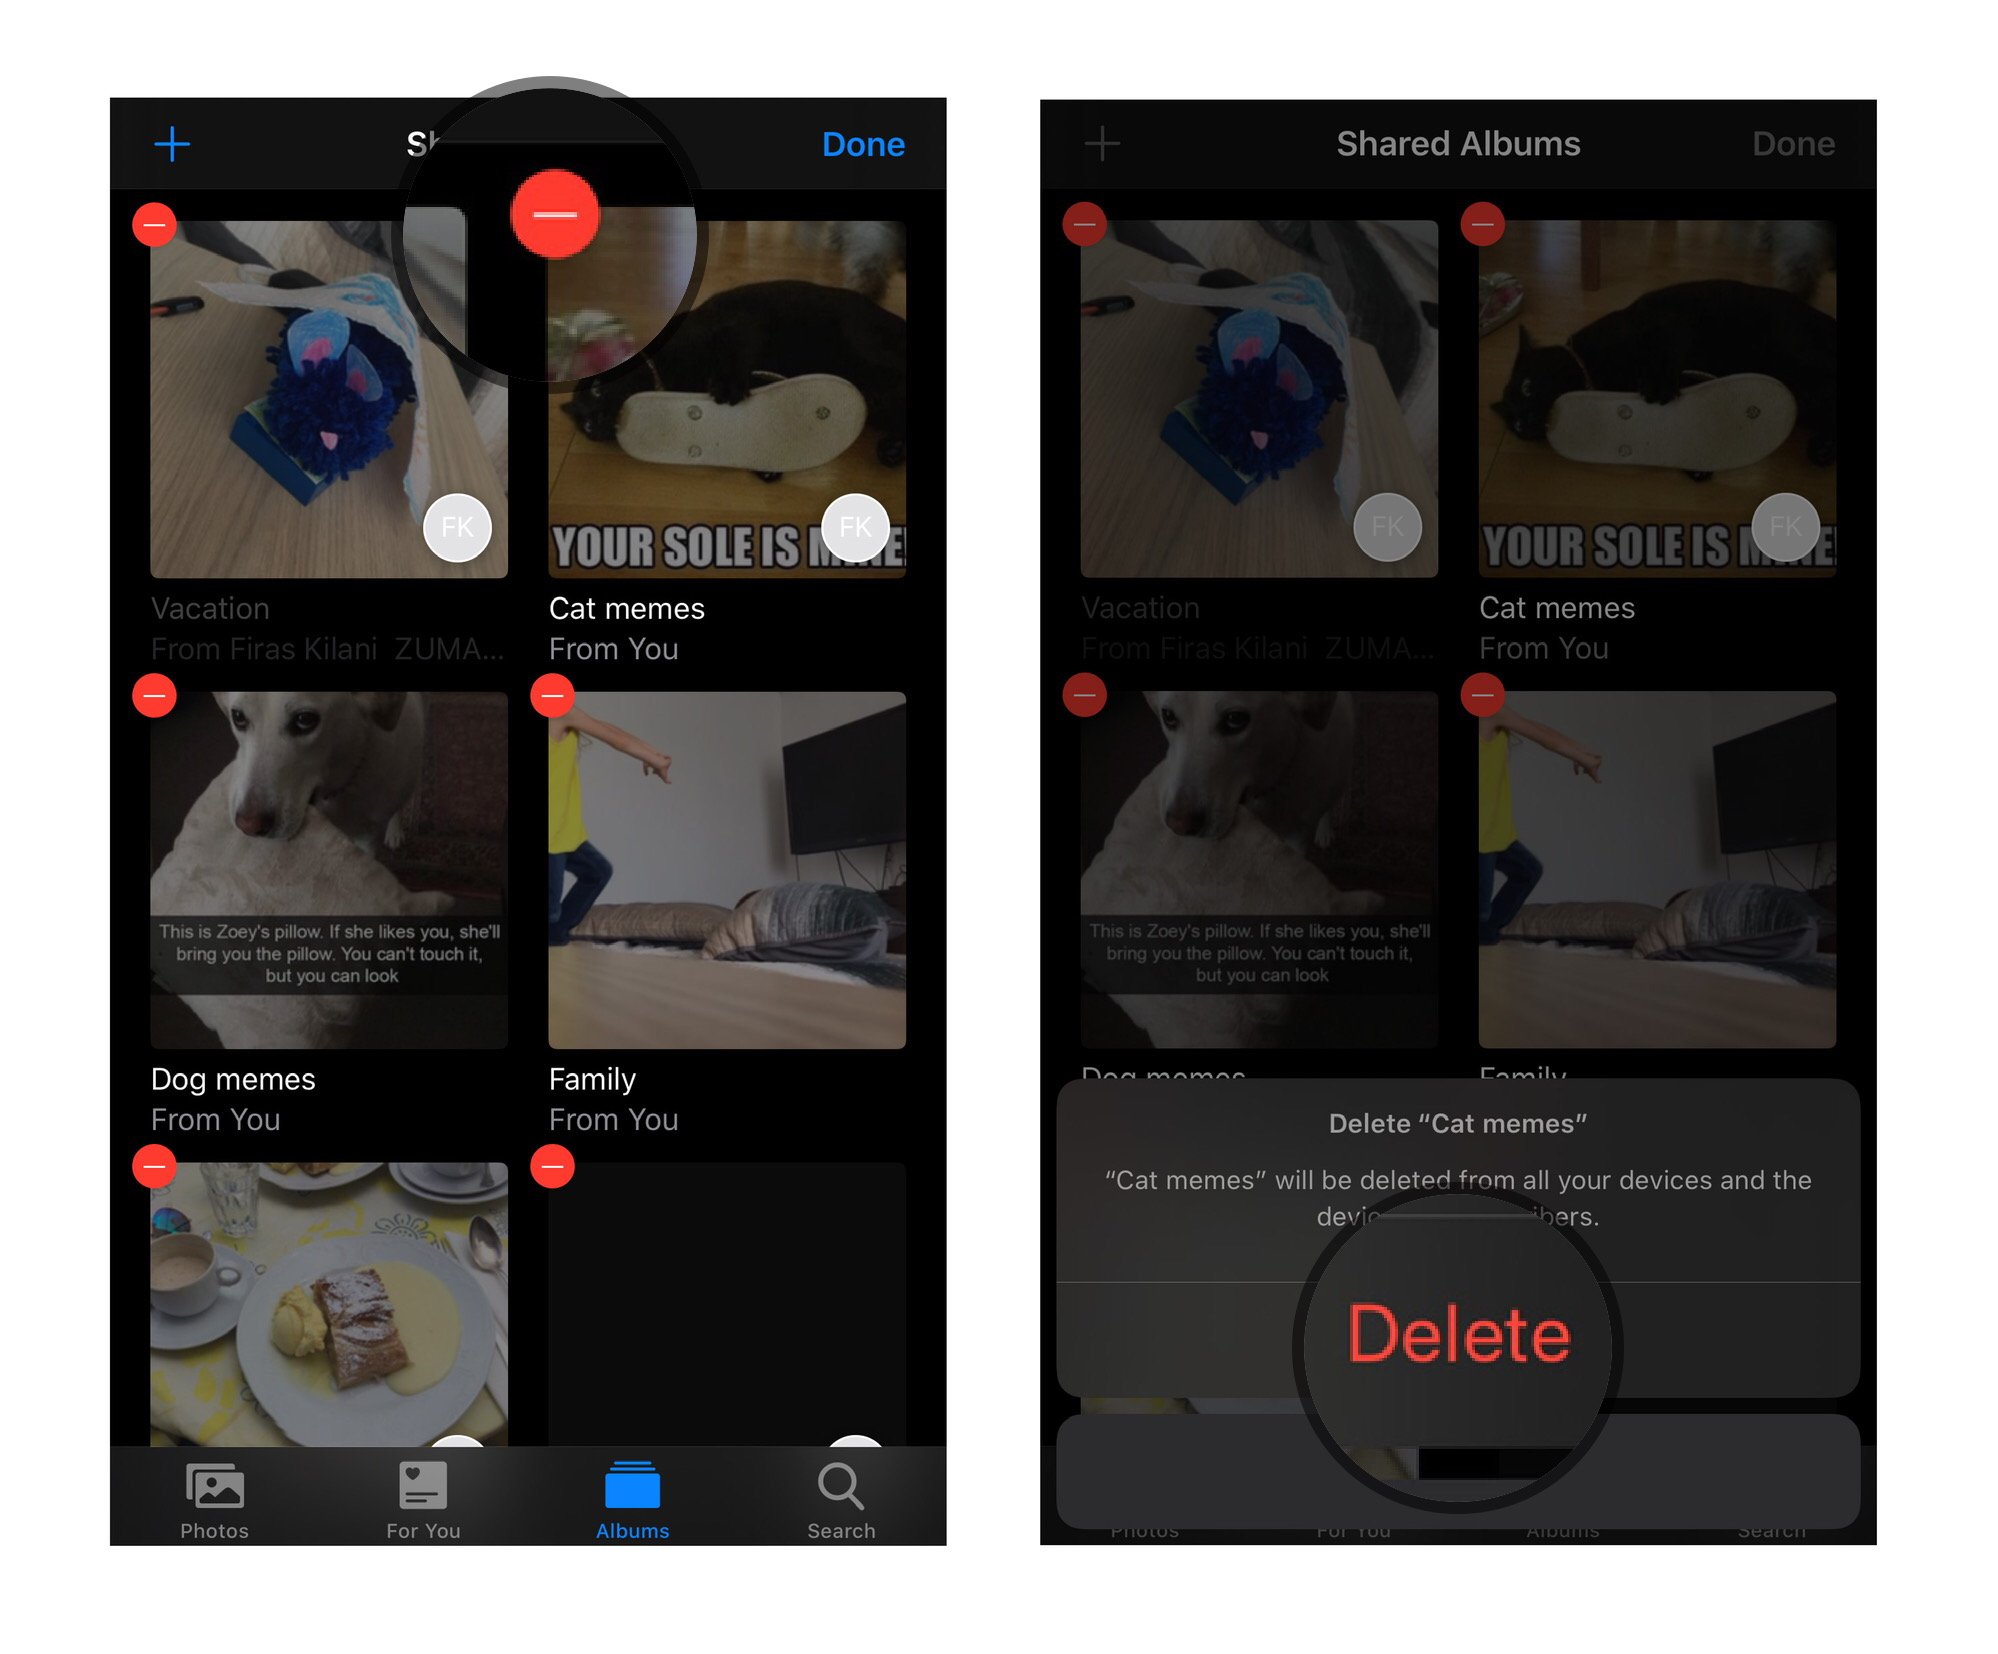
On iPhone and iPad
- Launch the Photos app on your iPhone or iPad.
- Scroll down to Shared Albums and tap See All.
-
Tap Edit in the upper left corner.

- Tap the red Delete icon next to the shared album you want to delete.
-
Tap Delete to confirm deletion.
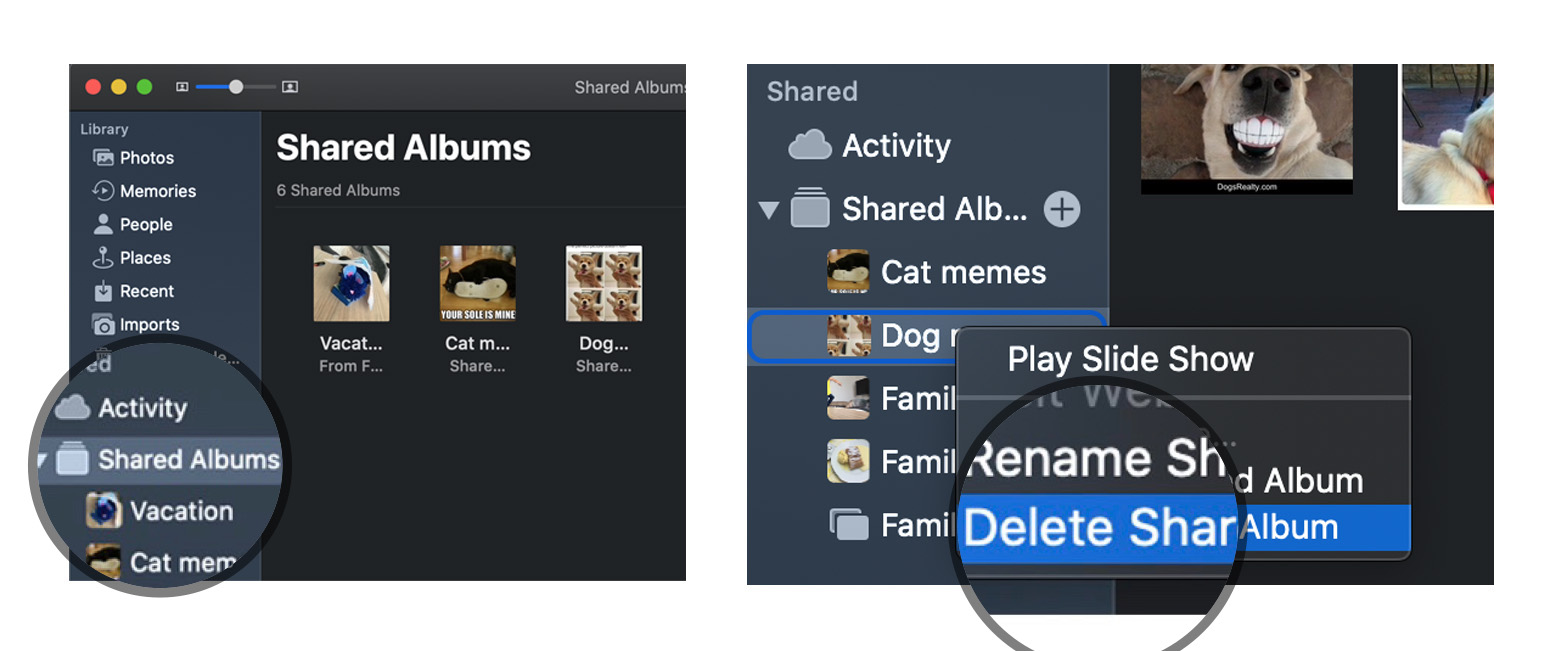
On your Mac
- Launch the Photos app on your Mac.
- Right or Control-click on the Shared Photo Album you want to delete.
-
Select Delete Shared Album from the list of options and tap Delete once more to confirm.
On your PC
- Open your iCloud Photos folder.
- Find the shared folder in question.
-
Delete it.

Sharing simplified
Now that you know how to create and share albums in iCloud Photo Sharing, you can easily involve family and friends in your photo adventures. Once you have this down, it's an easy and intuitive way to safely share photos with anyone you like.
Updated April 2022: Updated for latest operating system.


0 comments:
Post a Comment