How do I use my keyboard for accessibility with my Mac? That's just our type of question (sorry)!
If you have trouble using a keyboard with the best Mac desktop or best MacBook, there are some keyboard accessibility features that can help make things significantly more manageable for you. With these specific options enabled, you won't be accidentally typing when you don't intend to, and you also won't need to hold down modifier keys while hoding another key down — this can be difficult to do for some. Enabling these keyboard accessibility features is pretty easy to do, and will open up a whole new world to those who require it.
Here's how to set up your keyboard so that it's just your type — accessible! #sorrynotsorry
Keyboard Accessibility on macOS: How to enable Sticky Keys
Enabling Sticky Keys allows you to type certain things that would typically require you to press multiple keys simultaneously by typing them in succession instead.
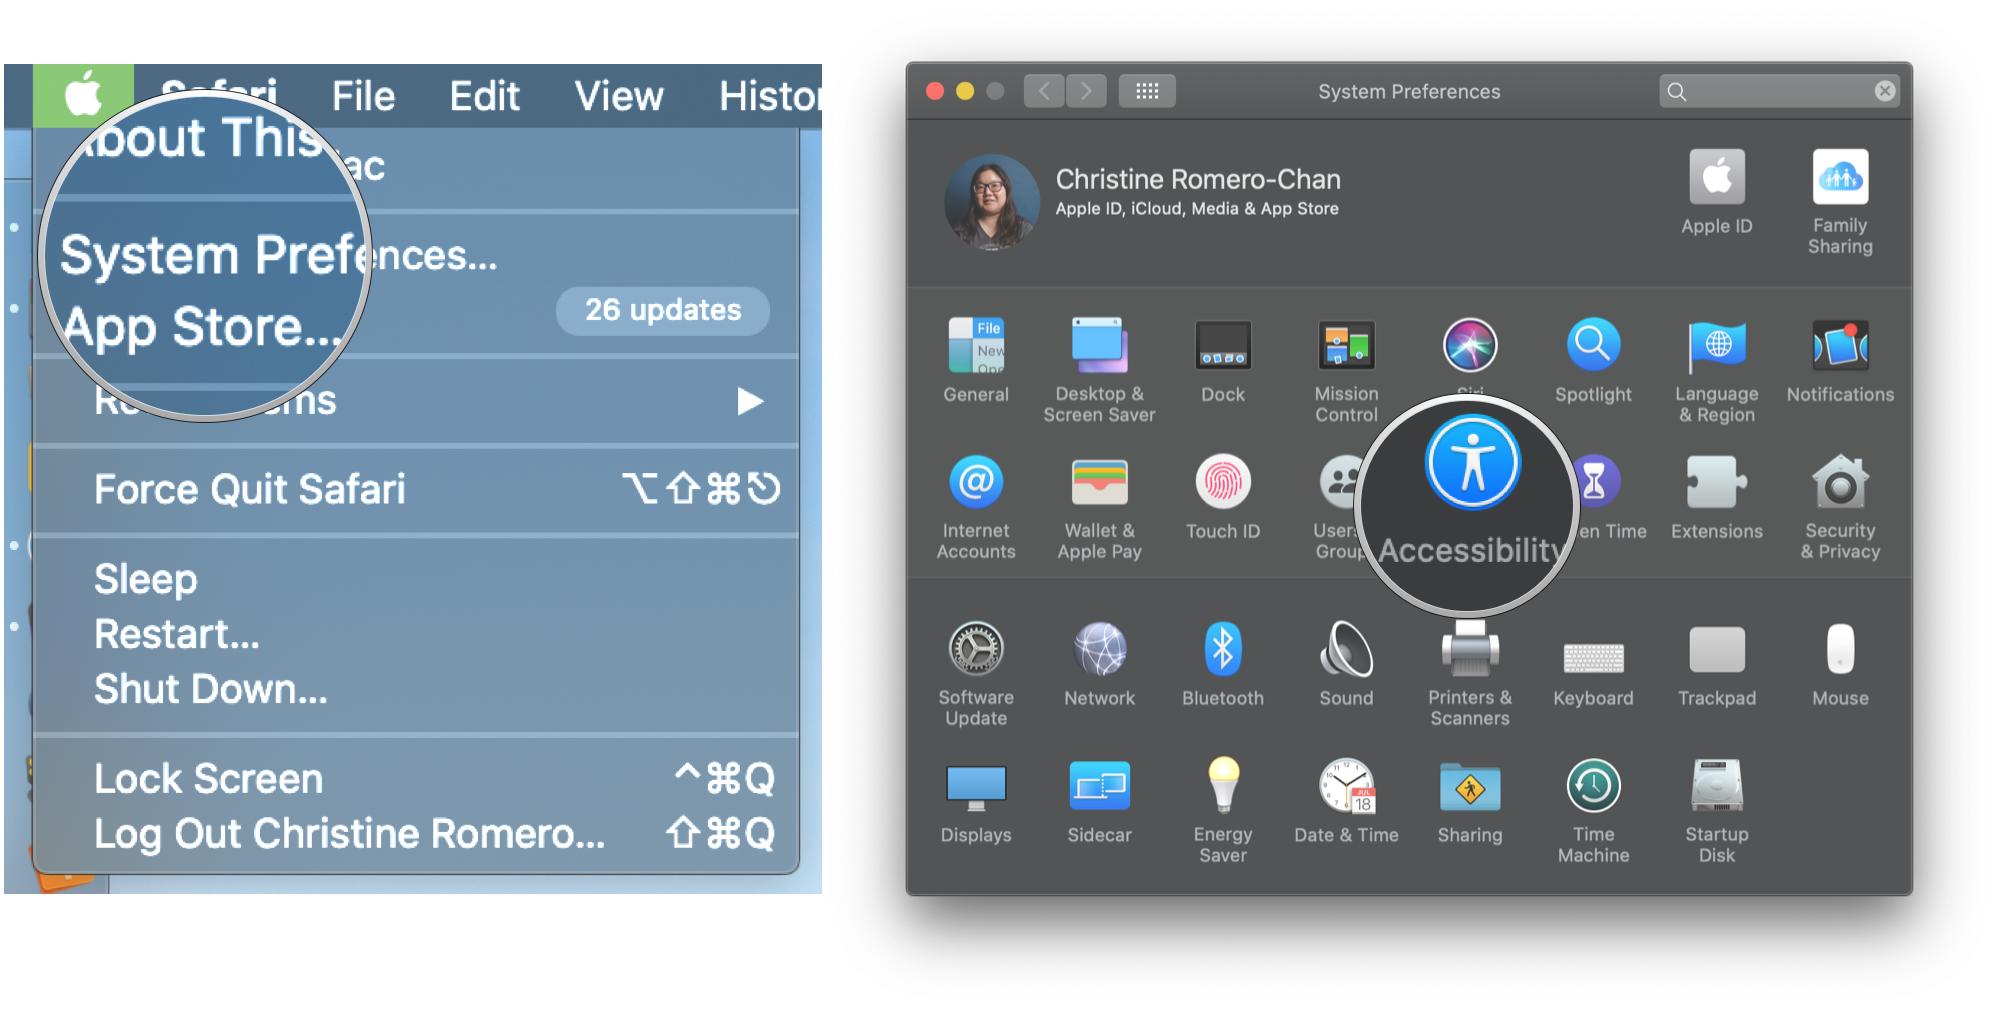
- Click the Apple menu button on the top left of your screen.
- Click System Preferences.
-
Click Accessibility.
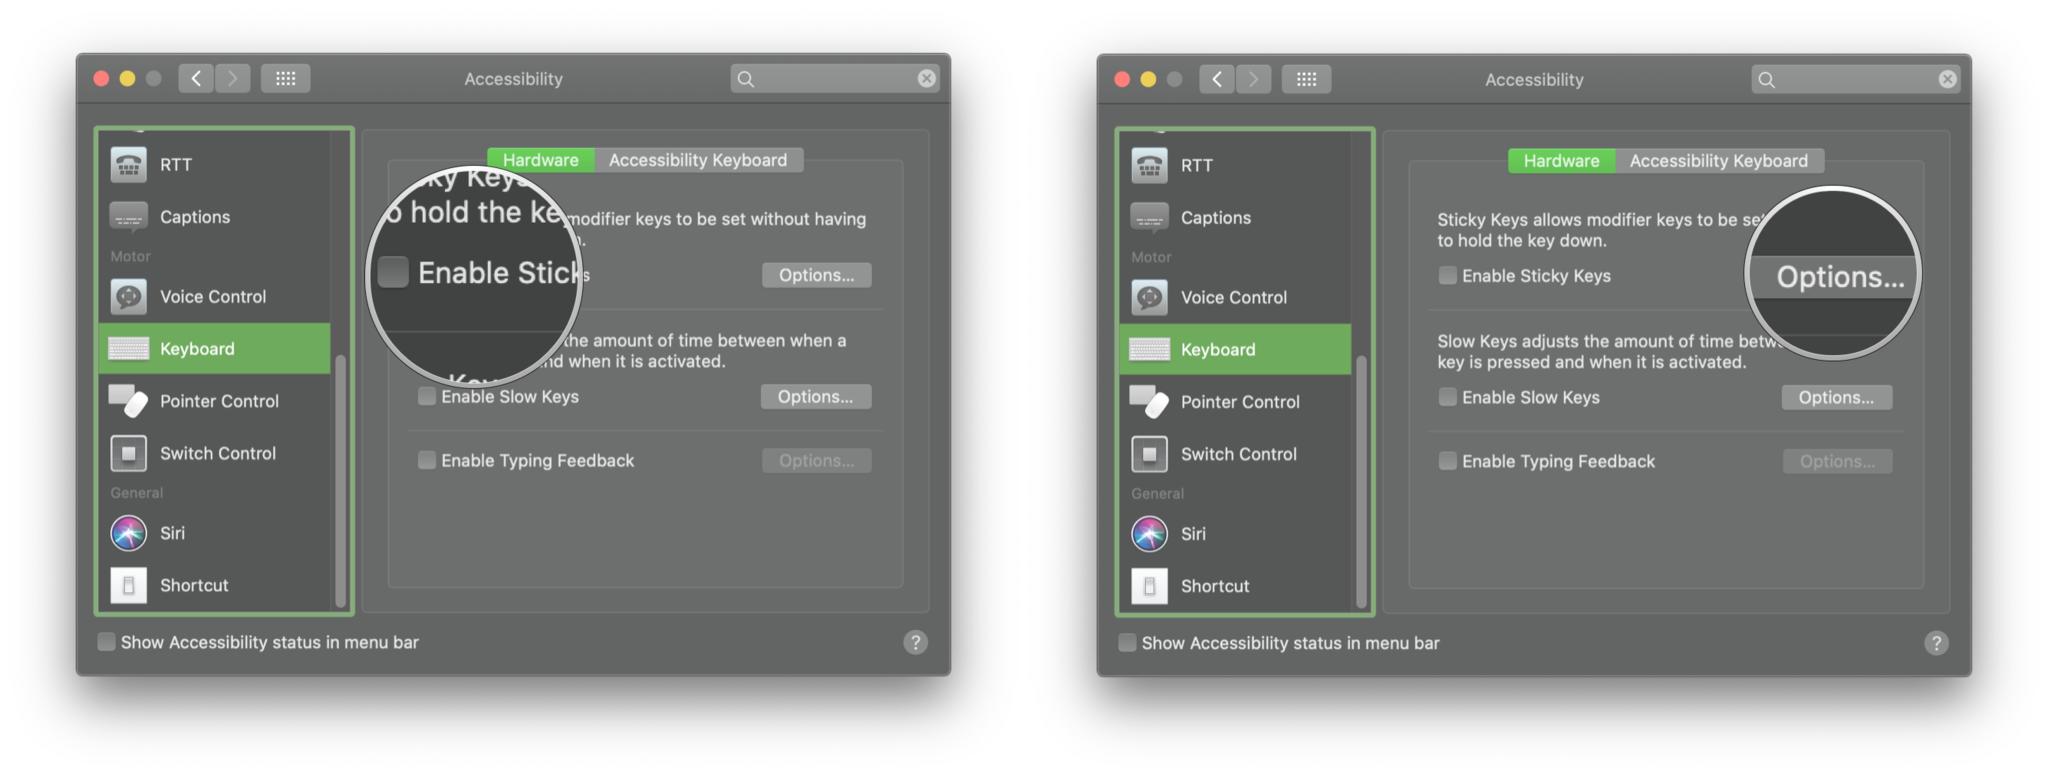
- Click Keyboard in the menu on the left.
- Click the checkbox next to Enable Sticky Keys.
-
Click Options next to Enable Sticky Keys.
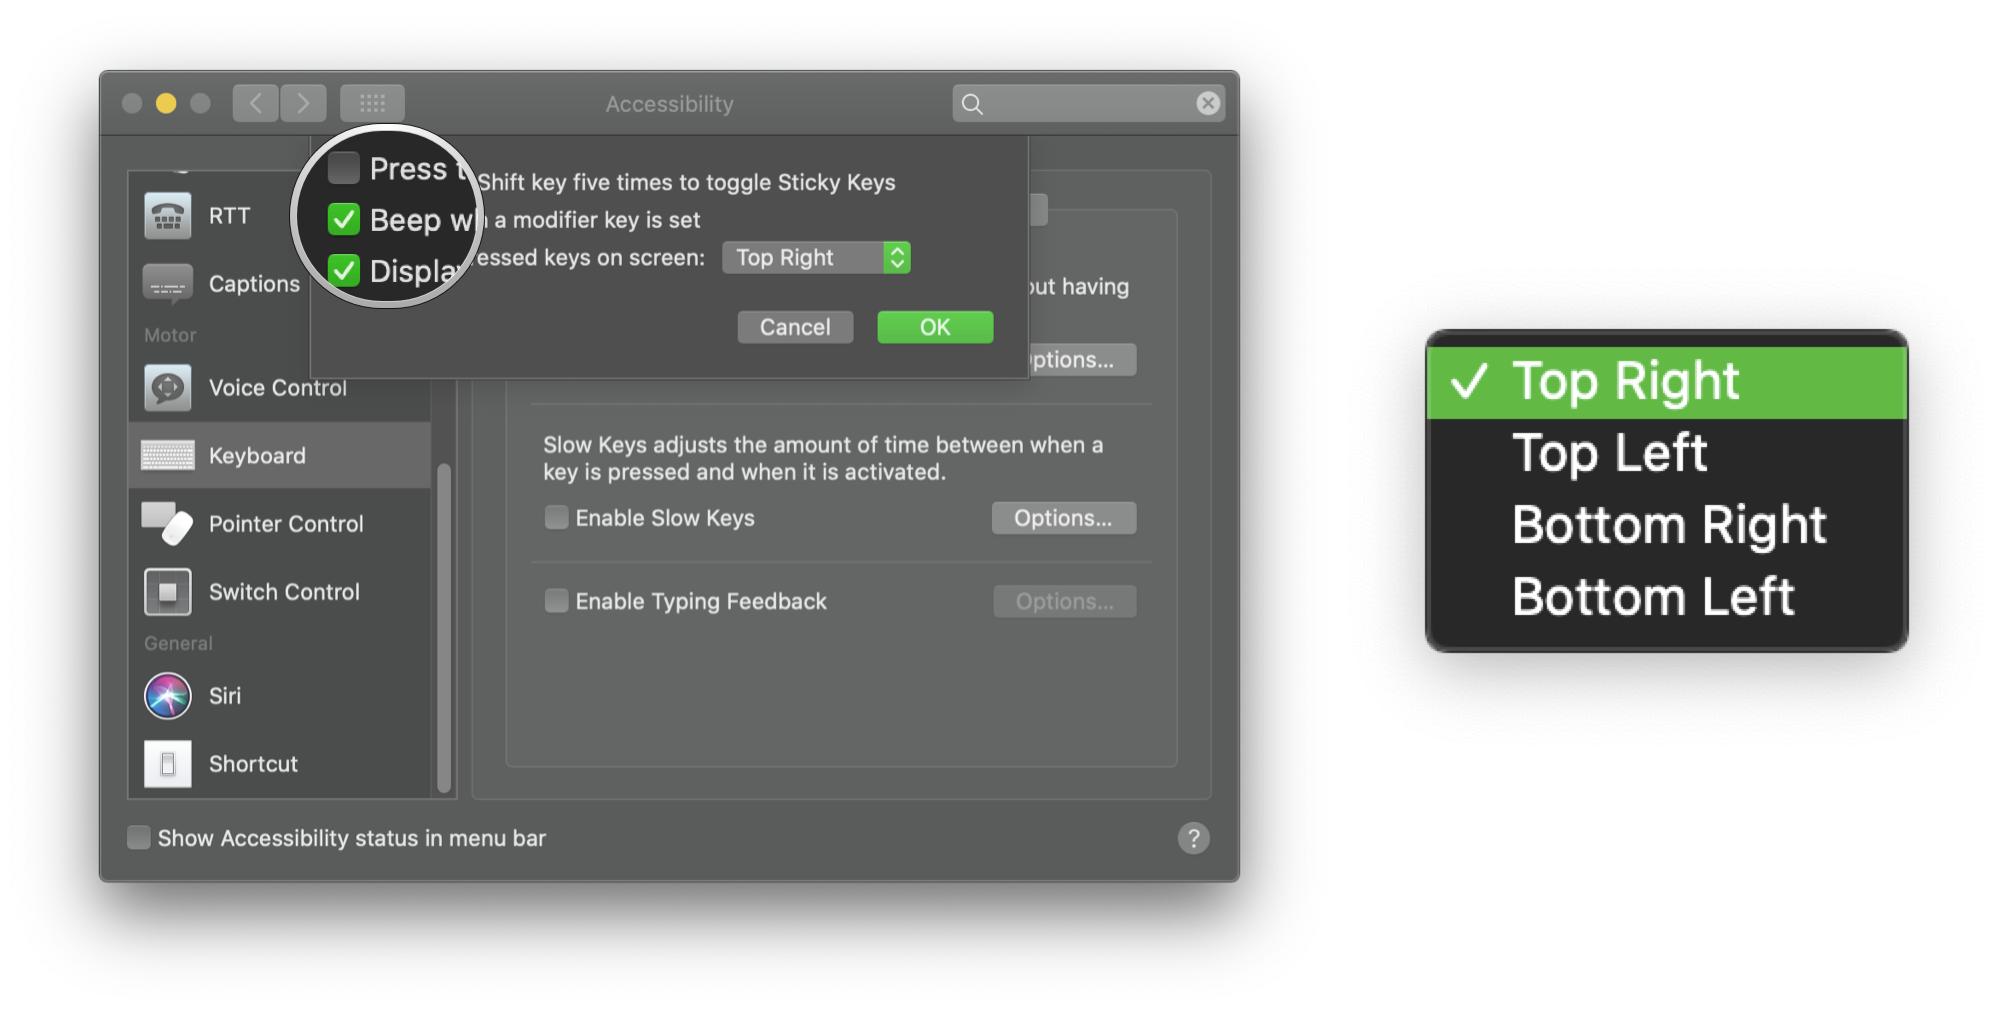
- Click the checkbox next to each setting to enable/disable it.
- Click the dropdown menu next to Display pressed keys on screen.
-
Click a location where the pressed keys will be displayed.
Keyboard Accessibility on macOS: How to enable Slow Keys
If you have tremors or other impairments that might cause you to press the keys on your keyboard multiple times when you only mean to press them once, you can enable Slow Keys so that each key must be pressed for a certain length of time before it registers.
- Click the Apple menu button on the top left of your screen.
- Click System Preferences.
-
Click Accessibility.
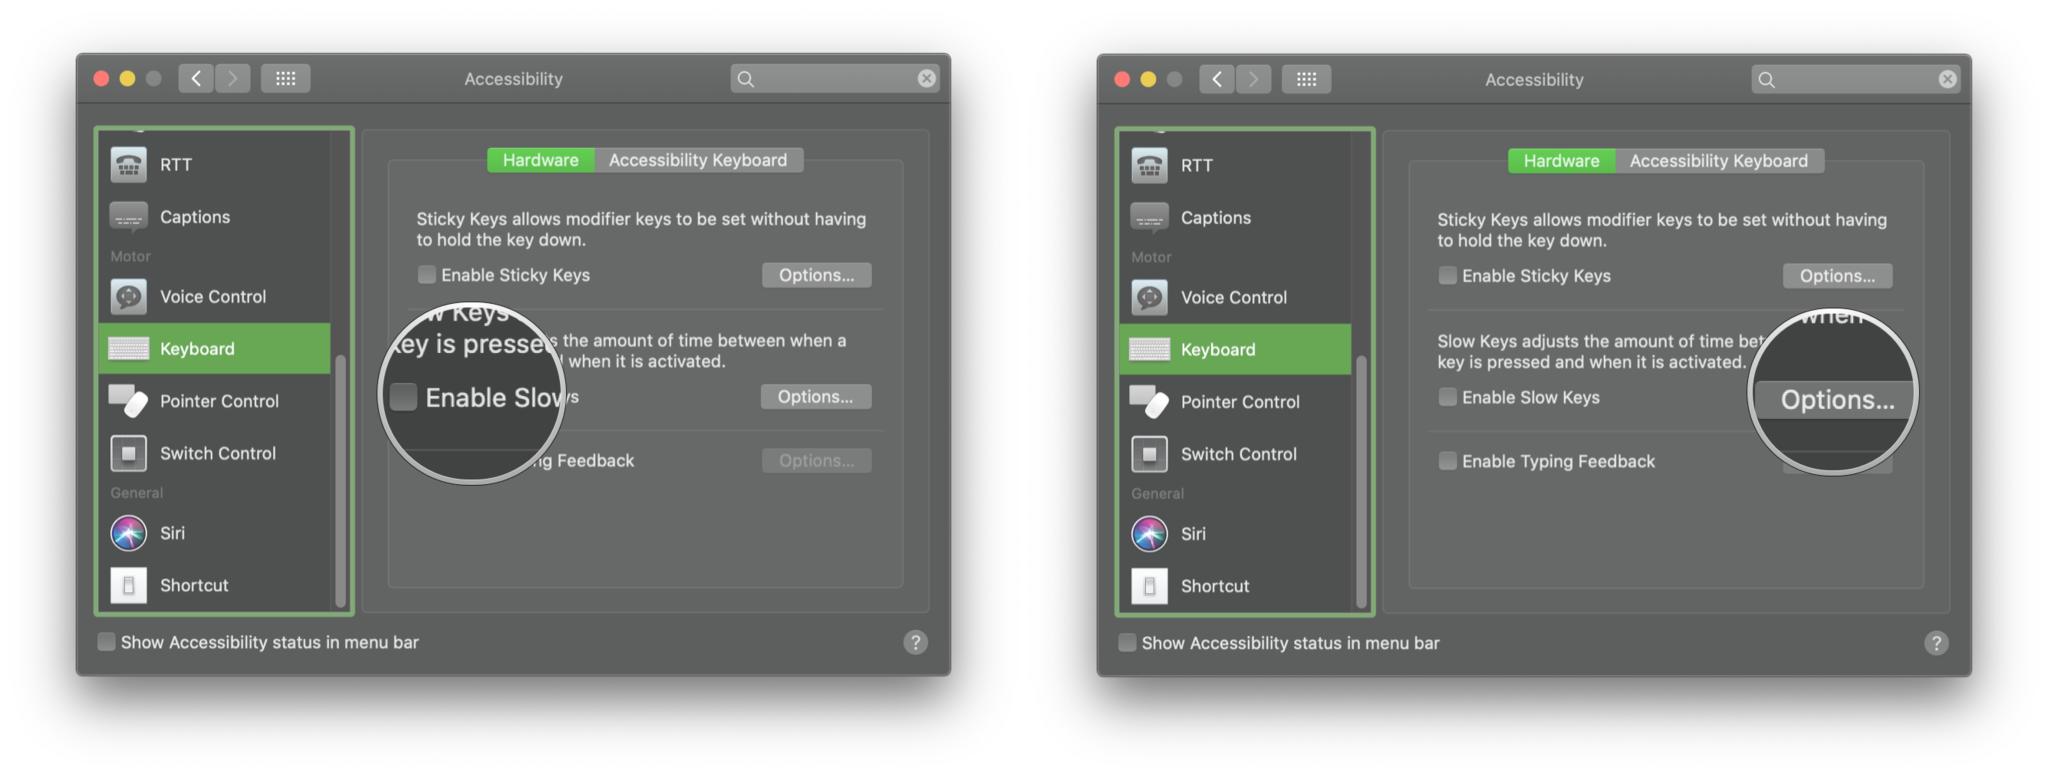
- Click Keyboard in the menu on the left.
- Click the checkbox next to Enable Slow Keys.
-
Click Options next to Enable Slow Keys.
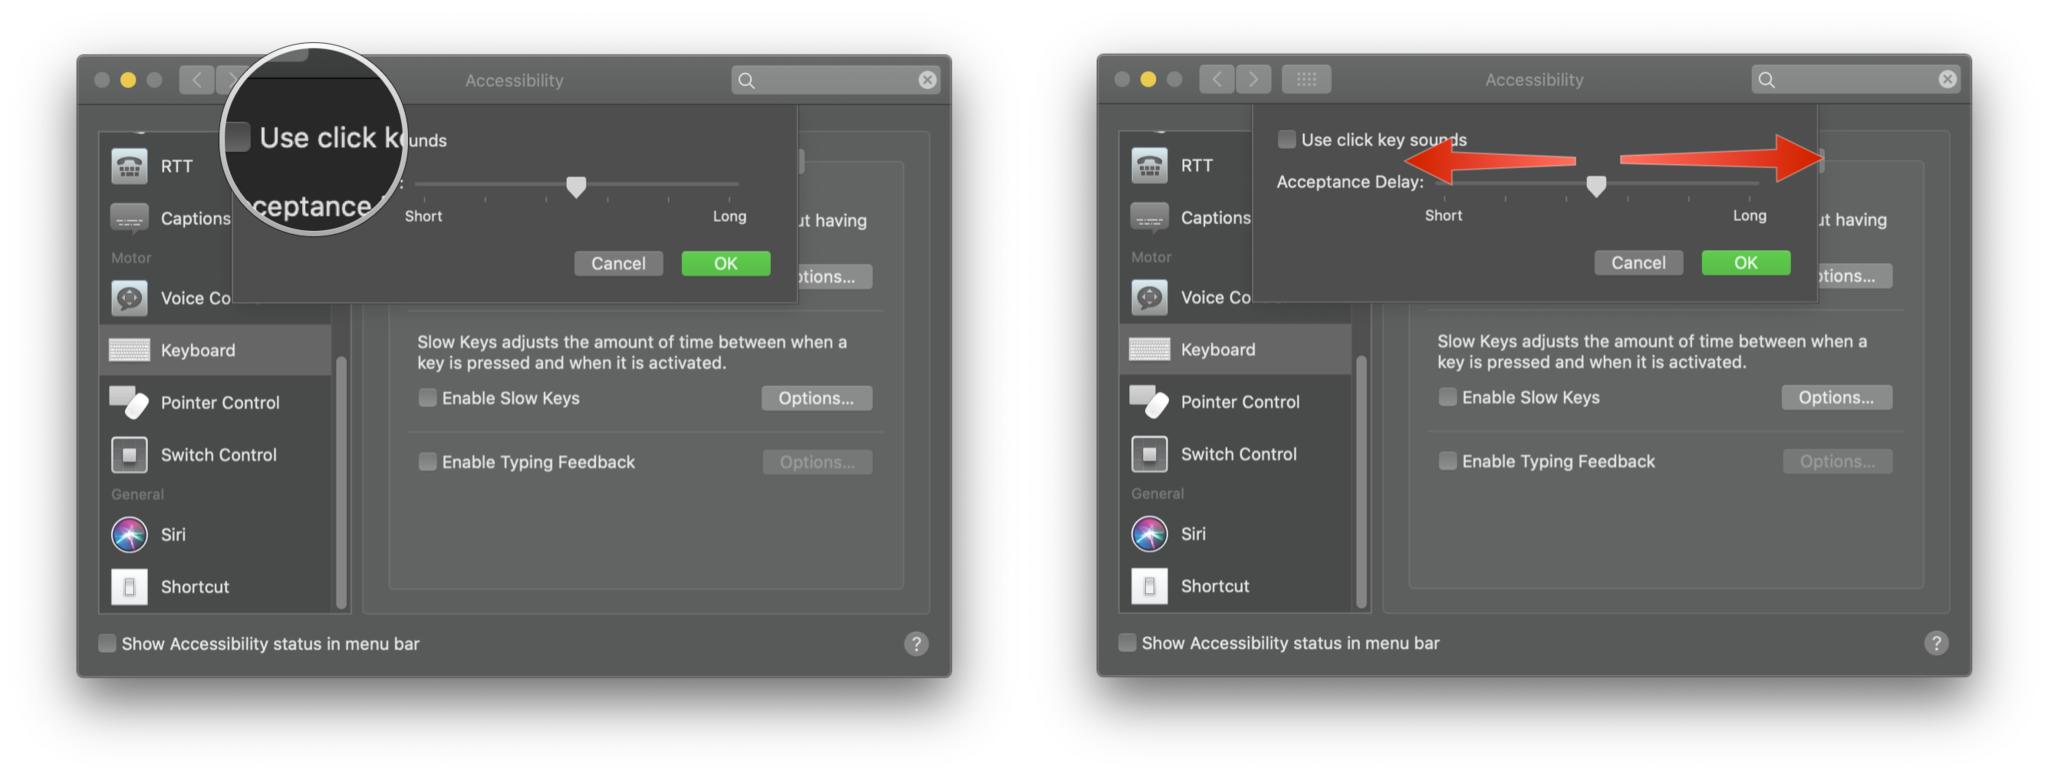
- Click the checkbox next to Use click key sounds (super useful).
-
Click and drag the slider to increase or decrease the key press delay. Left is shorter and right is a longer delay.
Keyboard Accessibility on macOS: How to enable the Accessibility Keyboard
The Accessibility Keyboard is an on-screen keyboard that lets you type and perform other actions on macOS without using your Mac's hardware keyboard.
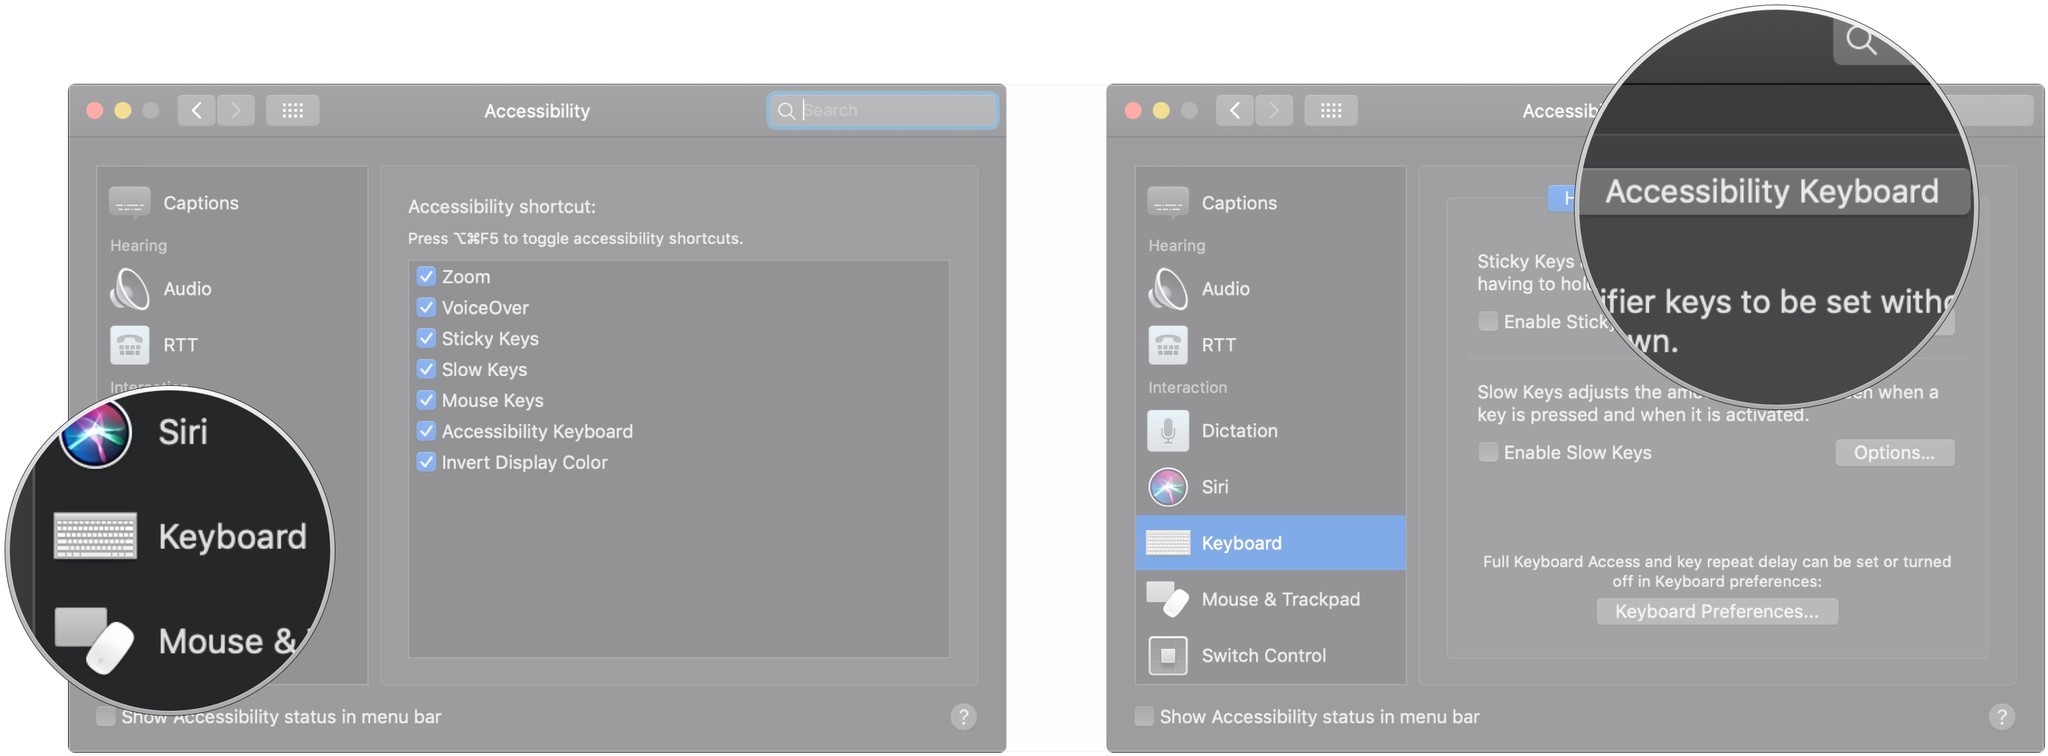
- Open System Preferences.
-
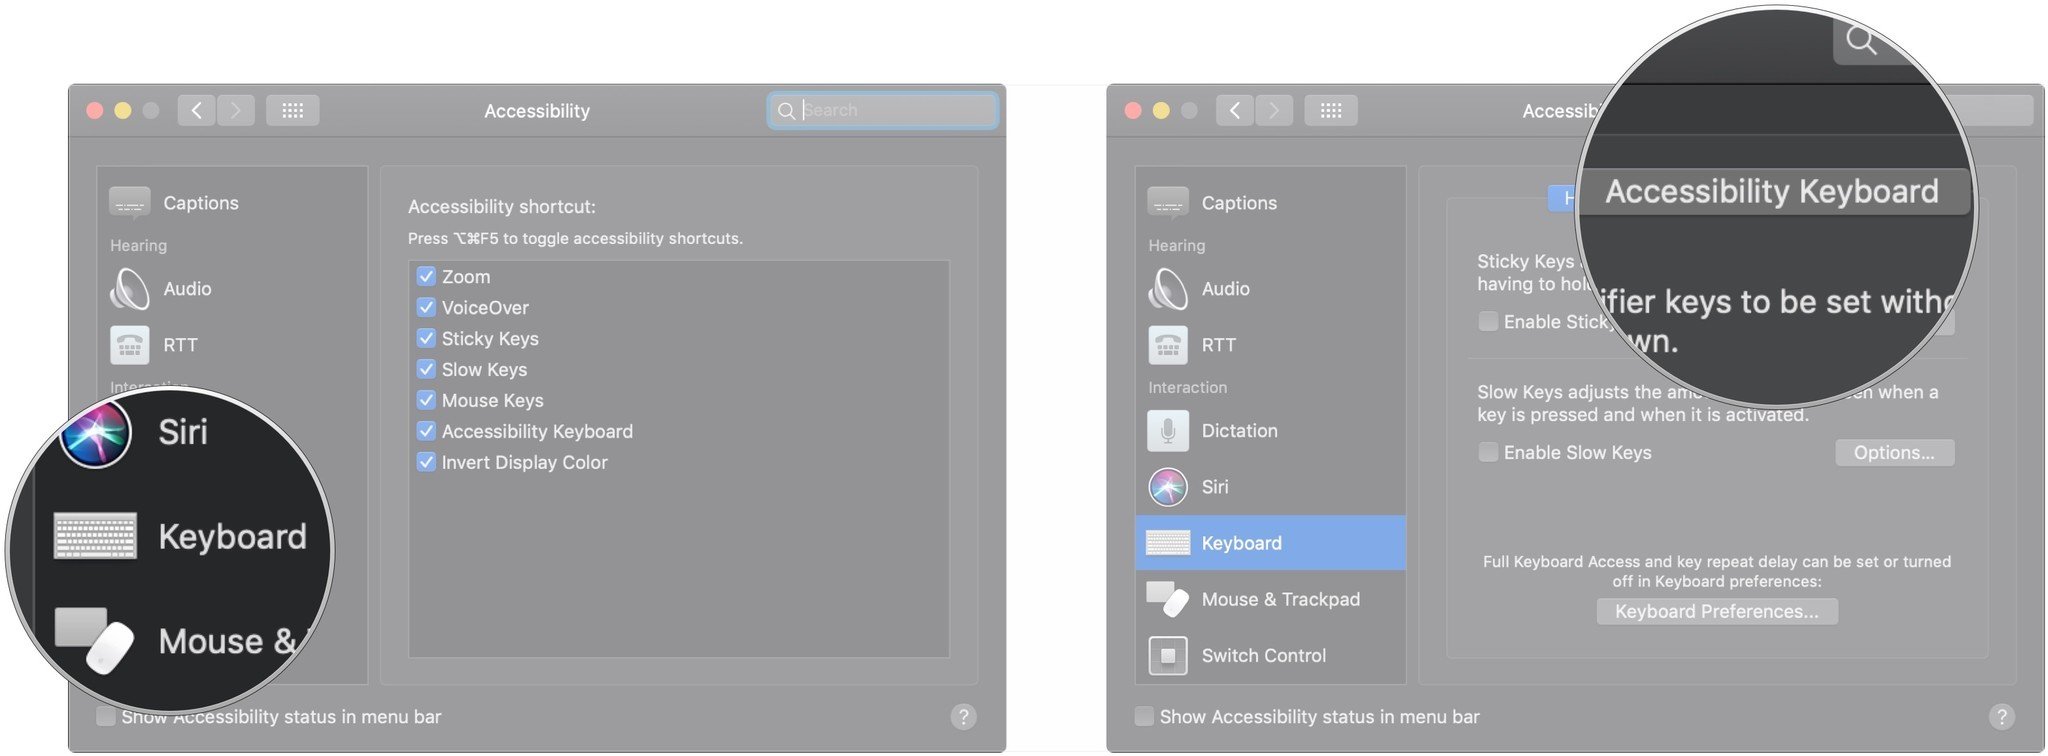
Click Accessibility.
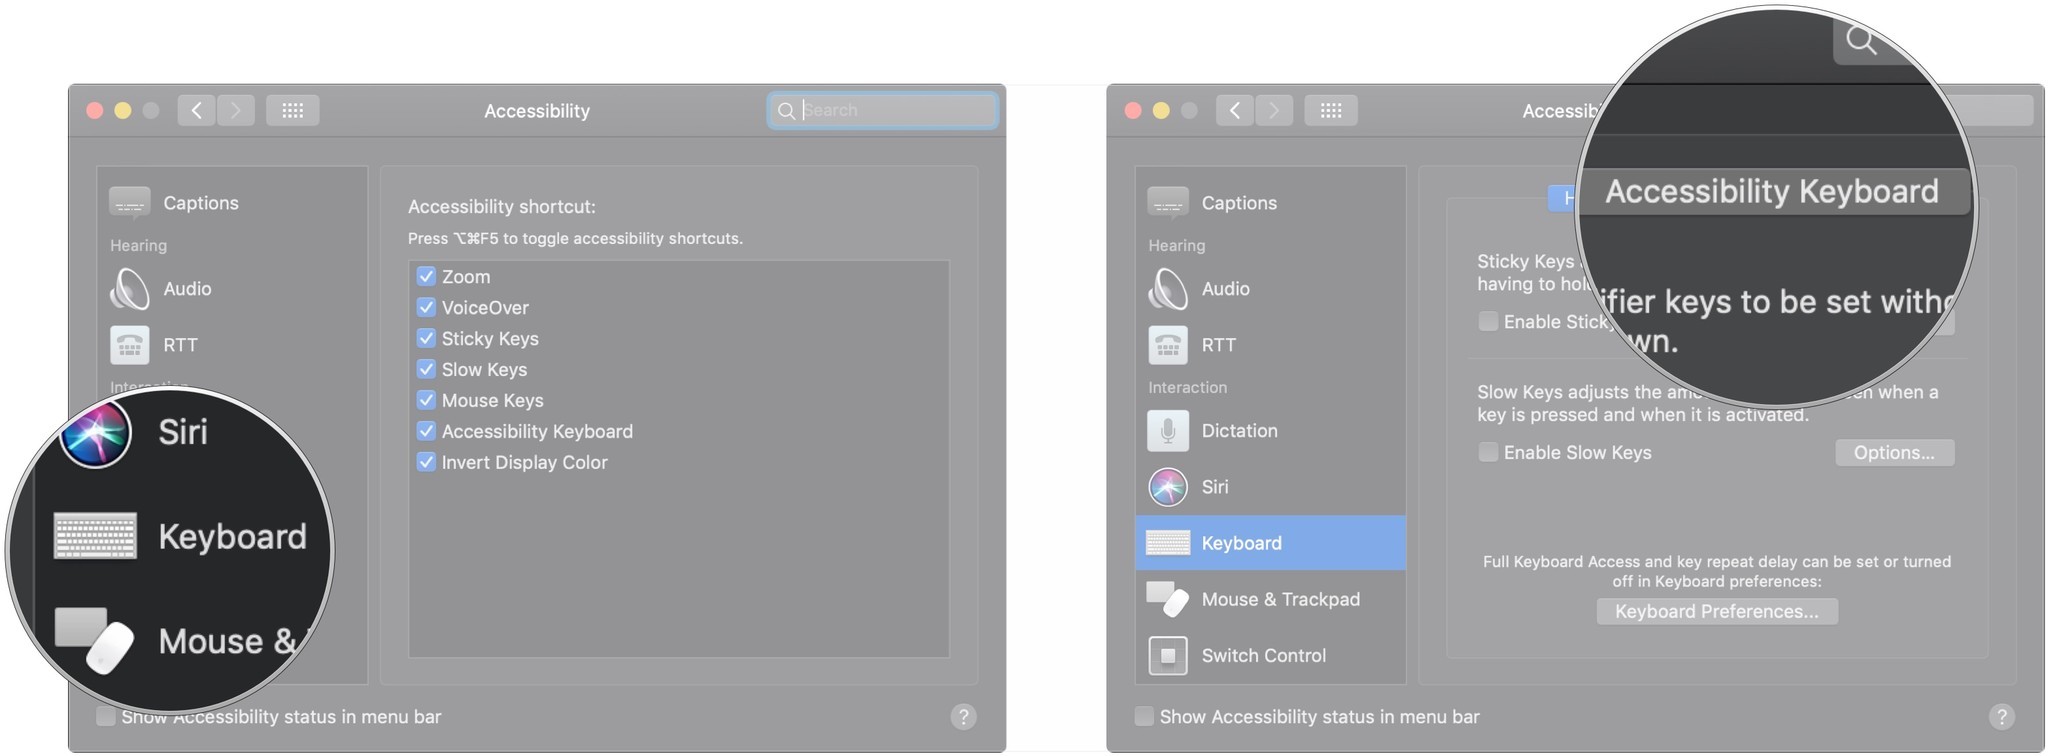
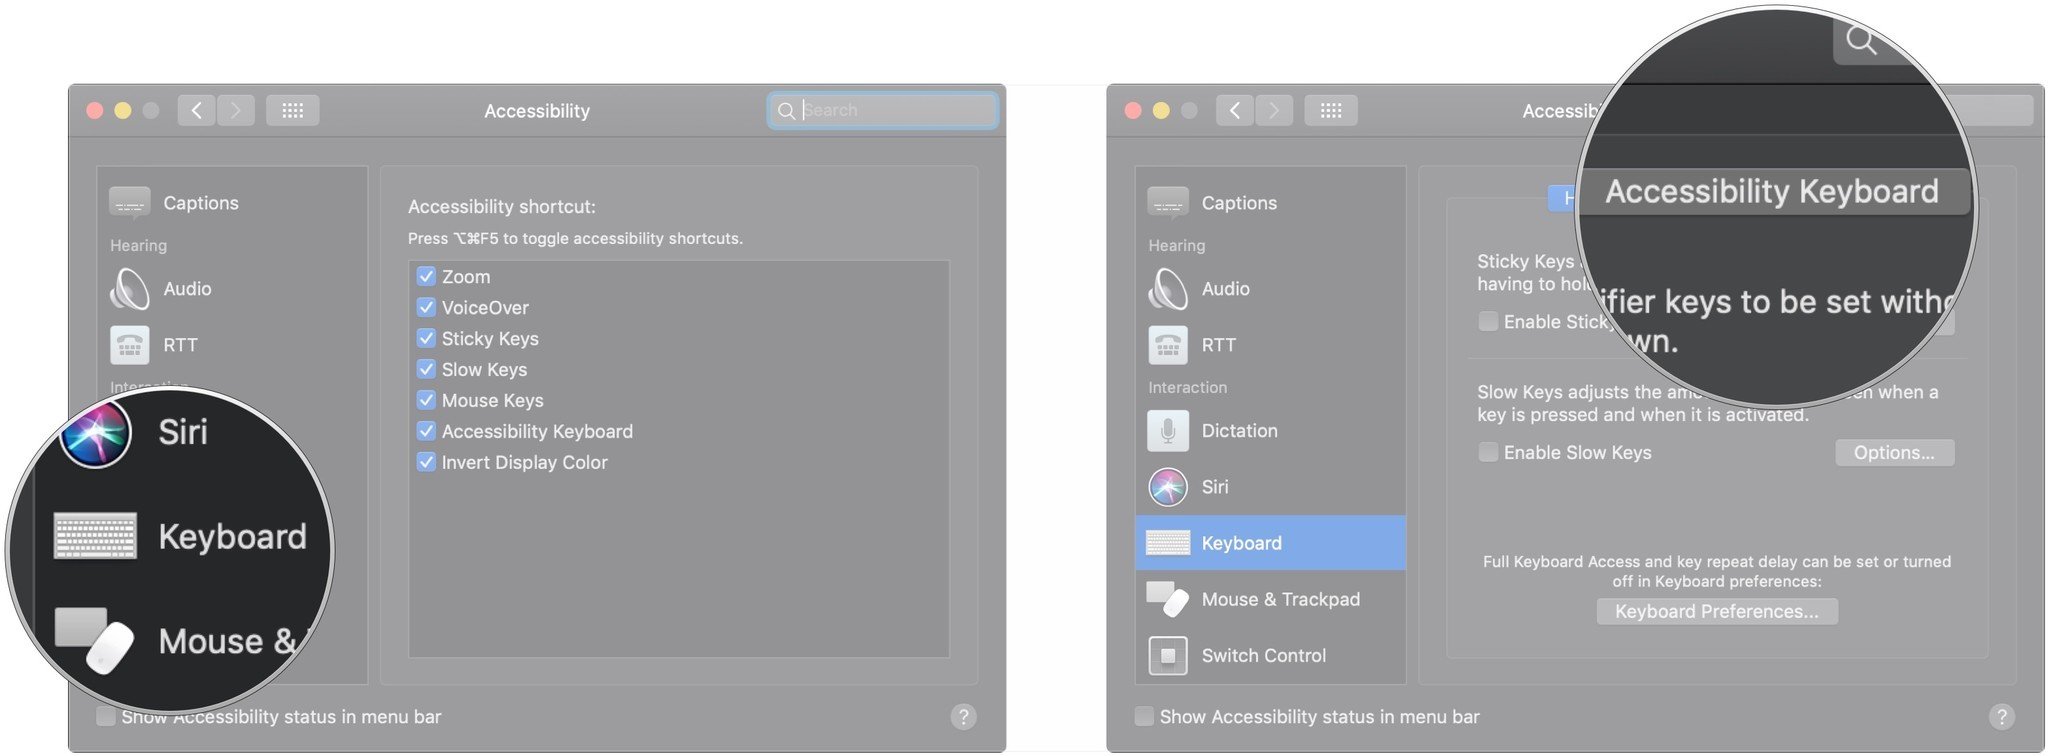
- Click Keyboard.
-
Click Accessibility Keyboard.
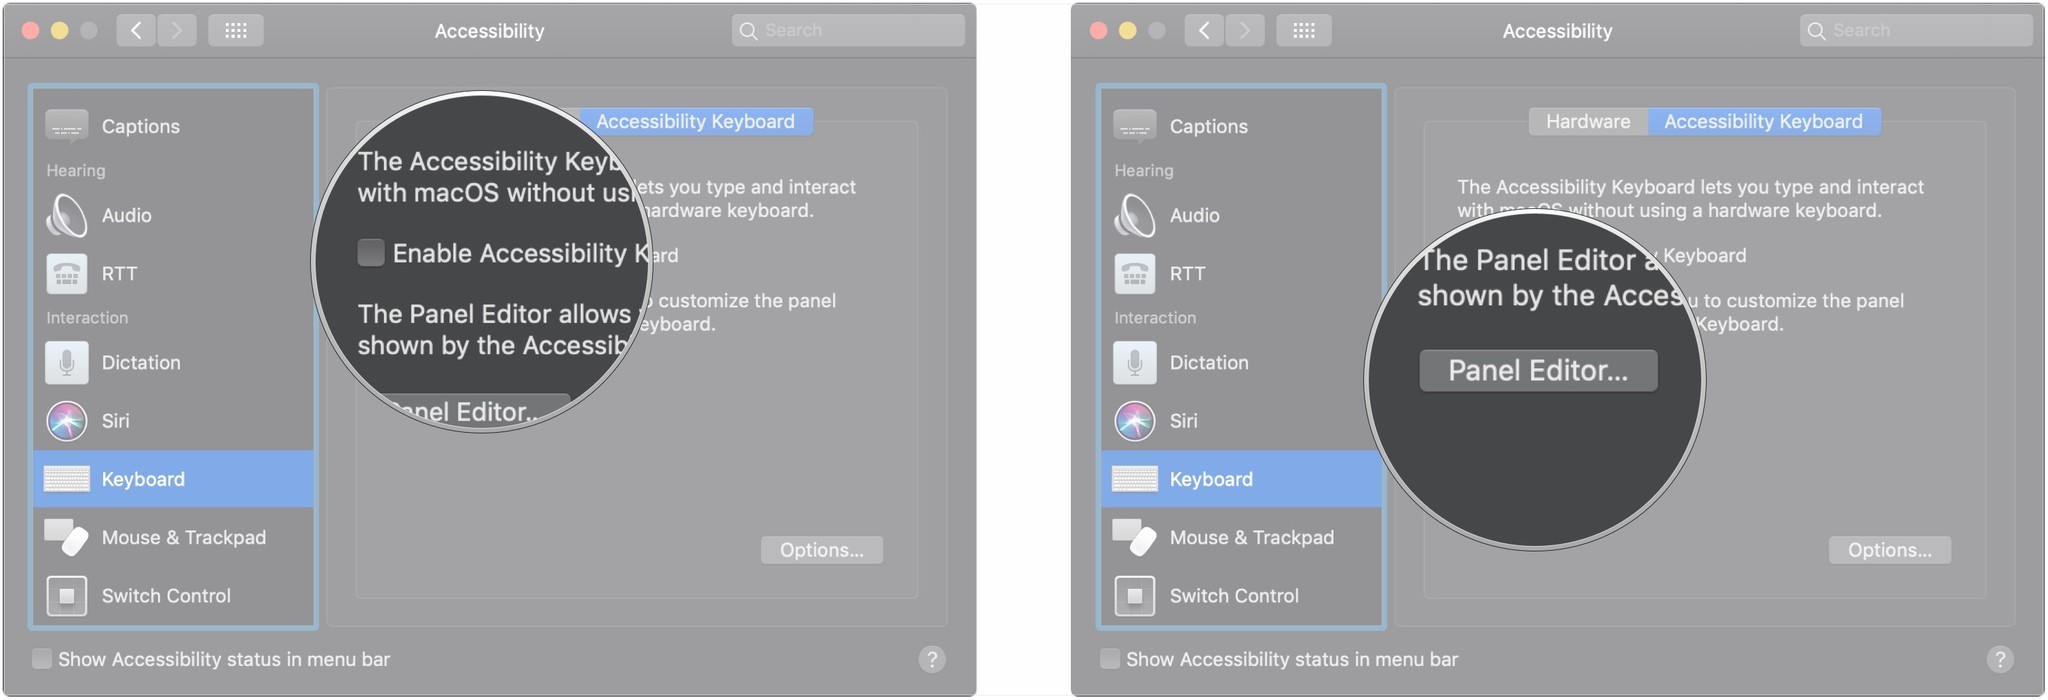
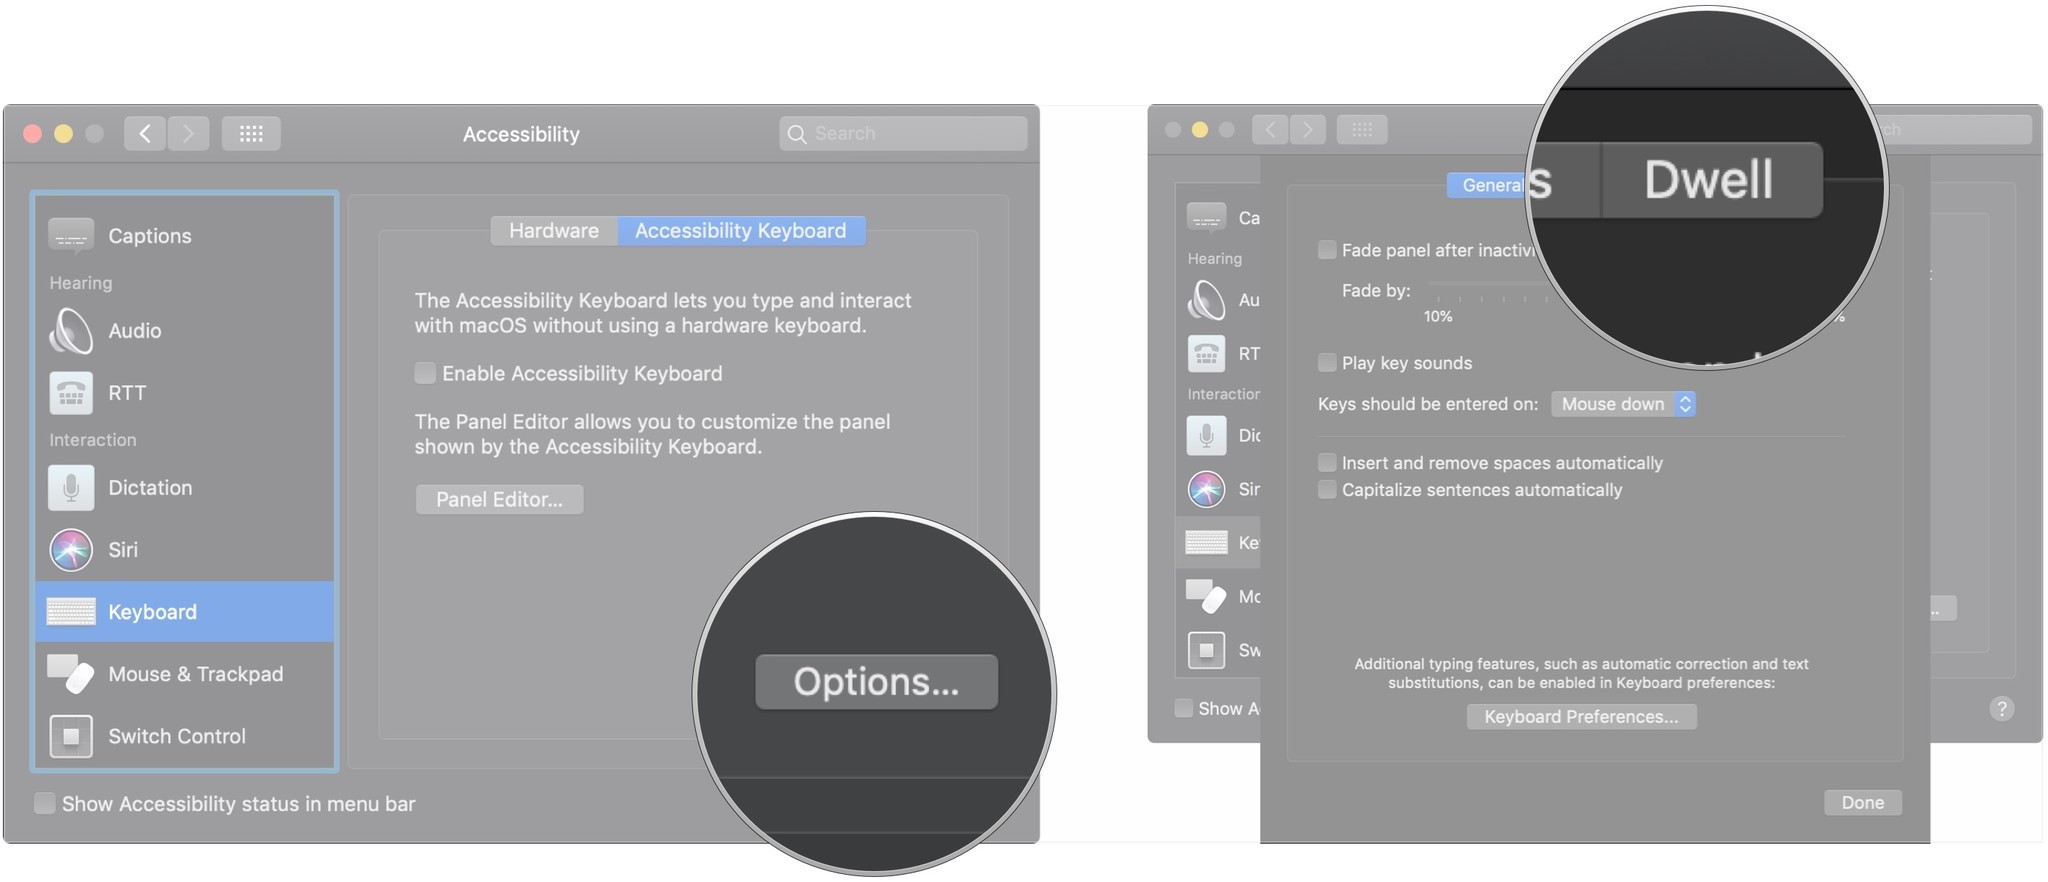
- Click the checkbox to enable the on-screen Accessibility Keyboard.
-
Click Panel Editor… if you want to open the panel editor.
-
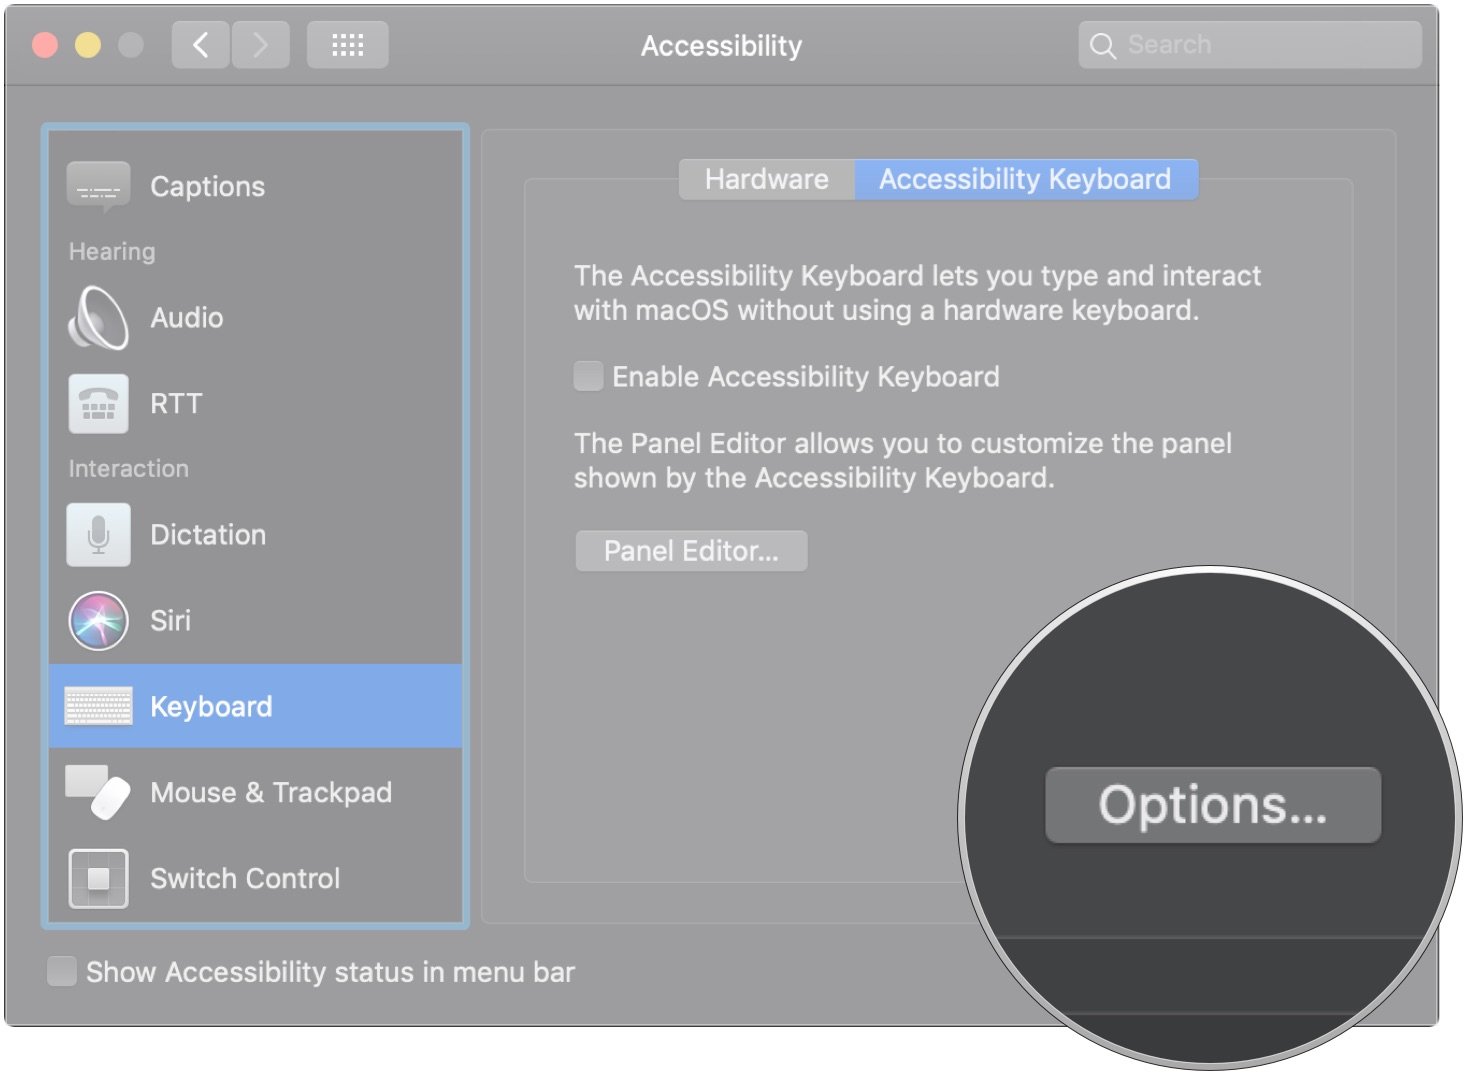
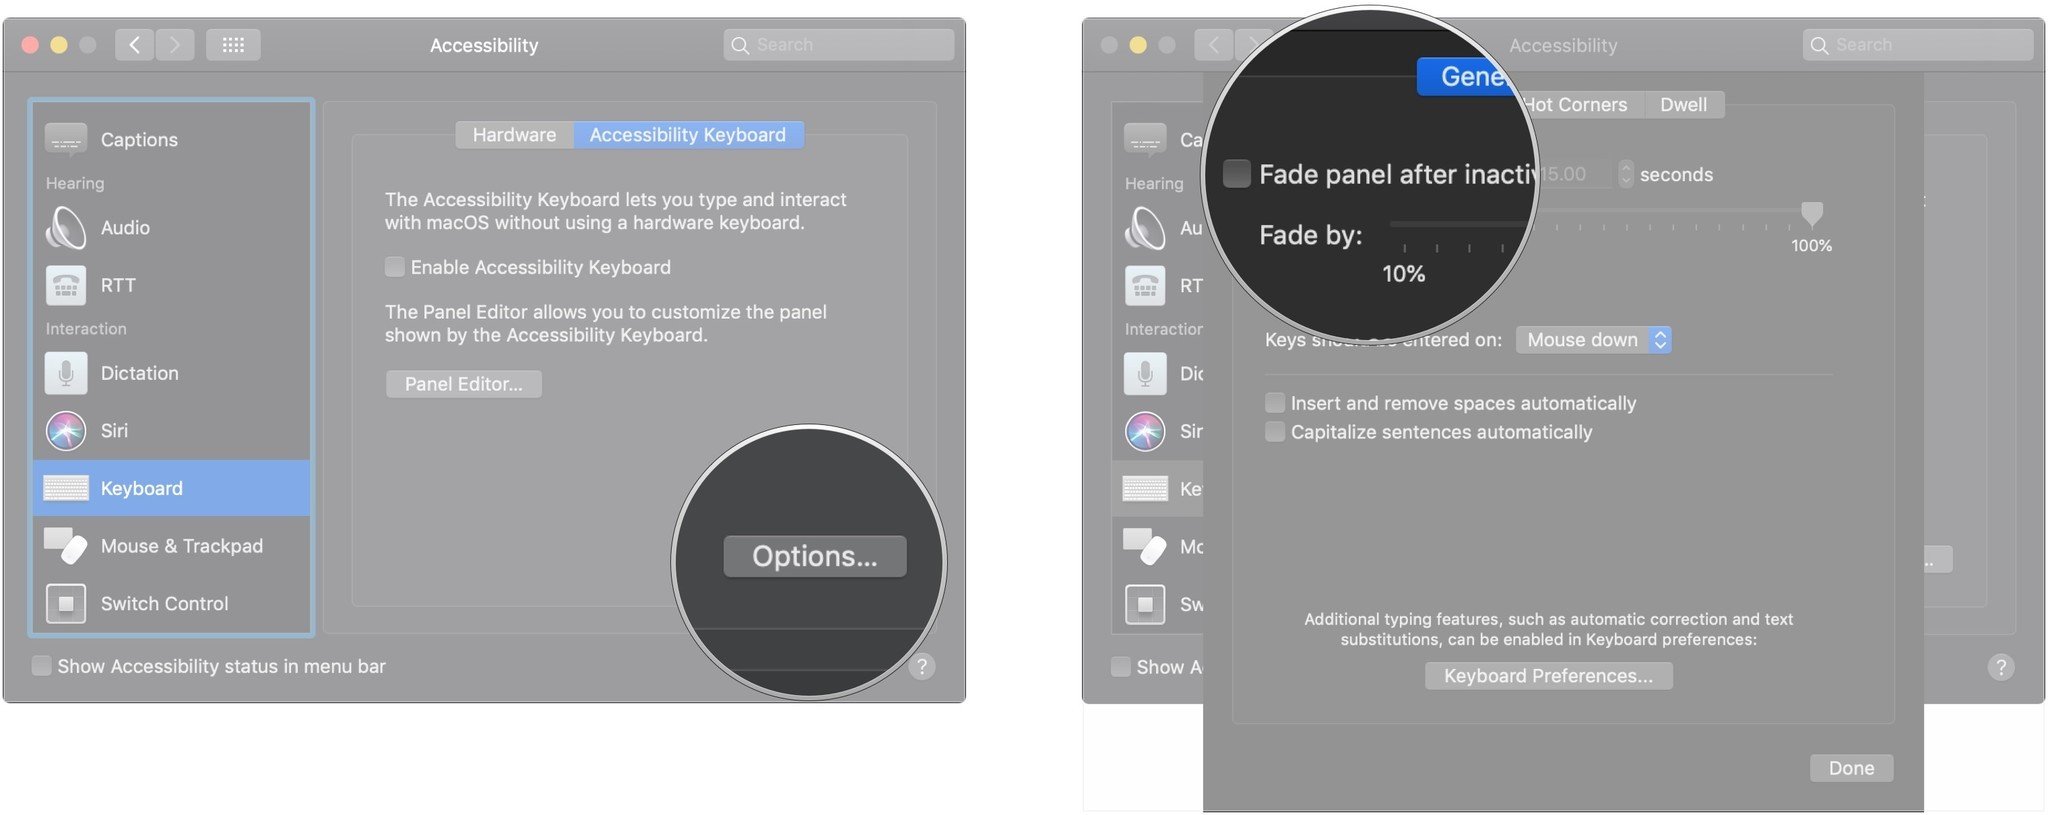
Click Options… to view various options for the Accessibility Keyboard.
Keyboard Accessibility on macOS: How to manage options for the Accessibility Keyboard
- Open System Preferences.
-
Click Accessibility.
- Click Keyboard.
-
Click Accessibility Keyboard.
- Click Options…
-
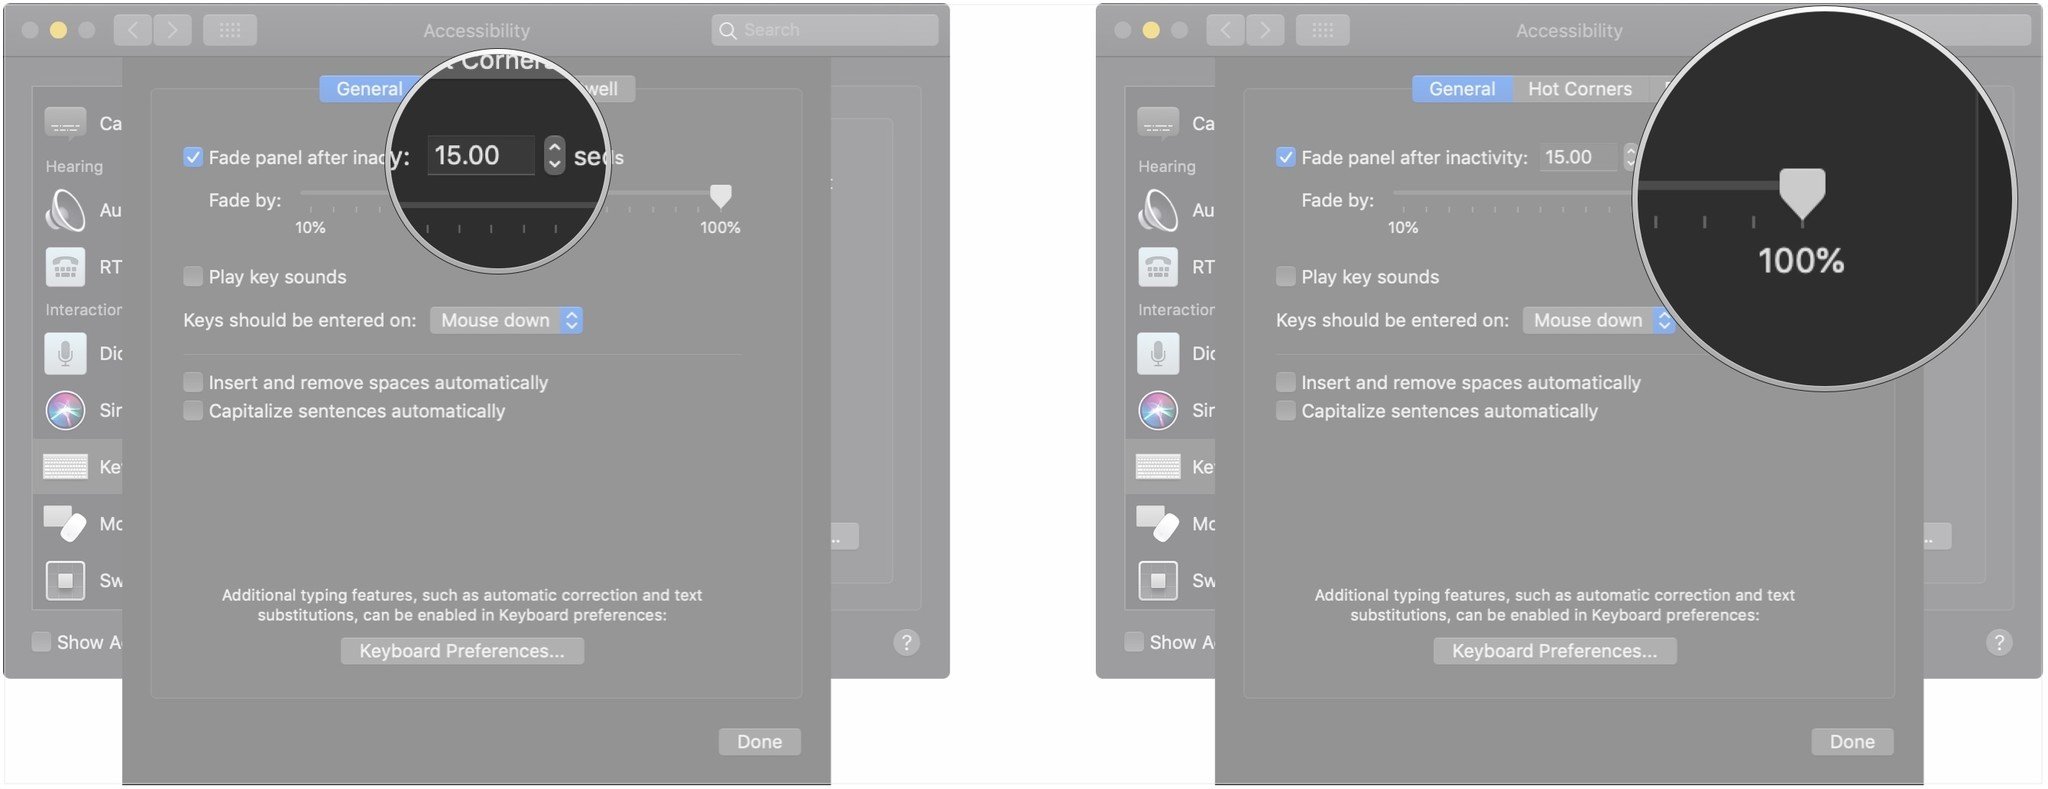
Click the checkbox next to Fade panel after inactivity if you want the keyboard to fade out when you're not using it.
- Click the arrows to determine the number of seconds that should pass before that happens.
-
Drag the slider to determine how much the keyboard should fade.
- Click the checkbox to enable keyboard sounds when using the Accessibility Keyboard.
-
Click the drop-down to set when keys on the keyboard should register as "pressed."
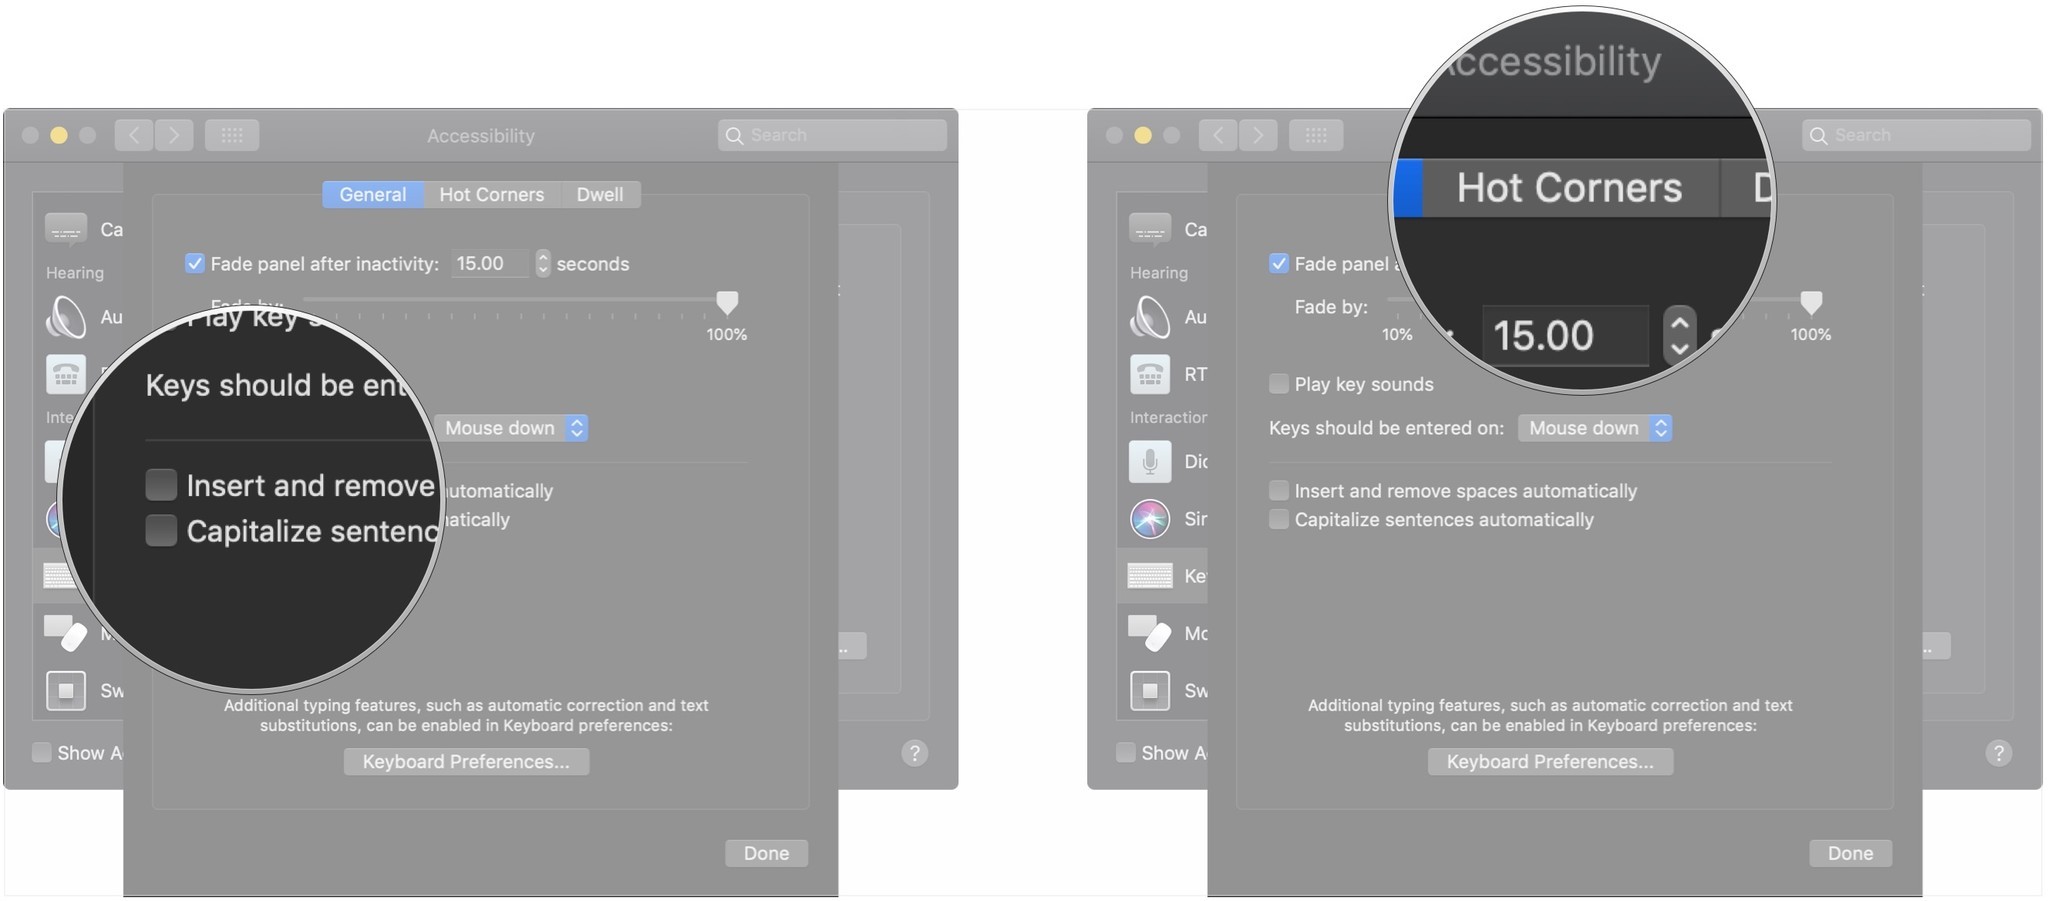
- Click the checkboxes to allow the Accessibility Keyboard to automatically insert and remove spaces and capitalize sentences.
-
Click Hot Corners.
- Click the drop-downs to select what should happen when you activate any of the hot corners.
-
Click the checkbox to determine your preference for whether the panel should follow Hide or Show for the Home panel.
Keyboard Accessibility on macOS: How to use Dwell with the Accessibility Keyboard
Dwell is a feature that allows your pointer to be controlled with head or eye-tracking technology.
- Open System Preferences.
-
Click Accessibility.
- Click Keyboard.
-
Click Accessibility Keyboard.
- Click Options…
-
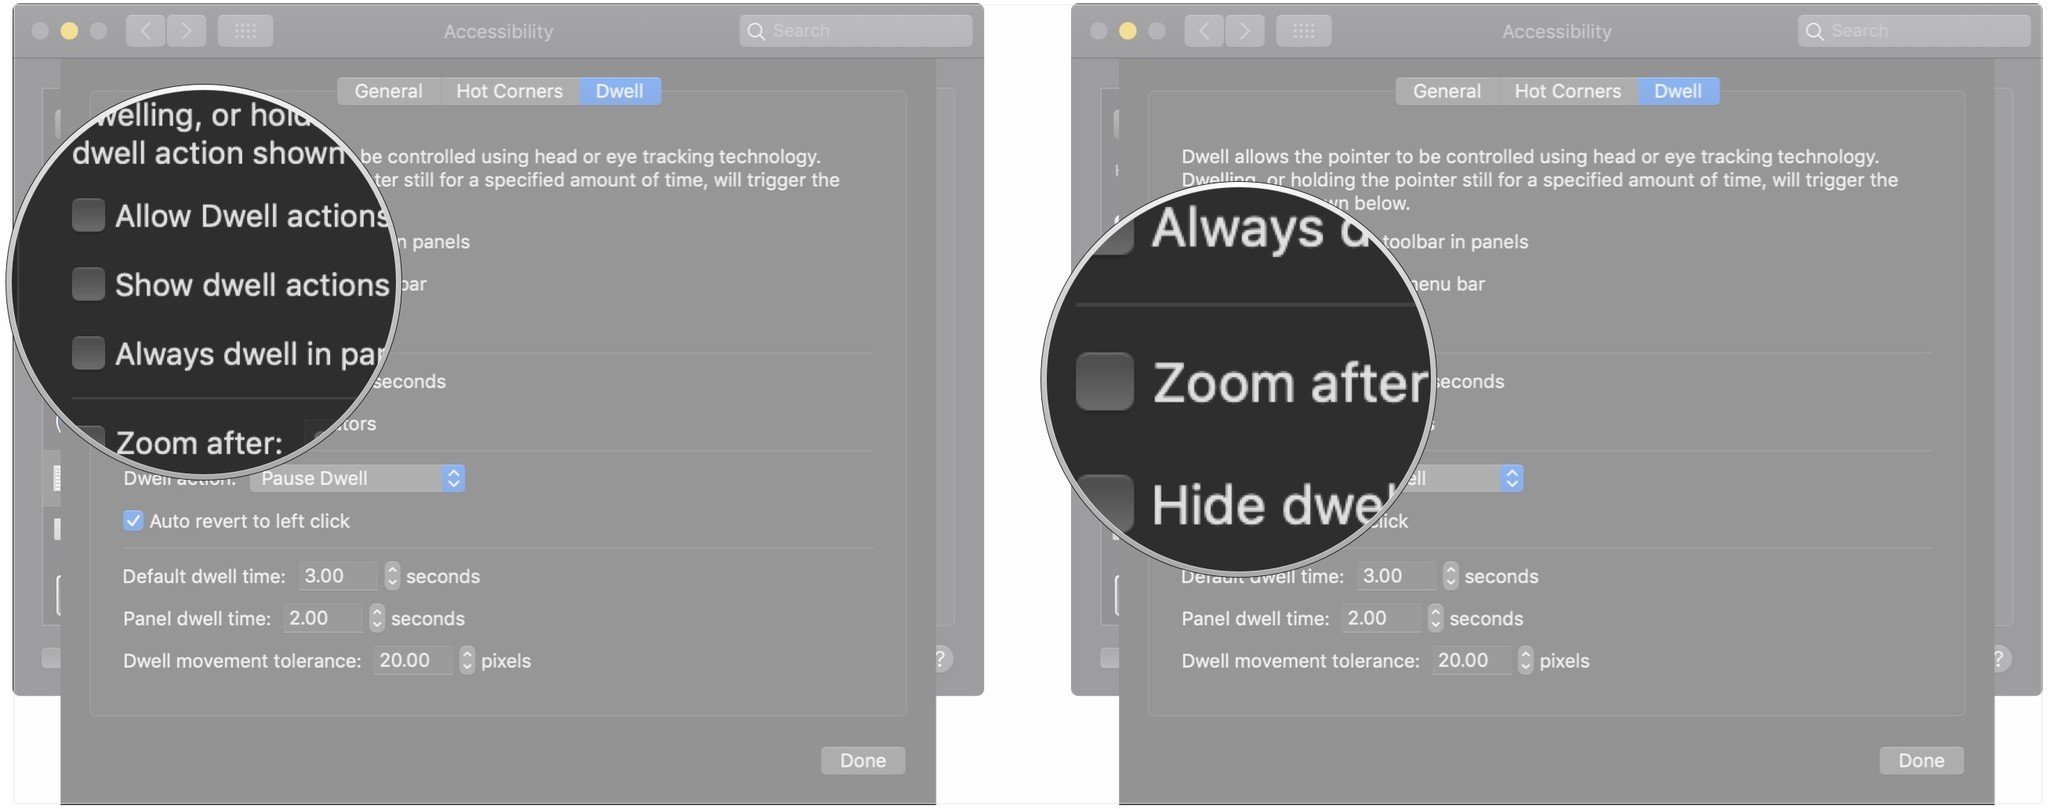
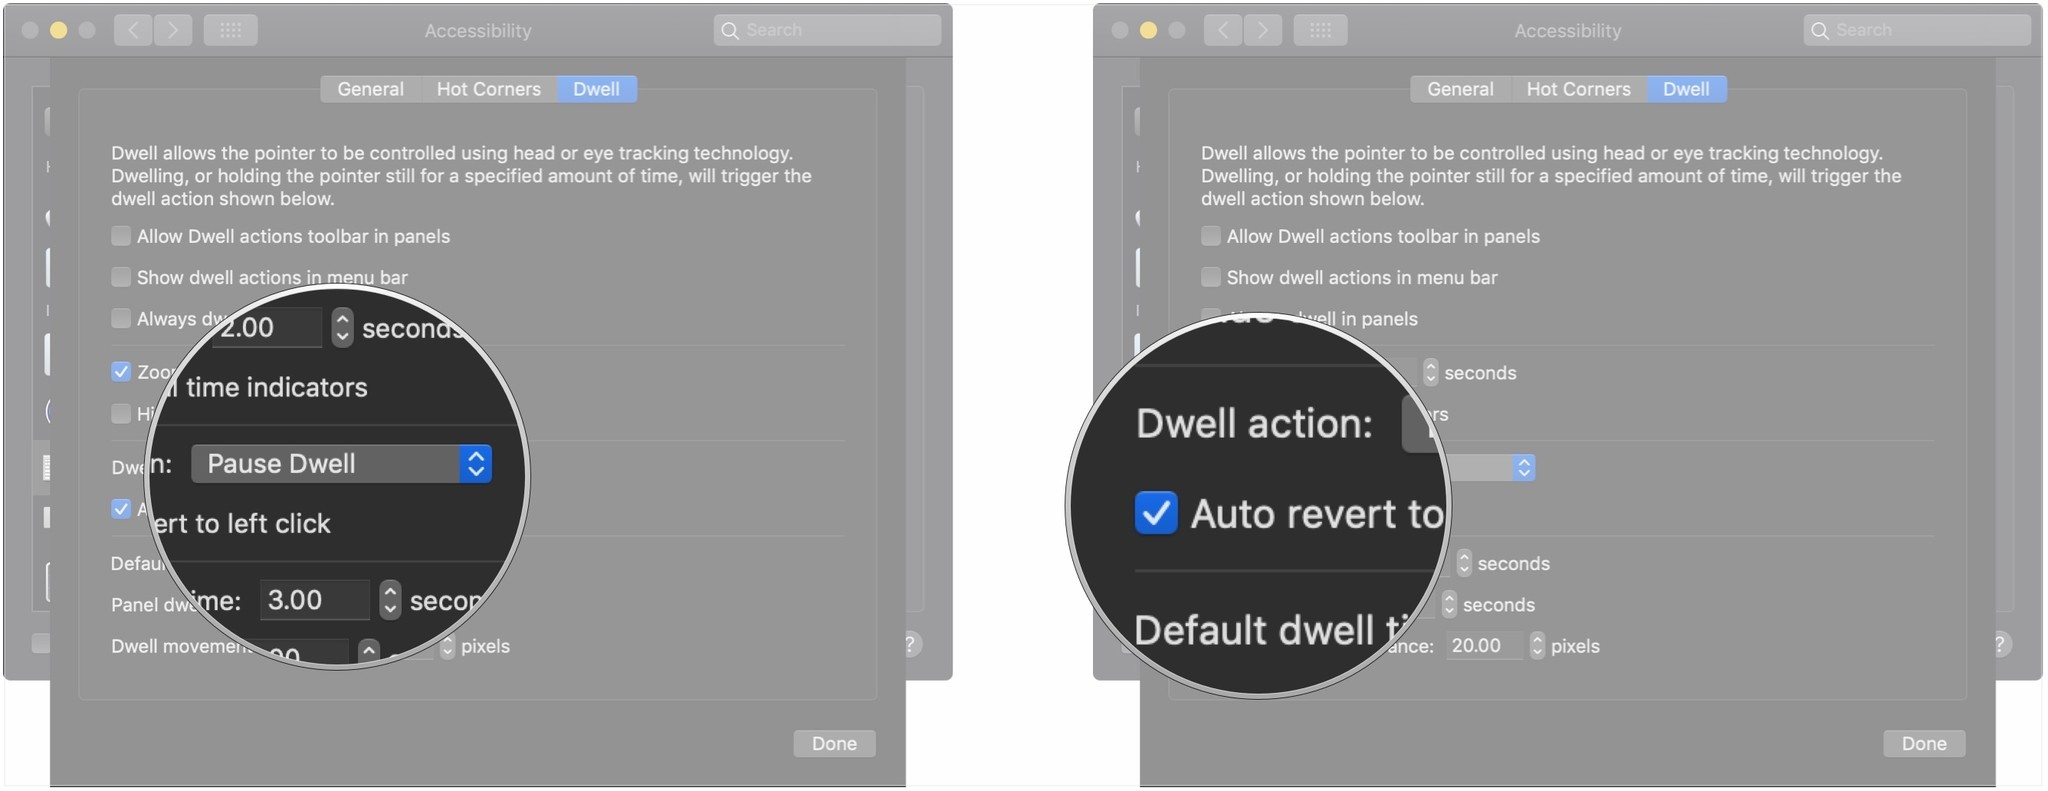
Click Dwell.
- Click the checkboxes to allow dwell action toolbars in panels, show dwell actions in the Menu bar, and to always dwell in panels.
-
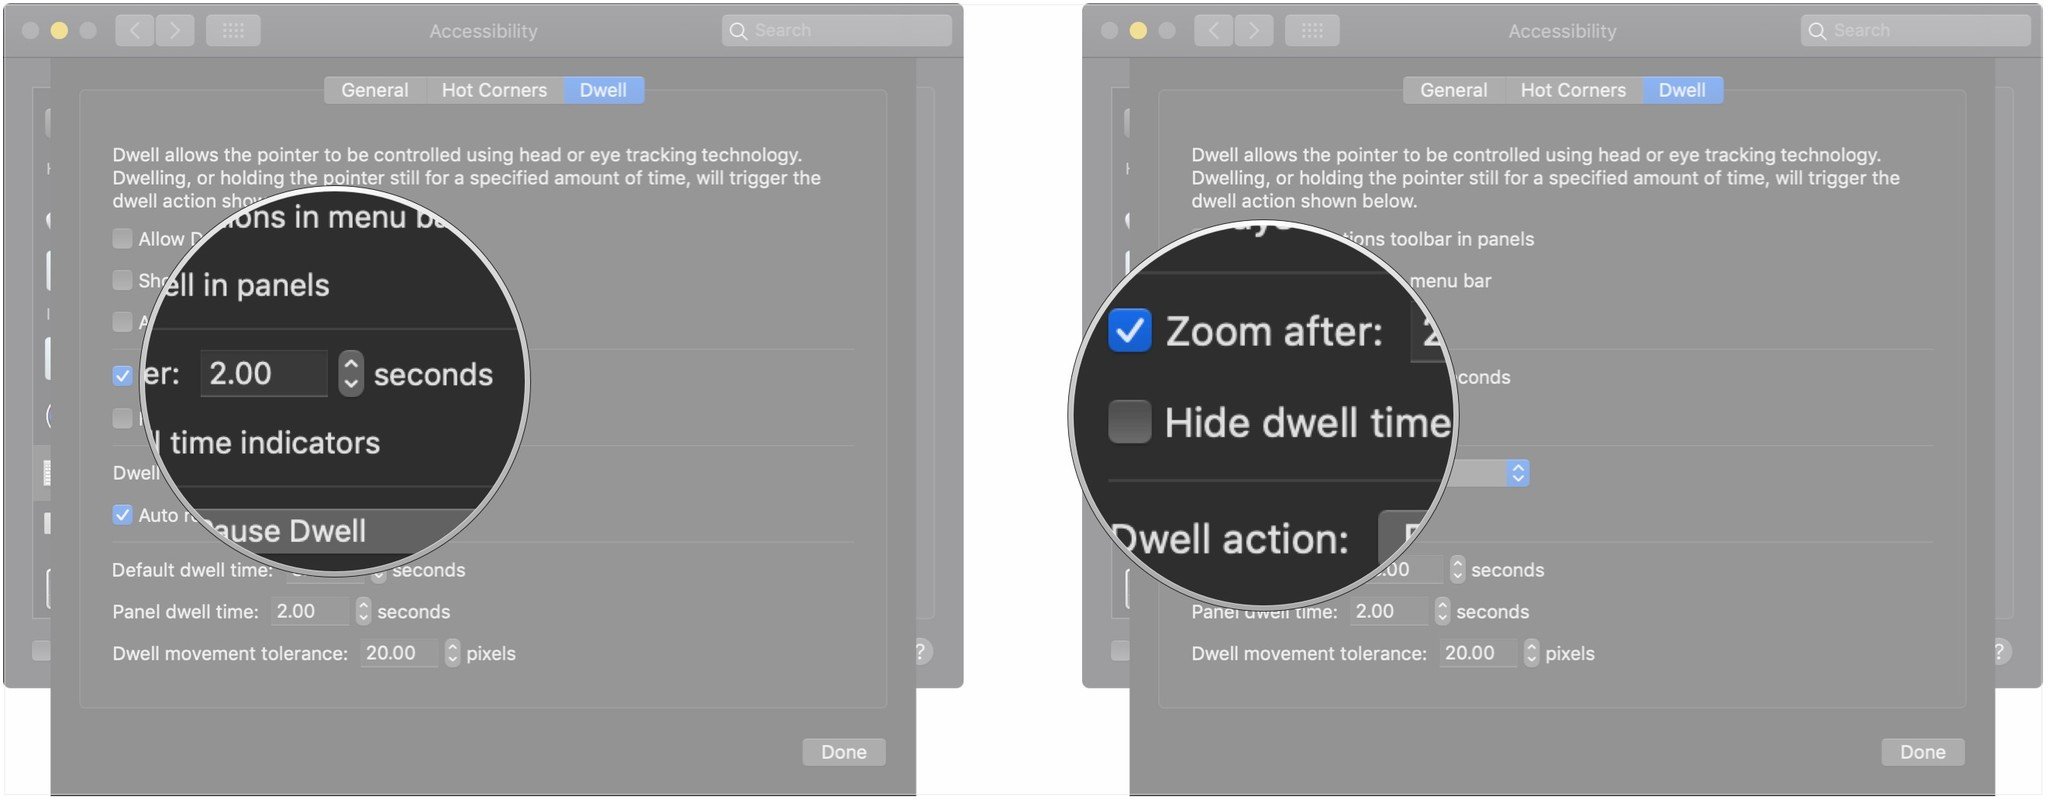
Click the checkbox to allow dwell to zoom.
- Click the arrows to determine when zooming should happen.
-
Click the checkbox to hide dwell time indicators.
- Click the drop-down to determine the default dwell action.
-
Click the checkbox to auto-revert to left-click.
-
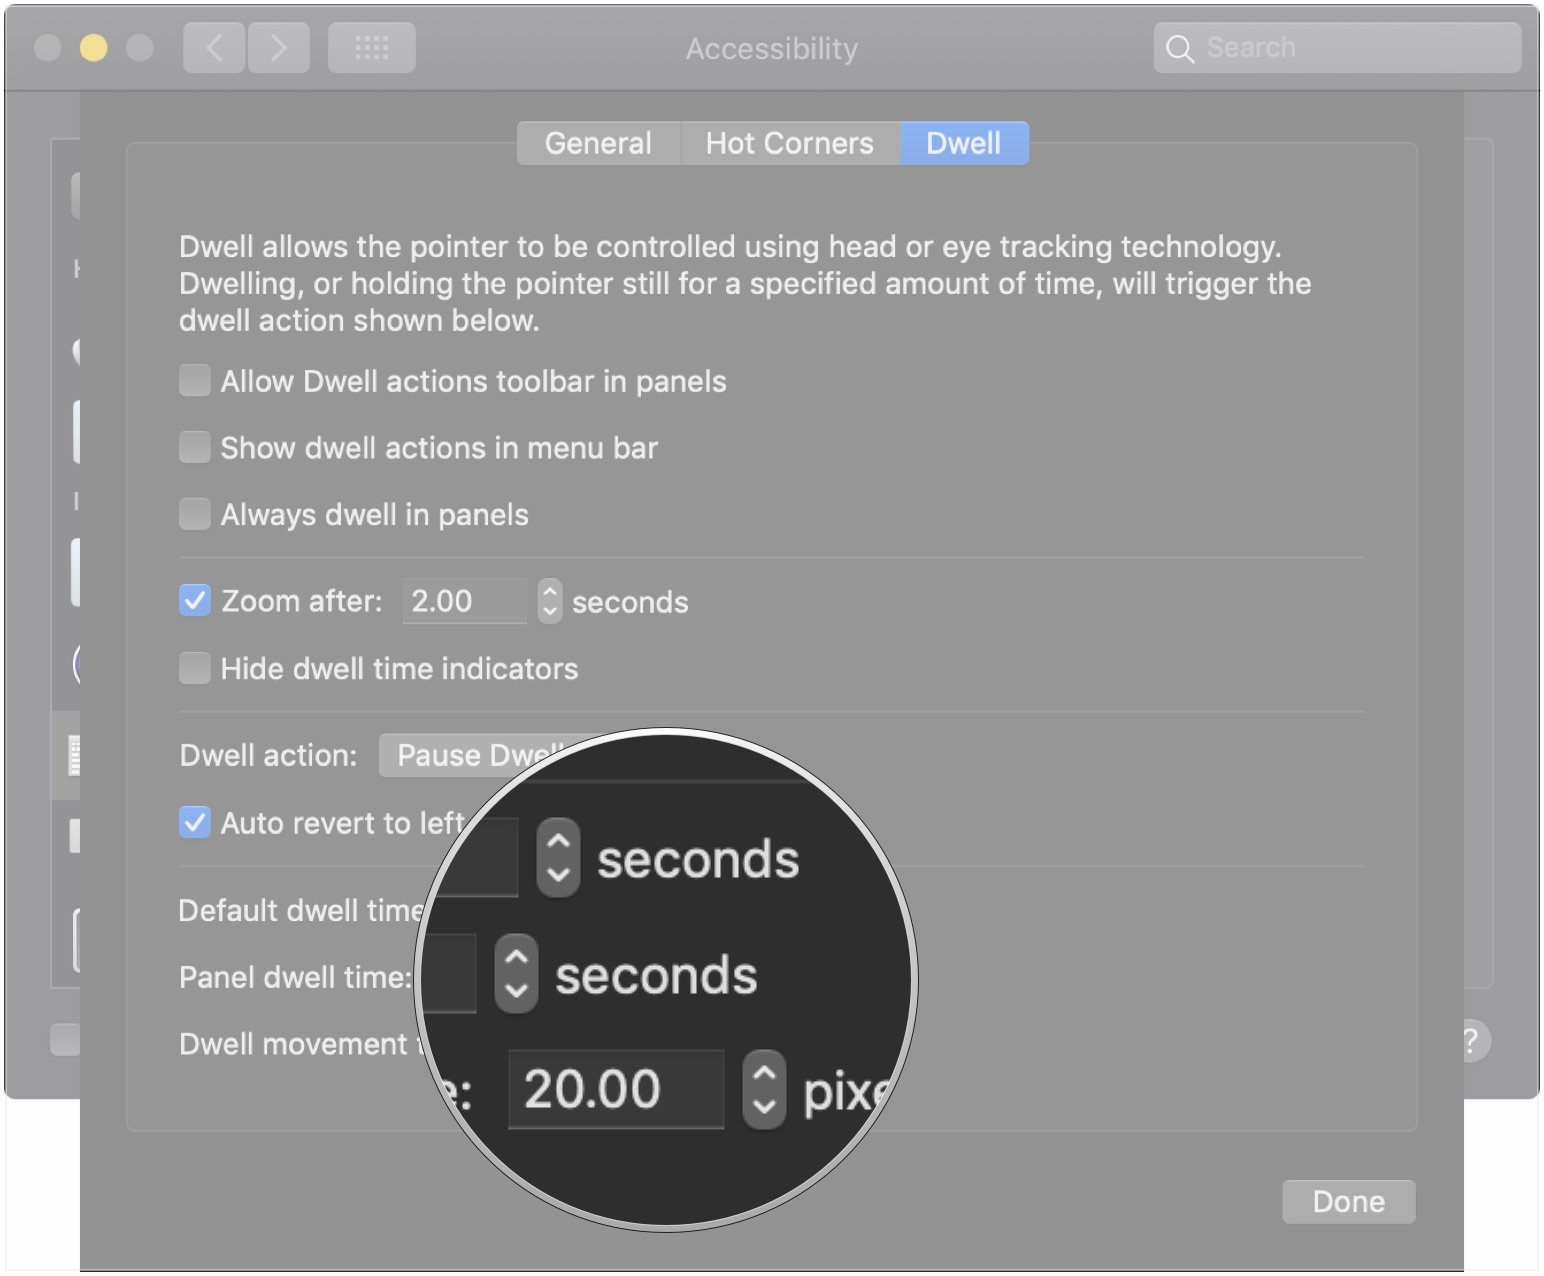
Click the arrows to set the default dwell time, the panel dwell time, and the dwell movement tolerance.
Keyboard Accessibility on macOS: How to use the panel editor
The panel editor allows you to create custom panels to use along with the Accessibility Keyboard, allowing it to customize it exactly to meet your needs.
- Open System Preferences.
-
Click Accessibility.
- Click Keyboard.
-
Click Accessibility Keyboard.
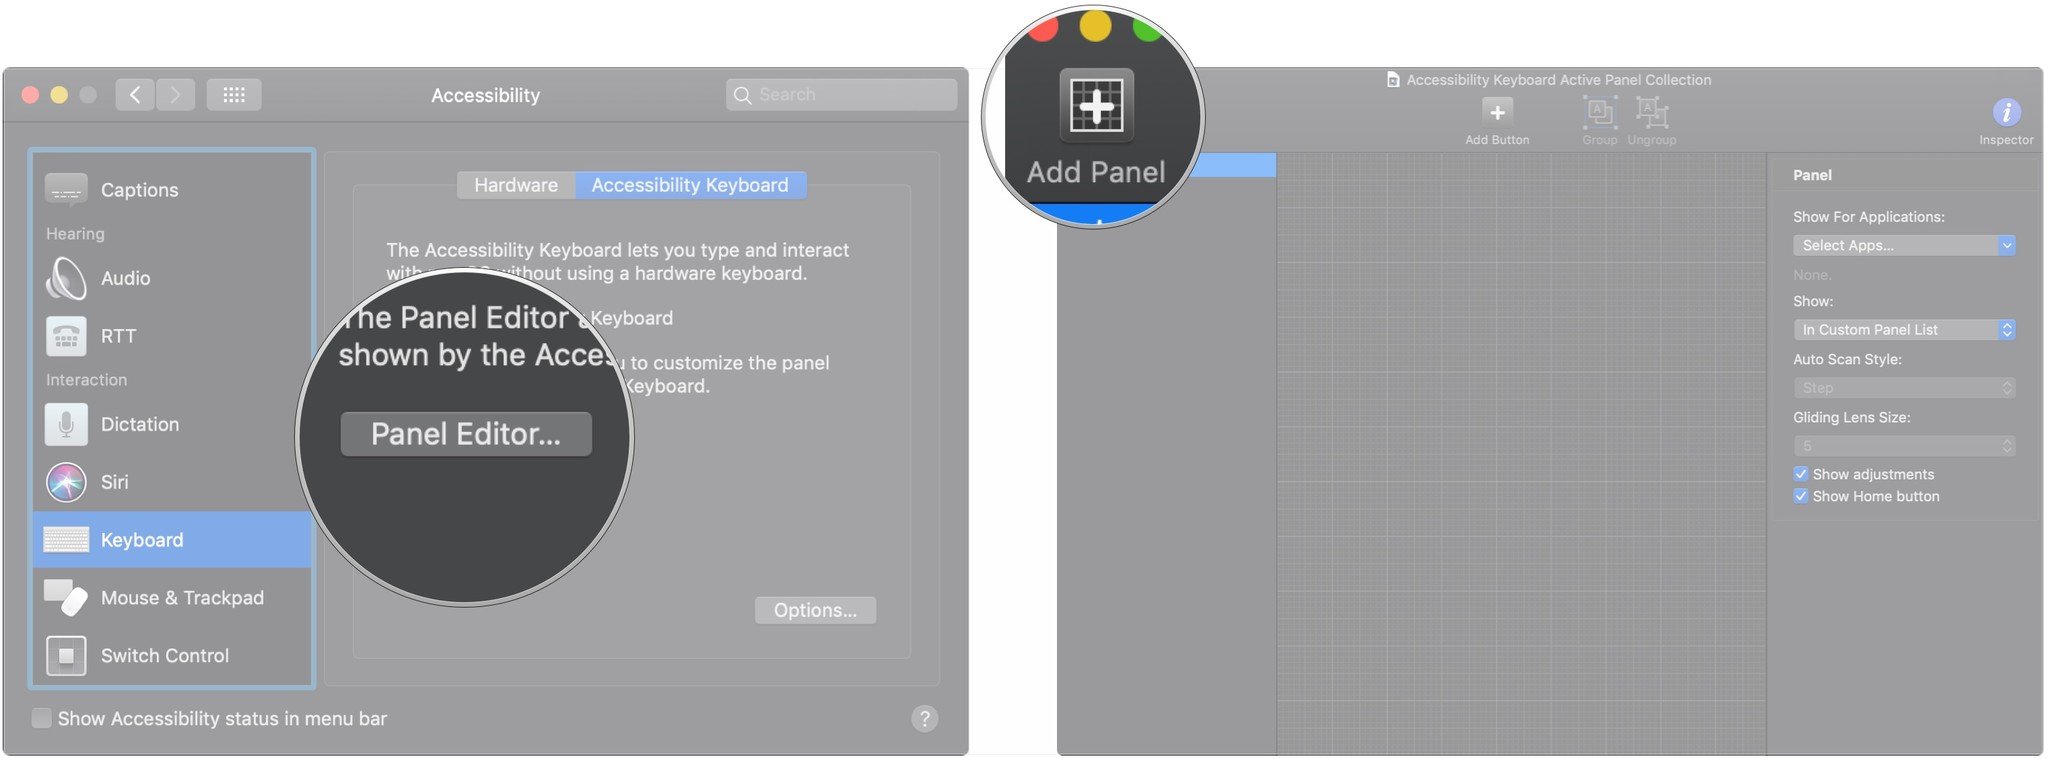
- Click Panel Editor…
-
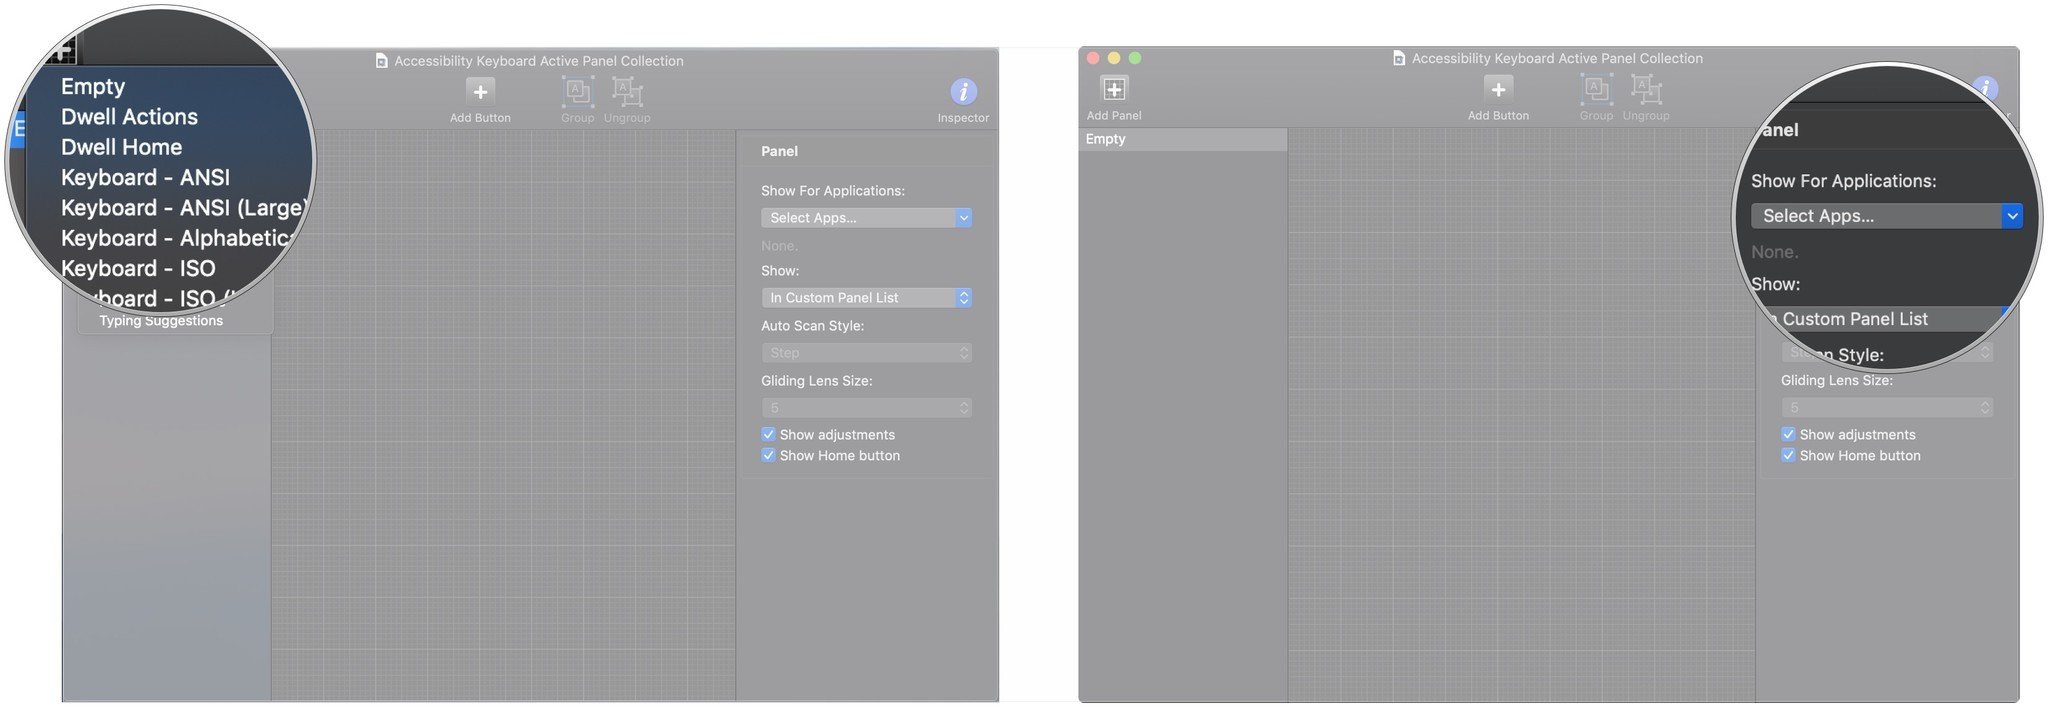
Click Add Panel to create an entirely new panel.
- Click the panel type you want to create.
-
Click the drop-downs to determine panel behavior.
- The drop-downs allow you to select which applications cause your panel to appear, how your panel is displayed, its auto scan style, and the size of its gliding lens.
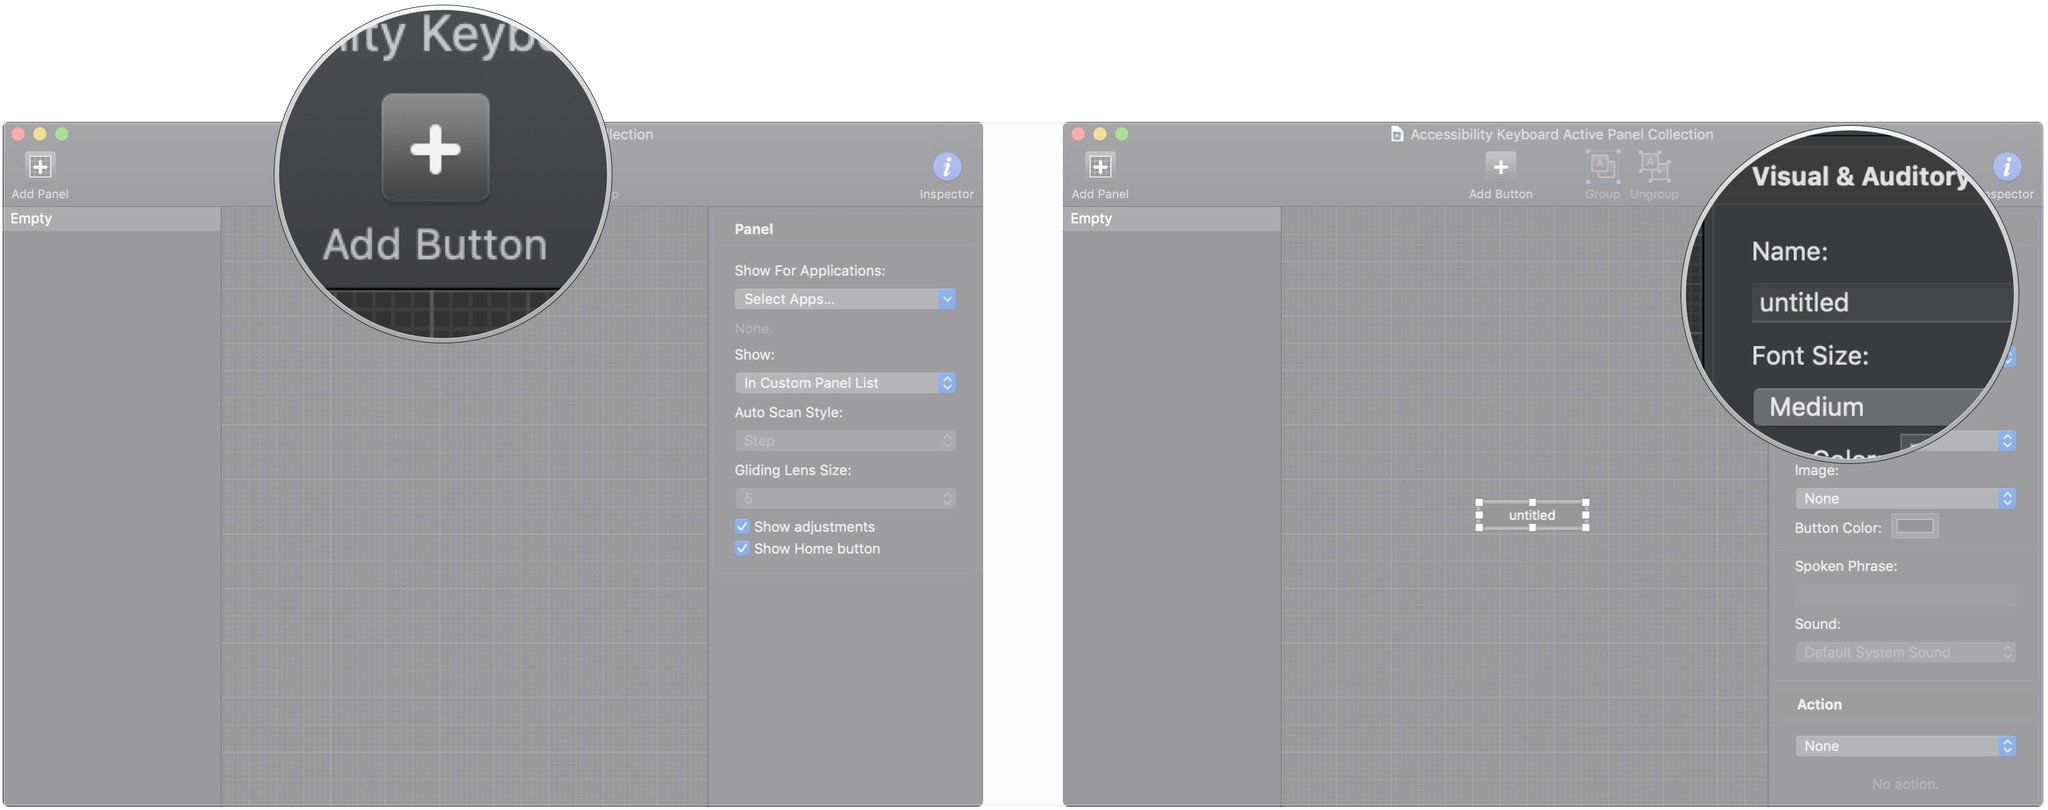
- Click Add Button to add a button to an existing panel.
-
Enter a name for your button.
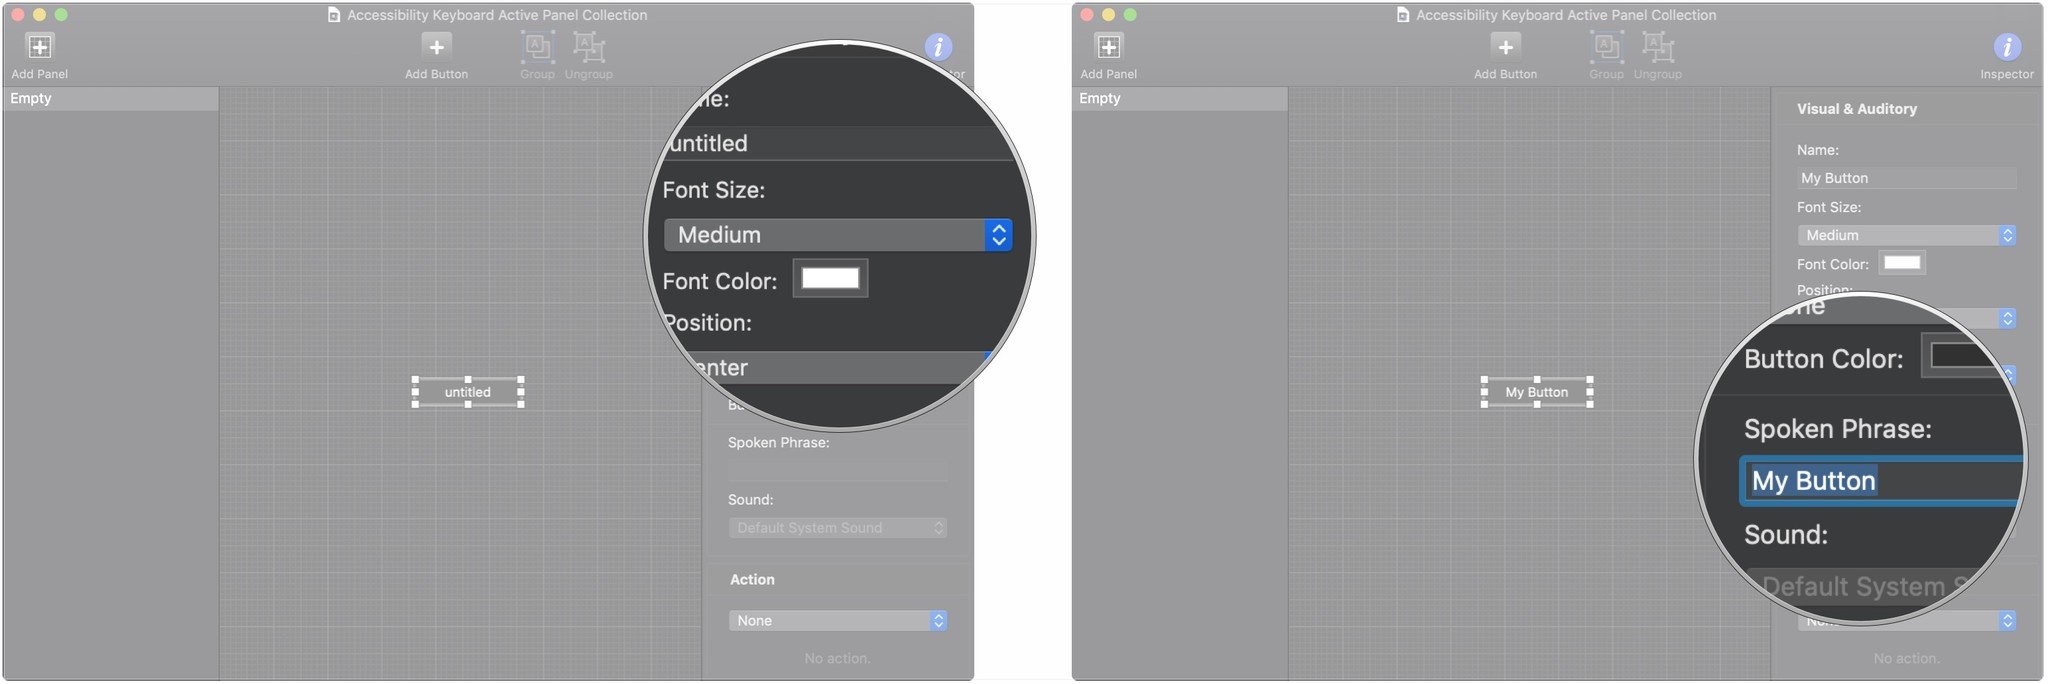
- Click the drop-downs and menus to determine the button's font size, screen position, image, color, and action.
-
Enter a spoken phrase for activating the button.
Keyboard Accessibility on macOS: How to enable Typing Feedback in macOS Catalina
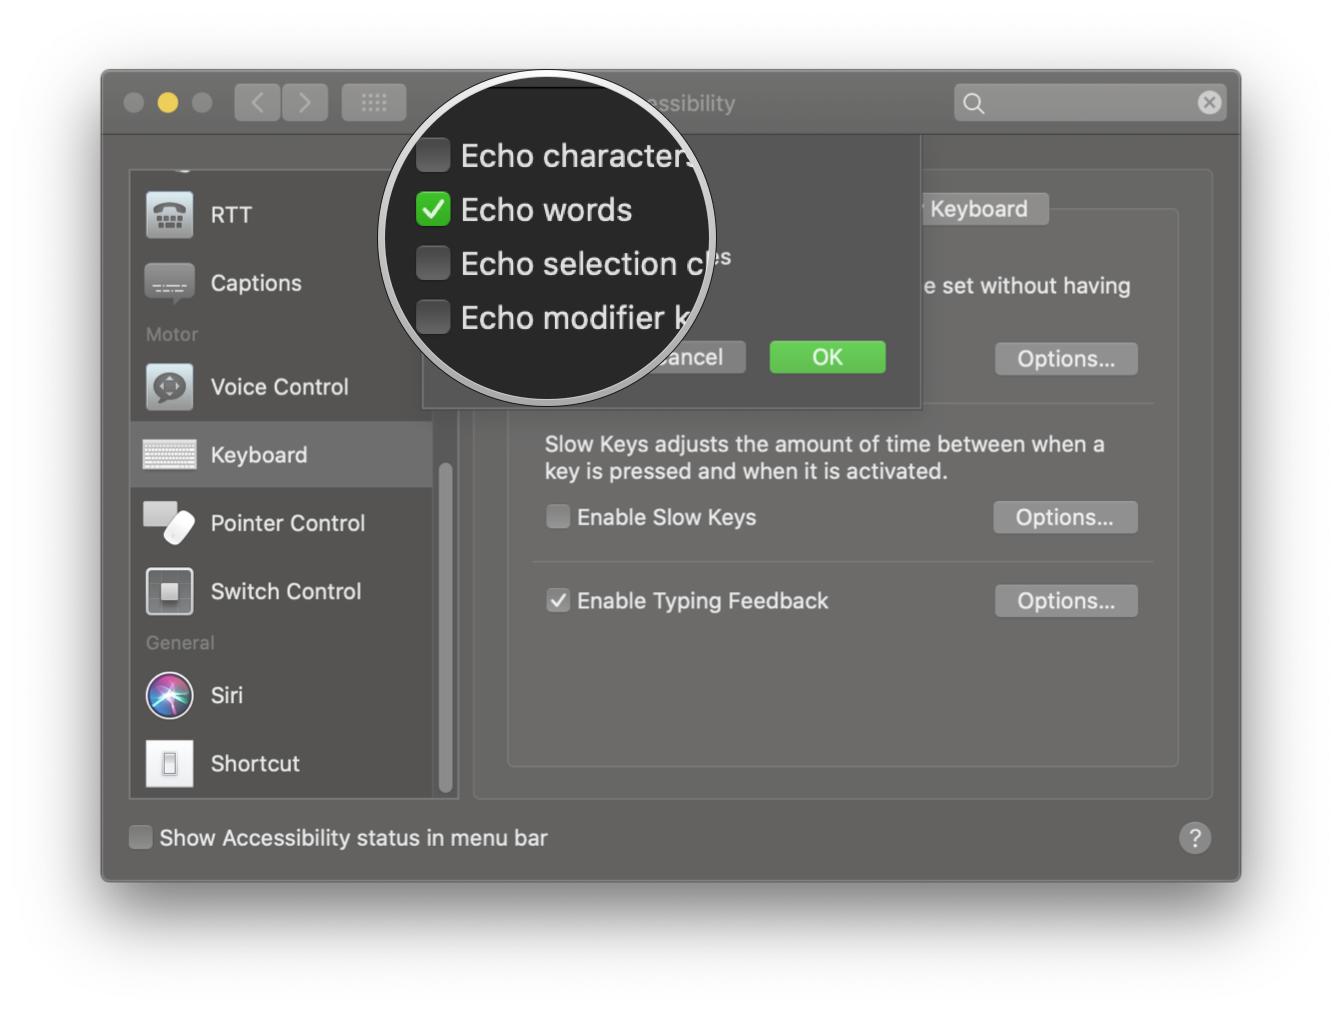
Sometimes as you type, you will want to have audible feedback of what you type out, word by word. This is the Typing Feedback feature, and it's easy to enable. However, this feature is only available in macOS Catalina, and has been removed in macOS Big Sur. If you rely on this option, then you may not want to upgrade to macOS Big Sur quite yet.
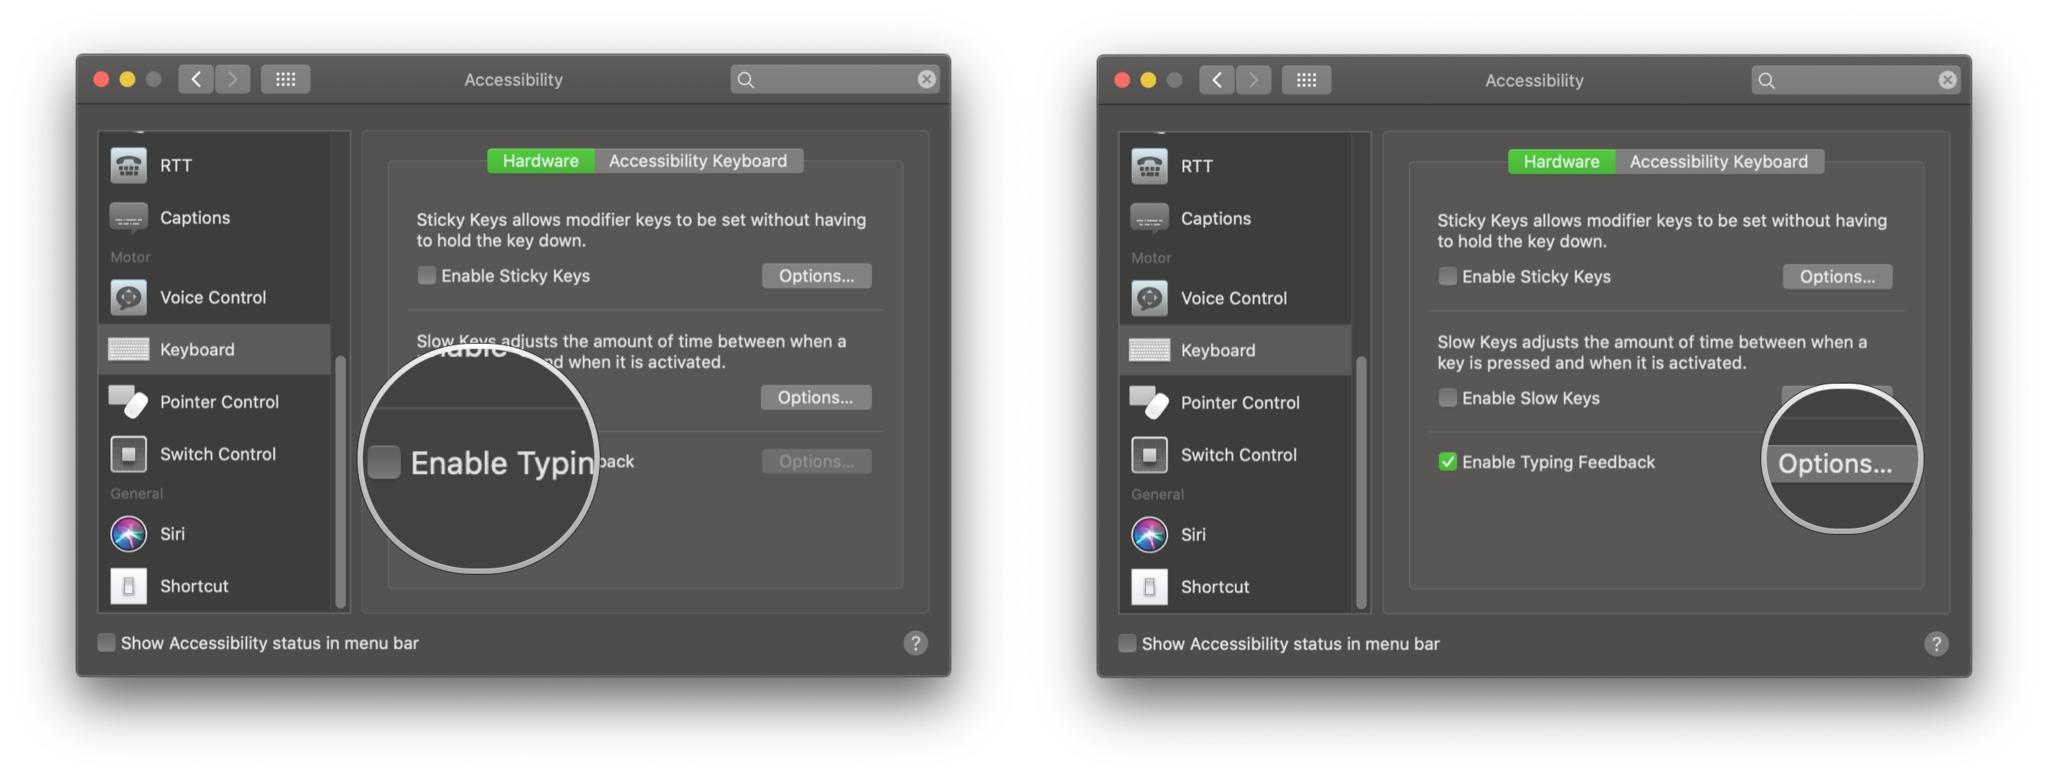
- Launch System Preferences.
-
Click Accessibility.
- Click Keyboard in the menu on the left.
- Check off the box for Enable Typing Feedback.
-
Click Options next to Enable Typing Feedback.
-
Choose what you want echoed as you type. The four options include echoing characters, words, selection changes, and modifier keys.
Questions about keyboard accessibility on macOS?
If you need to make your typing experience on the best desktop Mac or best MacBook more manageable, then the keyboard accessibility features should help you out. These are all of the current keyboard accessibility features that are in macOS, but remember — the Typing Feedback option debuted in macOS Catalina, but did not make it through to macOS Big Sur. So if you require it, then you may want to hold off on updating. If it is something that you don't need, then everything else is still available in Big Sur.
Have any other questions related to keyboard accessibility in macOS? Drop them in the comments below!
Updated February 2021: Added info about Typing Feedback being removed from macOS Big Sur, but still remains in Catalina. All other keyboard accessibility features remain the same.




0 comments:
Post a Comment