


The iPhone Guided Access feature lets you lock your iOS device to a single app, preventing people from snooping around.
Whether you're working for a business that wants to use the best iPad to display information or you'd simply like your child to focus on their homework app on the best iPhone, you can use Apple's Guided Access feature to lock your screen on one specific app.
This was originally built as an iOS Accessibility feature. With iPhone Guided Access, you can limit users to just one specific app of your choosing, thus preventing them from switching to another app or even going back to your Home screen. Guided Access is useful in a few different scenarios, such as education, autism research, businesses, restaurants, museums, and more.
Whether it's a writing app, drawing app, music app, math app, or a story, video, or reading app, Guided Access helps make sure that all attention remains only on that app. It also prevents you from accidentally exiting to the Home screen or another app when you don't mean to.
Guided Access can even be used to create a "guest mode," allowing you to hand your device to someone so that they can use Safari, iBooks, Video, or a game without having to worry that they'll snoop through your personal information.
How to enable iPad or iPhone Guided Access
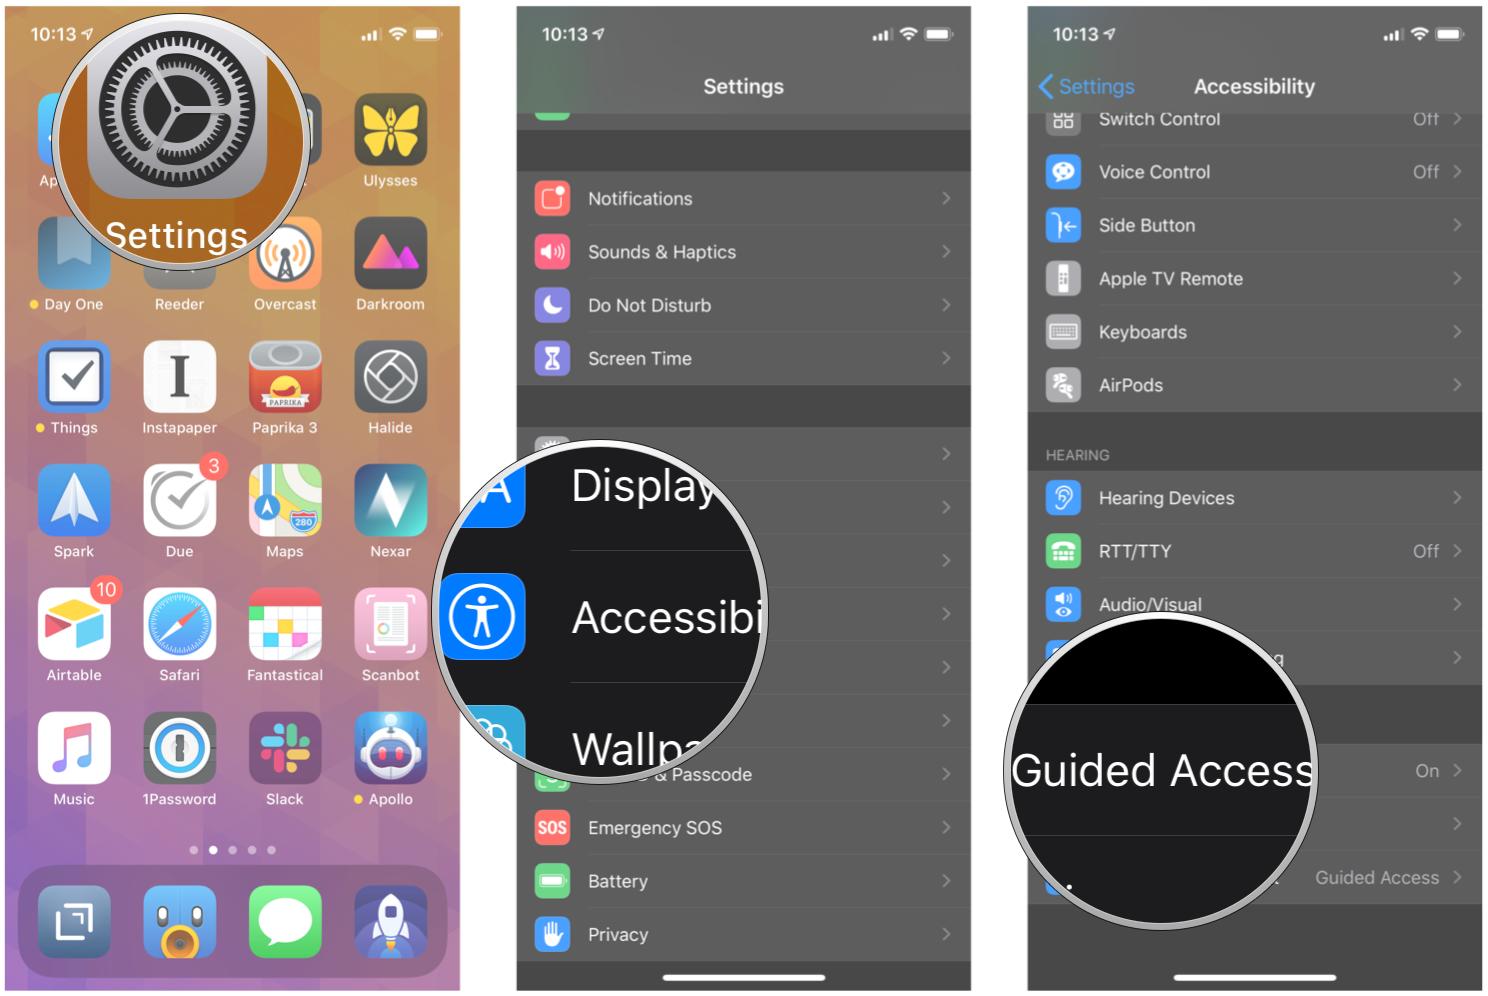
- Launch Settings on your iPhone or iPad.
- Tap on Accessibility.
-
Scroll down to the bottom and then tap on Guided Access.
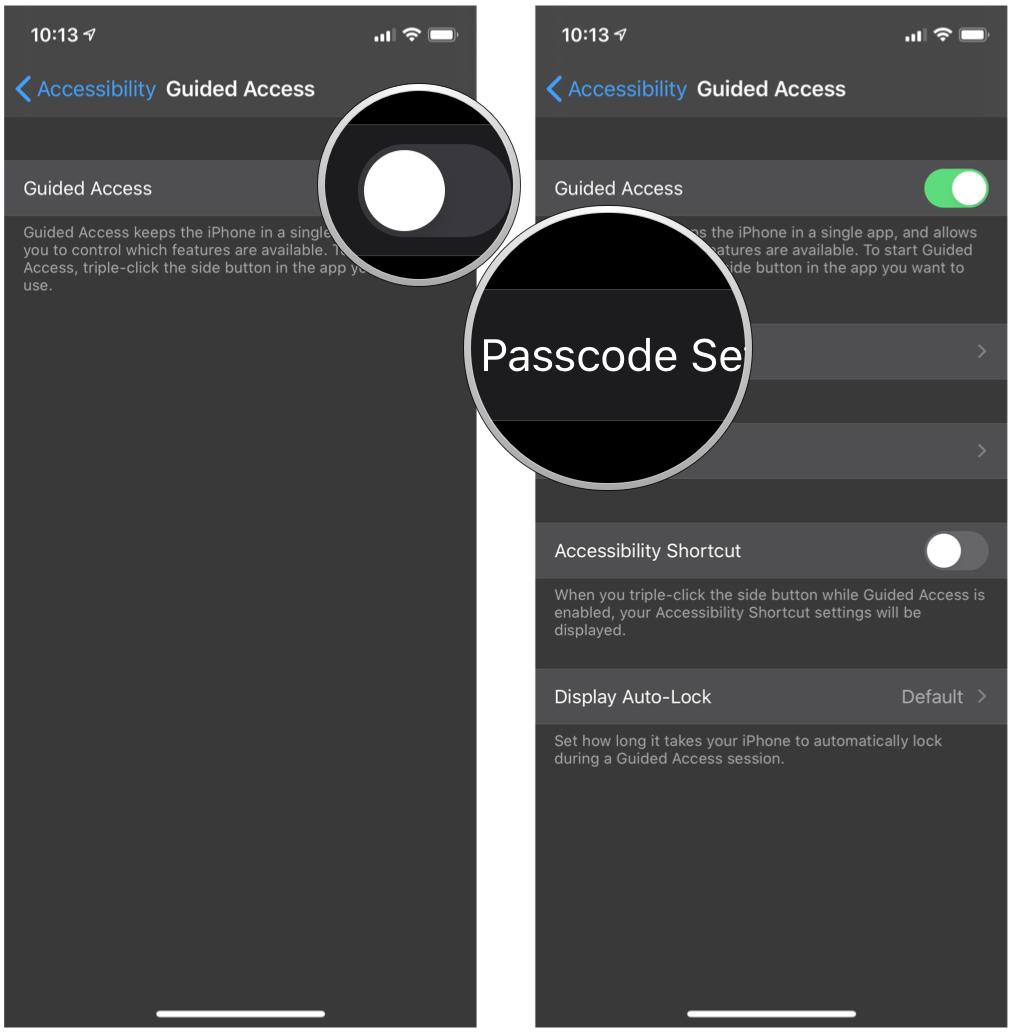
- Turn the toggle for Guided Access to ON (green).
-
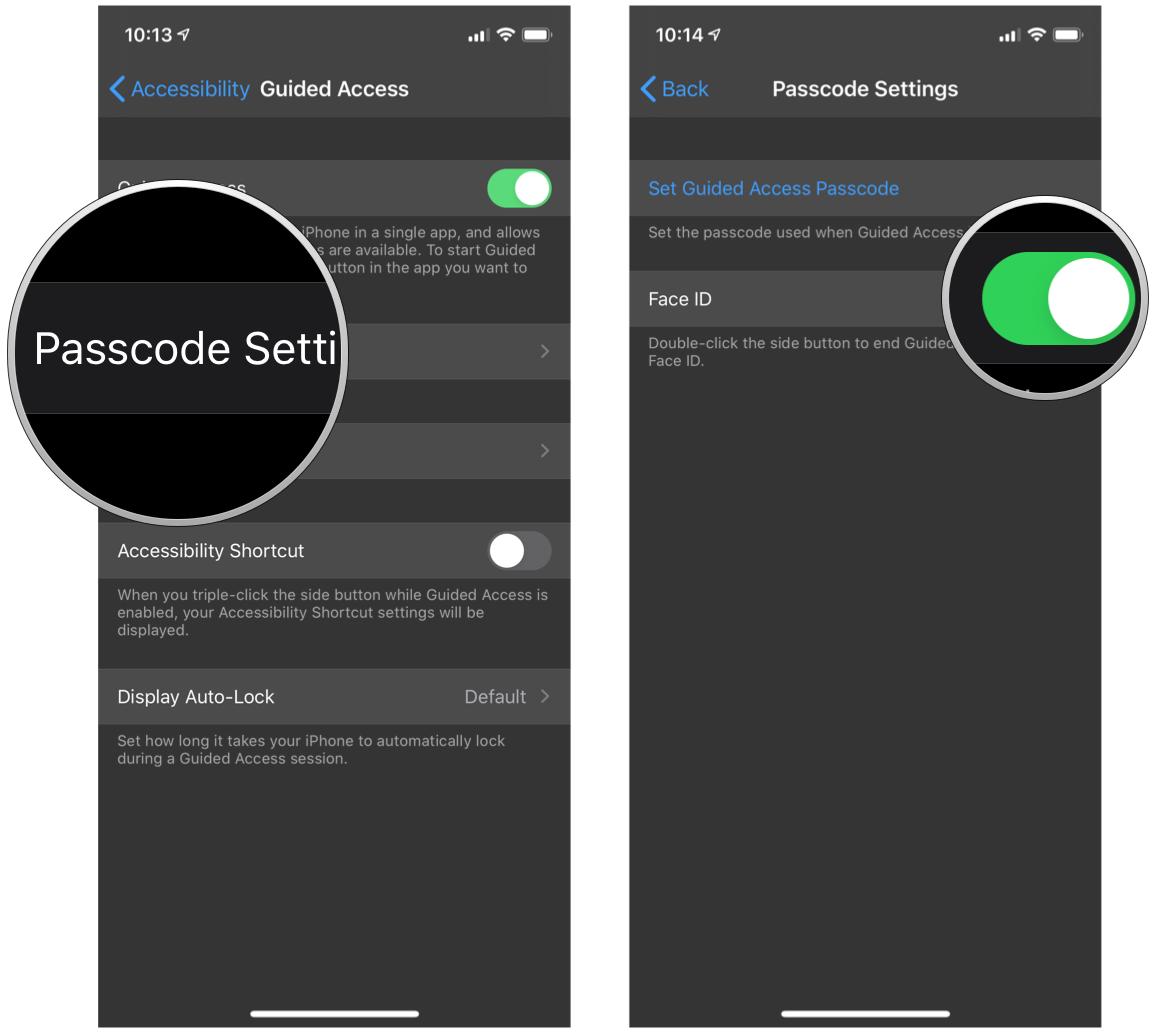
Tap on Passcode Settings.
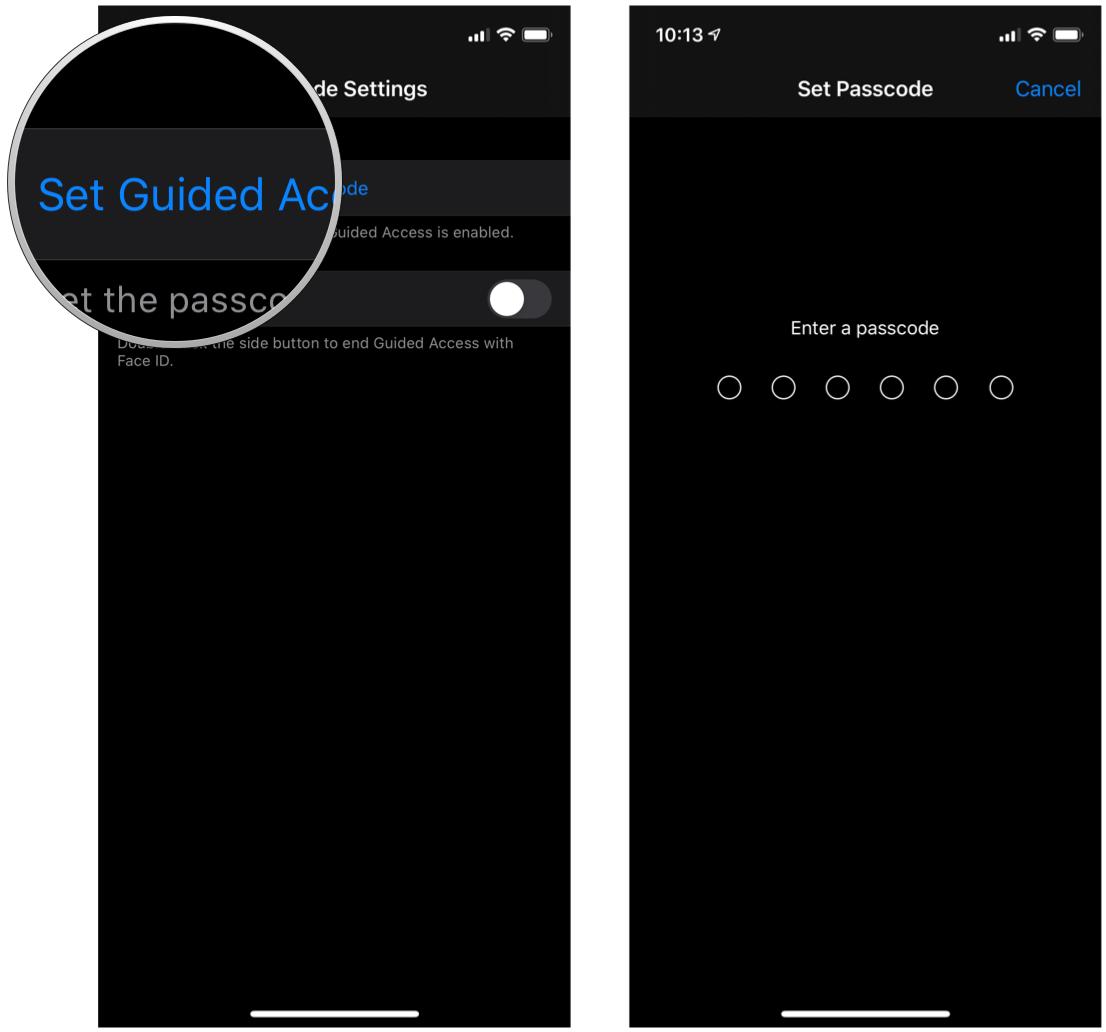
- Tap Set Guided Access Passcode to create a six-digit passcode. This passcode is needed to end a Guided Access session.
-
Verify your passcode by typing it in again.
How to enable Face ID or Touch ID for Guided Access
- Launch Settings on your iPhone or iPad.
- Tap on Accessibility.
-
Scroll down to the bottom and then tap on Guided Access.
- Tap Passcode Settings.
-
Turn the toggle to ON for Face ID or Touch ID (depending on your model).
How to use Guided Access
- Launch the app you'd like the user to have access to. In this case, we used Music.
- On iPhone or iPad with a Home button, triple-click the Home button, or on iPhone or iPad with Face ID, triple-click the Side button to launch Guided Access.
-
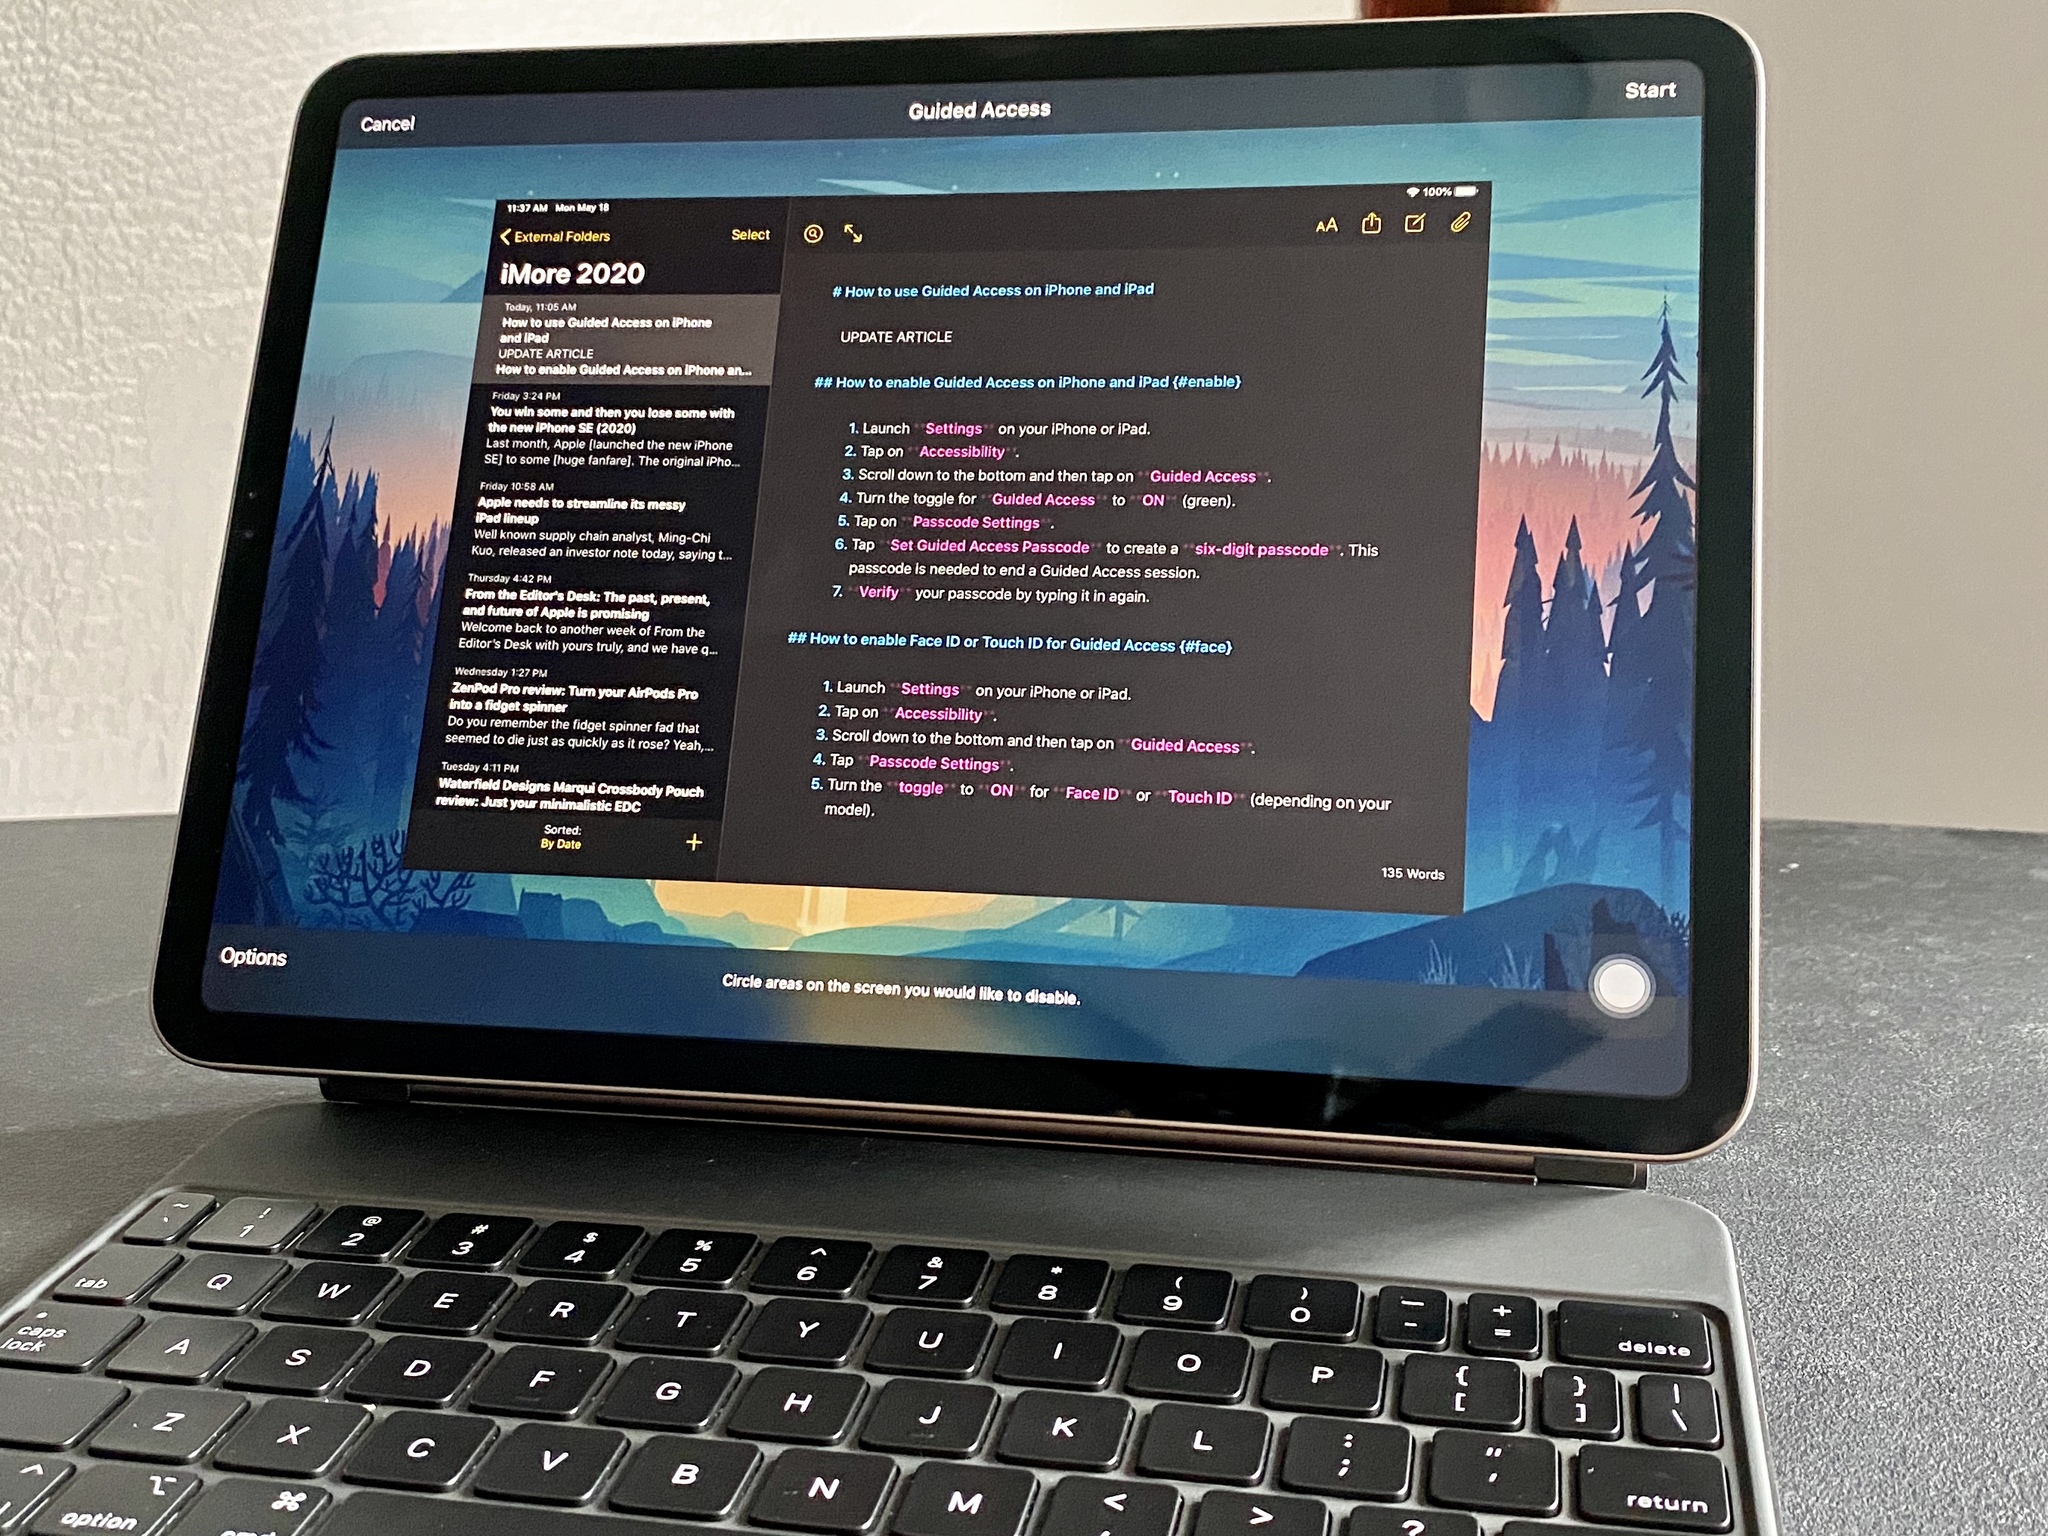
Circle any areas of the screen that you would like to make inaccessible.
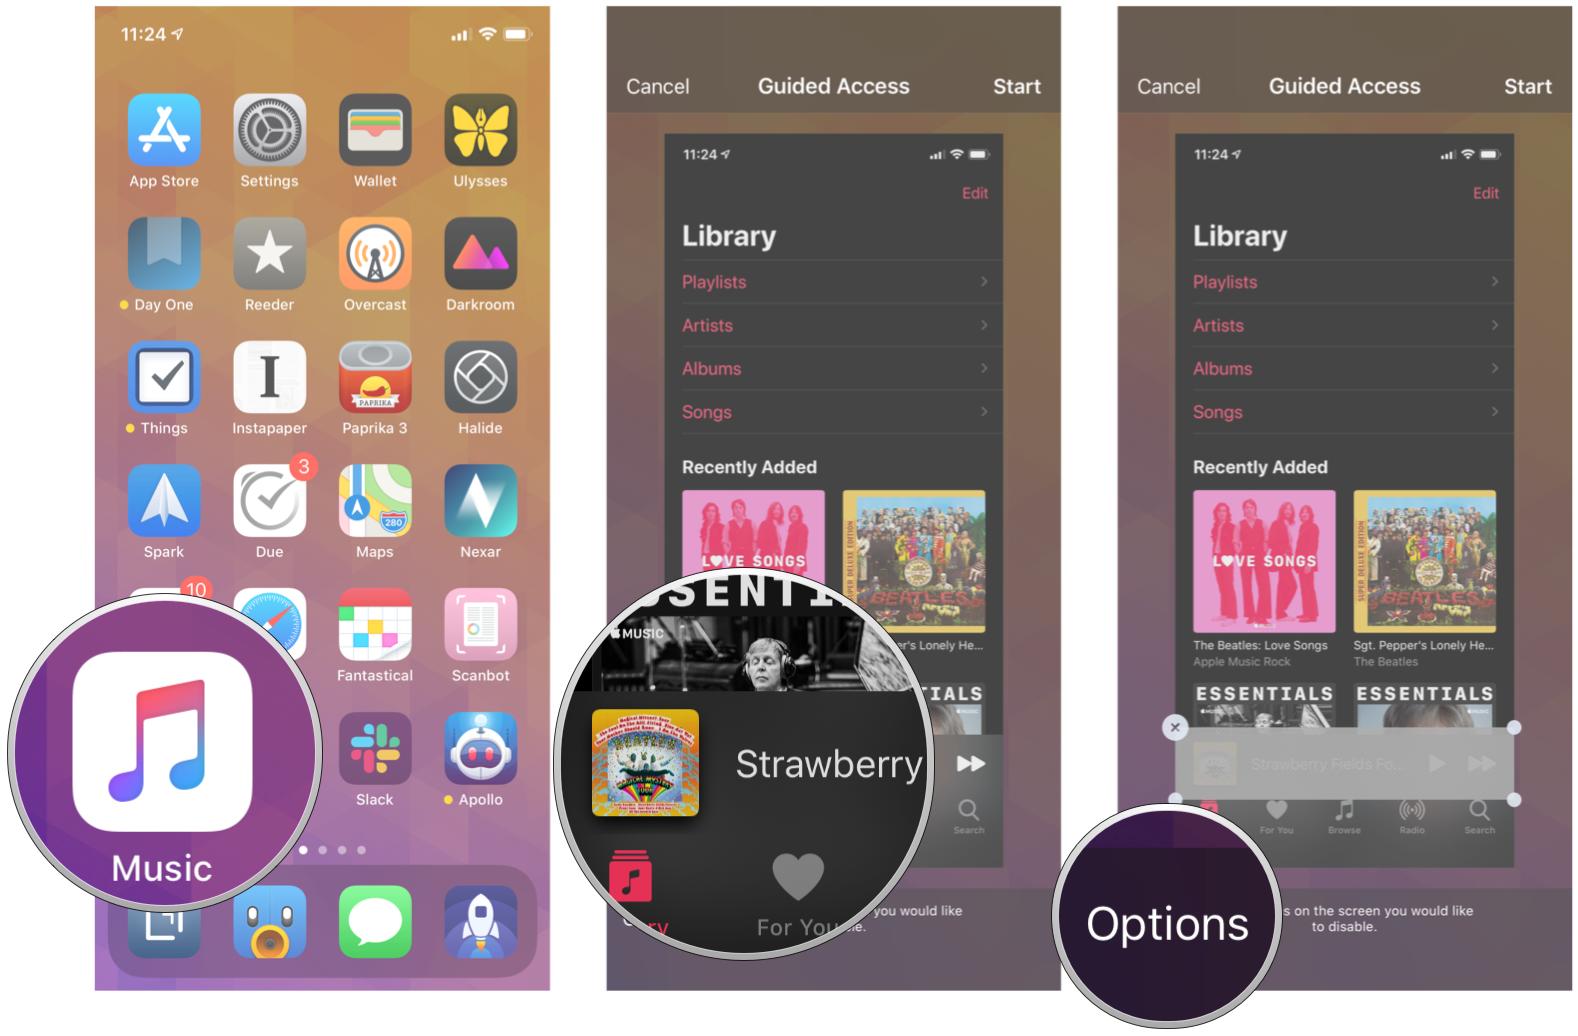
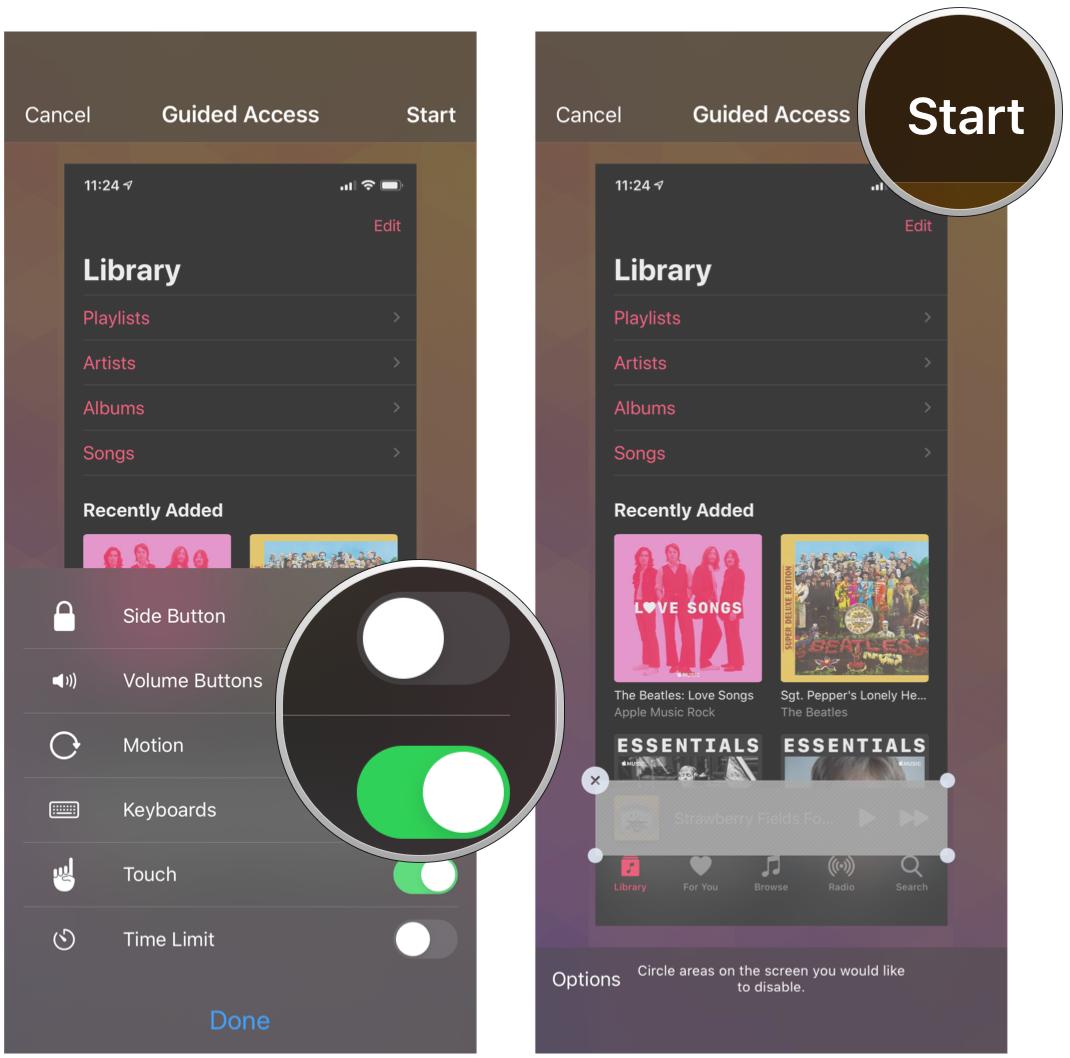
- Tap on Options in the bottom left corner to choose whether or not you want to grant access to the Sleep/Wake button, Volume buttons, touch screen, and motion. Tap Done to save your selections.
-
Tap on Start at the top of the screen to begin Guided Access.
Once Guided Access is enabled, anyone trying to leave the specific app you've locked it to will receive a banner message telling them to triple-click the Home button to exit. If they don't know the pre-set passcode, they won't be able to exit Guided Access.
Questions about iPad or iPhone Guided Access?
Have more questions about using Guided Access on iPhone or iPad? Let us know in the comments below!
February 2021: These steps are still how to enable and use Guided Access in iOS 14.


0 comments:
Post a Comment