


Helping you concentrate is the goal of Focus, coming this fall to Apple devices.
Focus on Mac is one of the more significant new features coming with macOS Monterey this fall. As the name suggests, the tool has been designed to make it easier for users to concentrate on what they're doing throughout the day by silencing unnecessary notifications and alerts. Thanks to iCloud, Focus syncs across multiple devices, so Focus changes made on iPhone, for example, are immediately reflected on Mac and iPad, when applicable.
If you have the macOS Monterey developer beta, here's how to set up and use a Focus on your best Mac.
Apple occasionally offers updates to iOS, iPadOS, watchOS, tvOS, and macOS as closed developer previews or public betas. While the betas contain new features, they also contain pre-release bugs that can prevent the normal use of your iPhone, iPad, Apple Watch, Apple TV, or Mac, and are not intended for everyday use on a primary device. That's why we strongly recommend staying away from developer previews unless you need them for software development, and using the public betas with caution. If you depend on your devices, wait for the final release.
What is Focus?
In recent years, Apple has beefed up its sleep tools on mobile and Apple Watch. When activated, the tools let you set sleep and wake-up times and decide which type of alerts are acceptable during your downtime. Focus is an extension of this (and Do Not Disturb) and allows you to establish parts of the day, then assigning notification settings for each. These parts of the day can be regularly scheduled (sleep, work) or activated on the fly (gym, dinner).
You can get started on your mobile device or through macOS Monterey on your Mac.
How to set up a Focus
Before you can start using Focus on Mac, you need to set it up first. You can do this on macOS Monterey via the System Preferences app.
- Choose System Preferences from your Mac's dock.
- Select Notifications.
- Click on the Focus tab.
- Choose a preset Focus to set it up, or tap + at the bottom left to create a custom one.
- With a Focus selected, select + under Allowed Notifications From (People).
- Add a new person.
- Click Add.
- With a Focus selected, select + under Allowed Notifications From (Apps).
- Add new apps.
- Click Add.
- Under Automation, establish the start and stop time for the Focus. If the Focus being used on the fly, leave this section blank.
- Choose Allow time sensitive notifications if you want people and apps to deliver important notifications immediately, even when Focus is on.
That's all there is to getting a Focus set up on Mac. If you decide you want to add or remove people and apps from a Focus, you can do so at any time. Now that you have a Focus set up, it's time to dig even further with customizations.
How to turn on Focus
You have all of your customizations set up for all of your Focuses; now what? Well, you're going to want to turn them on. Here's how to do that.
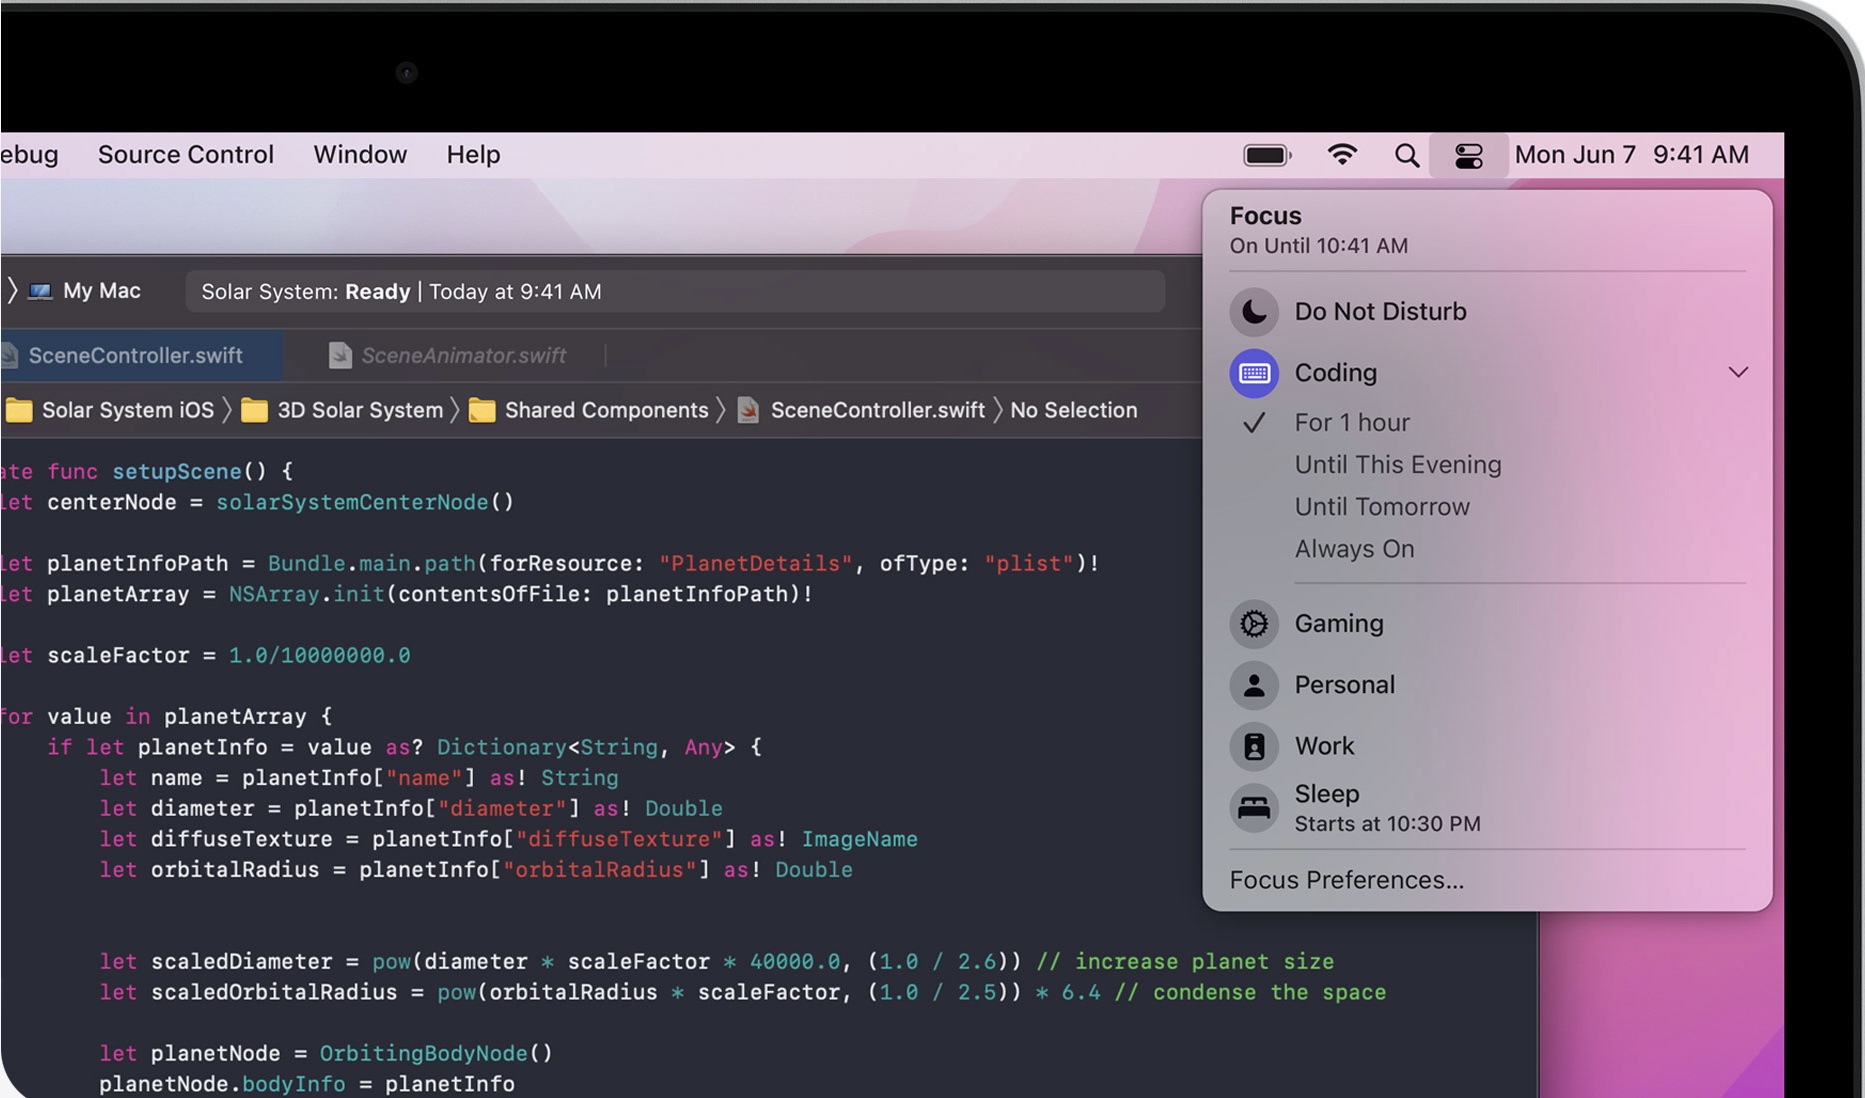
- Select the Control Center on the menu bar on your Mac.
- Choose the current Focus, when applicable. If no Focus is active, you'll see the word Focus instead.
- Select the Focus that you want to turn on. You can also tap on the ellipses button (three dots) on a Focus to choose how long you want it on.
How to create an Automation to turn on Focus
Another option that you can do to have a Focus turn on automatically is to create an Automation. This is done directly in the System Preferences app on your Mac.
- Choose System Preferences from your Mac's dock.
- Select Notifications.
- Click on the Focus tab.
- Select the Focus you wish to edit.
- Choose the + under Automation.
- Select whether you want to create an automation to turn the Focus on at a select Time, Location, or when you open a specific App.
- Once you select your automation choice, tap Done.
Questions?
Do you have questions about how to set up and use Focus on Mac? Drop them here in the comments, and we'll do our best to help you out.


0 comments:
Post a Comment